Greetings to All,
For a few years I have been trying different user approaches to the task of auto fading the Cantabile 3 Performer sliders in live situations on the various slots for plugins, racks, media players and input and output routes we add or create and name. Last year I did a show where I had the need for auto fades on many songs and while using my version I had at the time I began not liking that I couldn’t quickly customize the slope values instead opting for preset values I made that I could choose from. I usually had to use the slider on the output route of the plugin or media player as a trim to tweak the final gain. I also didn’t like that that there was no visual feedback for setting of the fade duration. In addition it required management of user named rack states for each new custom fader event you had to do and it added to the bloat of the rack when done that way. So I wanted to come up with a better way for me to program the fade events using the numerous tools and flexibility of Cantabile 3 Performer. As a result of these thoughts and some experimenting I have made some significant changes & what I hope are improvements to the simple fader rack design and will be passing them to the larger quad engine rack for a new revision later.
For the purpose of abbreviating the words “Cantabile 3 Performer” I will use “C♪3” to refer to Cantabile host throughout this instruction set.
First, a review of what the rack is for and how I chose to implement it using C♪3. I wanted a utility rack that I could drop into any new or already made song that could automate the movement of the gain adjustment slider on the media players, plugins slots, rack slots, output route sliders and external MIDI hardware via C♪3 routing and bindings. For routes more specifically it meant any slider on a MIDI output route that was a C♪3 default or that I made and named myself. I chose a long while back to use a dedicated media player inside the rack loaded with a MIDI file with a 0-127 CC7 output when played in full. That media player output was then routed through a binding to set the gain range of the fade event and sent to the rack MIDI output port at the rate of the media player. Early on I had an up file and a down file to have up and down fades that is now just an up one with the direction being a function of the gain slope setting. The default playback length at 120bpm of the default file is 2.5 secs and with the speed control of the media player it can be set from 1 sec to 25 secs which covers most common live fade situations. The fade event could be started by any MIDI note or CC switch that was routed to reset the initial gain value of the fader rack state. The fade start triggers could be from a direct route, a binding or a timeline position type trigger binding.
So I made these changes to the basic fade rack in terms of function and user interface. I broke the task of programming a fade event that had already been routed via route or binding into a song as follows -
- set the length of the event
- set the starting and end gain values for the event
- save the changes to the song state changes to the song file
Based on this list I made the new rack to function with the use of the custom rack buttons both at the song level on the rack slot and on the rack editing architecture I built to facilitate it. I included keyboard hotkey ability to provide another even faster way to program your event.
In addition to acting as an automated MIDI CC7 fader source it also can act as a time delayed trigger. You can isolate the CC20 On/Off message that is sent at the end of each fade event with a binding or route filter at the MIDI output port. I hope this new approach works better and is more usable to people. So all that said ![]() here are the instructions for the new version.
here are the instructions for the new version.
The easiest way to start off on the right foot is to unzip the contents of the .zip file to the C♪3 Racks folder location you use and it’s ready to go. It’s contents include some extra rack copies and a PDF manual shown here.
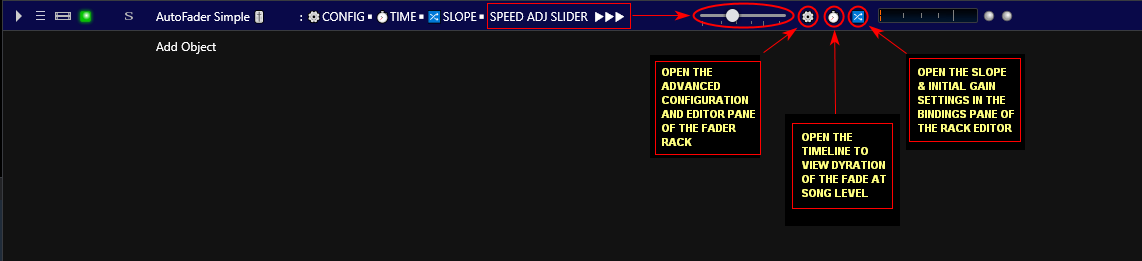
In the picture above you see a description of the rack buttons on the rack that help make it easier to use I hope.
- The slider on the rack gain is setup to allow fast adjustment of the fade speed without opening the rack for edits. The default values when you load the rack in a song are minimum gain as a starting value and a slider range of minimum to maximum. The maximum value will depend on the slider control curves which are set in the C♪3 options. When loaded and left this way it can be used as a full range fader generator of MIDI 0 – 127 with a variable speed of 1 to 25 seconds for external route or binding filters an advanced user may prefer to use to set the fader ramp values.
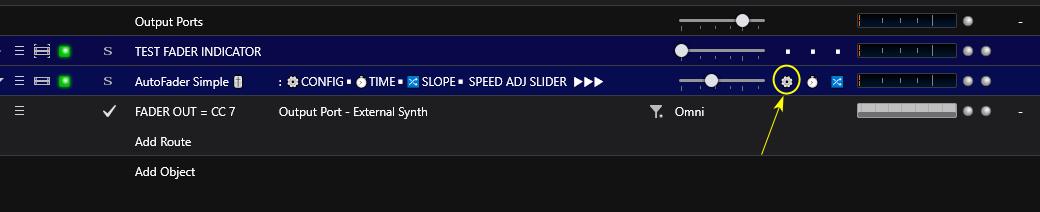
- The first custom rack button at Song level opens the rack editor to the routing pane of the rack which acts as the advanced time and configuration editor pane with the timeline editor open as shown here.
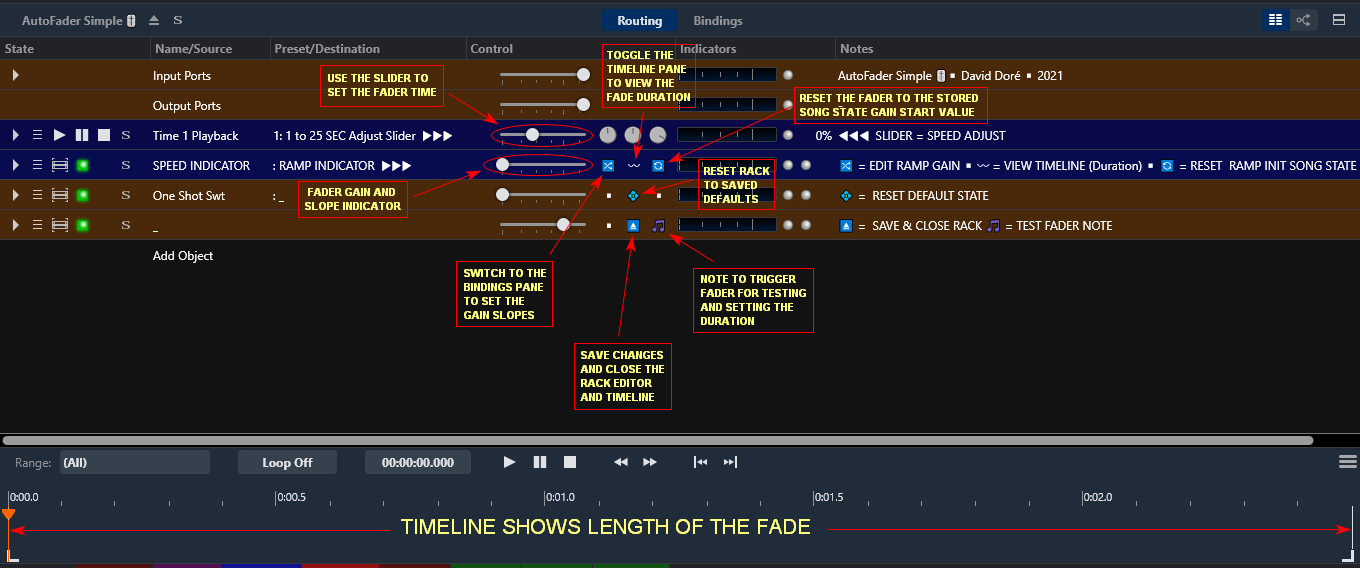
The sliders and custom buttons on the embedded racks used for the configuration section of the rack are shown above in the picture with details on their use. In summary there is a slider to adjust the duration like the one at the song level, buttons to open the bindings pane for slope settings, togging the timeline pane, resetting the fader gain start point, resetting the saved defaults, auditioning the fader cycle and saving and closing the rack editor.
-
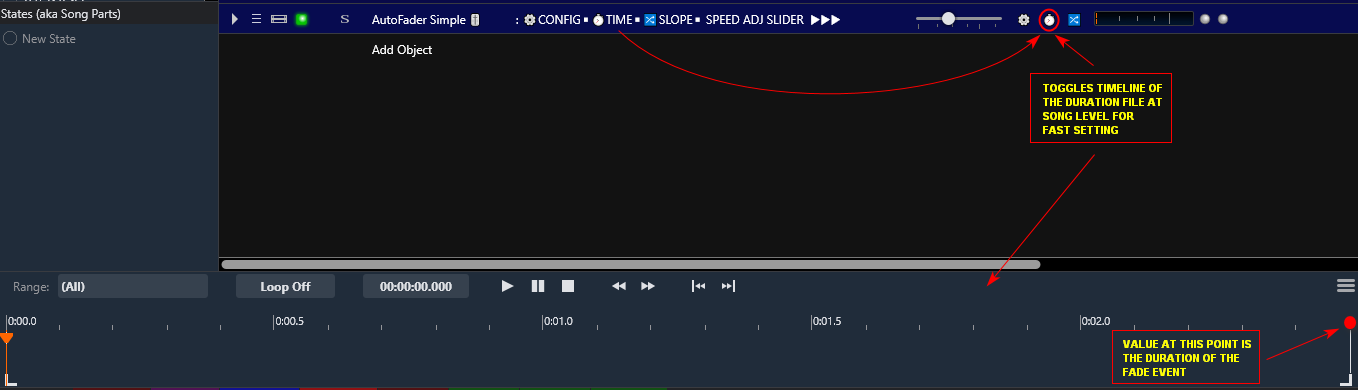
The second custom rack button at Song level is used for toggling the timeline window for the setting the duration slider with the aid of the visual time value being available at the right side of the timeline view. You toggle it open, make the visual adjustment with the duration slider beside it and toggle shut when done and hit Ctrl+S to Save the Song file with the time you set.
-
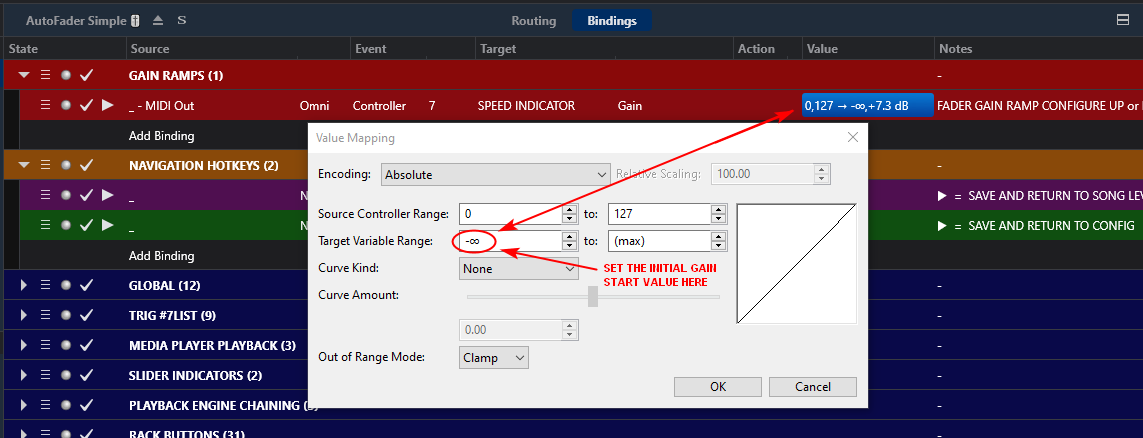
The third custom rack button at Song level for opening the rack editor to the Bindings Pane and the gain values that are saved with the Song state and locates the first entry box and opens it for entry for the initial fade gain value used to locate and reset

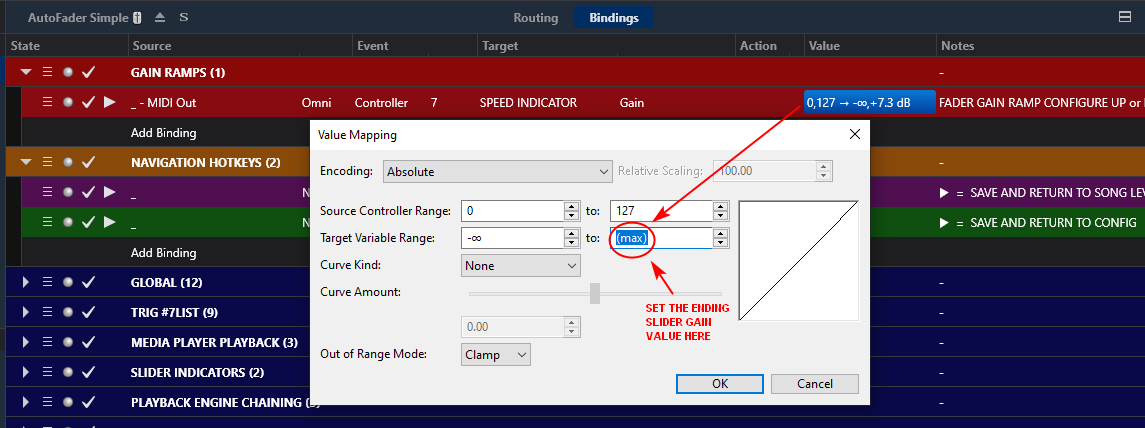
Upon pressing the custom button it will open the Value Mapping dialog box that is used for the gain value starting and ending values. Leave the Source Controller Range fields (0 & 127) alone. You only want to edit the Target Variable Range values that are in db below that with what I’ll refer to as the “from” gain value being the left entry box ….
and the “to” gain value being the right hand entry box. You can also set the curve here if you want a non linear fade.
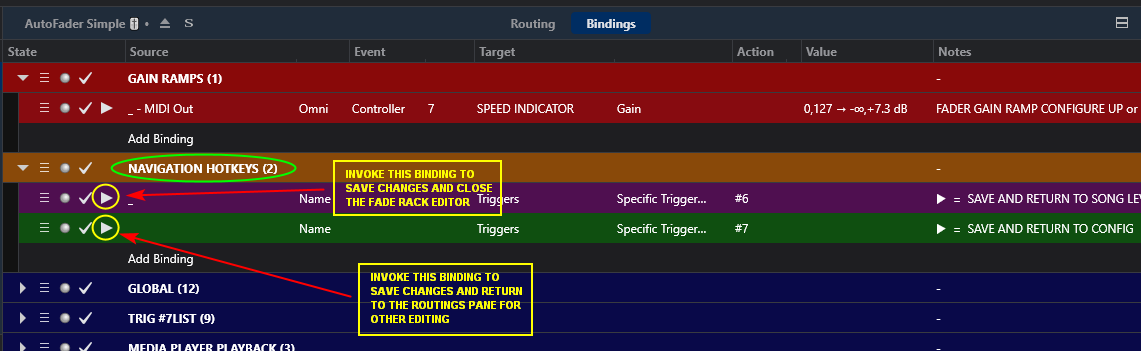
Below the Gain value binding you see a “Navigation Hotkeys” binding group that holds a few bindings. The purple colored binding sets off a triggered command chain that saves the changes to the song file and closes the rack when the binding is invoked. The green colored binding below that saves the gain value changes you made and returns you to the routing configuration pane of the editor to set the time or test the edits you made before closing the rack editor.
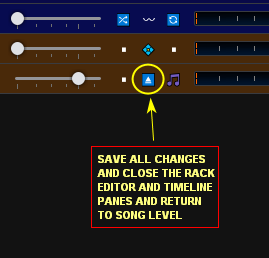
If you do go back to or are in the routing pane where the time adjusted and the test enviroment is you can press the custom button at the bottom that looks like an eject icon as shown here to save all changes close the rack editor and the timeline pane if it’s open.
I also changed the hot key values to F9, F10 and F11 as detailed in the picture. Using the rack with them you can do a fast program sequence of F9 to set time or duration, F10 to set the initial value and the gain slope and then finally F11 to save changes and close rack.

Note that there are 2 other base duration files of .25 and 30 seconds in the routing pane of the rack media player when you press the configuration button on the rack or use the F9 key to open the rack routing editor pane or what I’m referring to as the configuration pane. The default time file covers most jobs but for certain situations you may need a faster or longer speed range.

This rack is made to save the speed and gain slope and initial gain values to the C♪3 Song file and that way so it can be reused in many songs and song states in a set list without having a bunch of saved rack states that bloat the rack as they are added to it’s rack file. Also when I used that method I had to name and save those elements as well. When the Song file loads the rack will initialize the slider it is bound to and be ready to fade on the next trigger it receives. Triggering can be done with any MIDI note or CC2 which is reserved for resetting the initial fade gain value.
You can use a route filter to choose the note or CC switch you want to trigger on. A CC2 button switch to the common rack MIDI input port will reset the fader value to the initial starting value you saved with the song state.

There is only the one output port that delivers the CC7 data and the CC20 end of fade button message.

You can also use bindings to trigger it like these examples for manual input bindings for MIDI note and CC Switch and a Transport position automated binding. Note that the media player you are setting the event for much be the transport master for the auto marker bindings. Also shown is an example binding for the reset switch

![]() As mentioned early on the layout and instructional programing sequences proposed for this rack will be passed on to the coming revision of the quad fader rack that has basically 4 of the simple engine used here with the addition of independent time and gain/slope setting of each engine, presets for chaining & looping of the engines, timed trigger outs and access to the variable speed control. It also saves all relevant settings to the Song file like this simple one to save bloating the rack with song specific custom presets.
As mentioned early on the layout and instructional programing sequences proposed for this rack will be passed on to the coming revision of the quad fader rack that has basically 4 of the simple engine used here with the addition of independent time and gain/slope setting of each engine, presets for chaining & looping of the engines, timed trigger outs and access to the variable speed control. It also saves all relevant settings to the Song file like this simple one to save bloating the rack with song specific custom presets.
There are some experimental (at least for me) ideas in use in this rack involving the use of Cantabiles’ column based GUI using batch navigation and UI commands triggered by the custom rack buttons and hotkeys. If I am correct these functions will be reliable and allow future manipulation of closed racks including A/B enabling and disabling of Source bindings from Song level while in the same Song state. ![]()
Here is the .zip package :
AutoFader_Simple_for_C♪3_2021.zip (451.1 KB)
Special Thanks to @brad Brad Robinson for creating and supporting Cantabile 3 and all the good folk of the Cantabile User Community. ![]()
Cheers! ![]() Dave Doré
Dave Doré ![]() January 2021
January 2021