I have done some more experimenting with this approach, using the MIDI Outputs customized to the rack and the rack’s bindings to send data to them. In so doing, I’ve discovered a couple cool things.
So, let’s imagine a synth keyboard that has notes (duh), a sustain pedal, mod wheel, aftertouch and pitch bend. Let’s also imagine it has two knobs, one called “User 1” and the other called “User 2”. (My Kawai K5000s has such named knobs!) We might want to separate out the sustain pedal (and perhaps expression pedal) later into its own rack, but for now it will sit here also.
So, I’ll make a new rack and call it “My MIDI Controller”.

I right click upon the name (you may have to click a second time to select only the rack name) and select "Rack MIDI Ports…
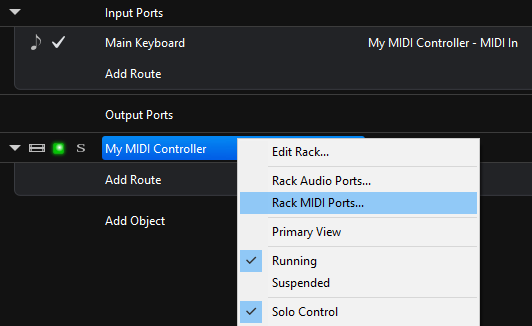
In that dialog one sees the defaults, in:MIDI In and in:MIDI Out. So, we click on the “Add” button and add a port we’ll call “Notes”, another we’ll call “Mod Wheel”, etc. until we have a port for each output we want to isolate.
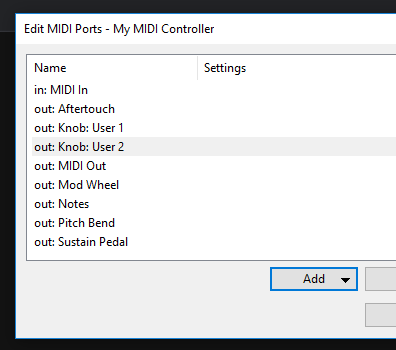
So, now we have separate ports, but nothing goes to any of these yet. (We CAN filter the input to these ports while adding them, but I’m keeping it simple for now, and will use Bindings to do all the filtering for this example.)
So, here I open up the rack by double clicking it, and go to the Bindings section right away. I add connectors for each one of these items I’ve made output ports for.
(When adding the Notes connection, don’t forget to include adding one for “Notes Off”)
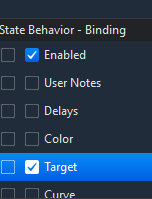
If you will want to use States (and we do), you will need to check “Enable” and “Target” for each of these bindings in the States tab as you add them to the bindings list, or they will not change.
Just assign each item to its associated Rack MIDI output.
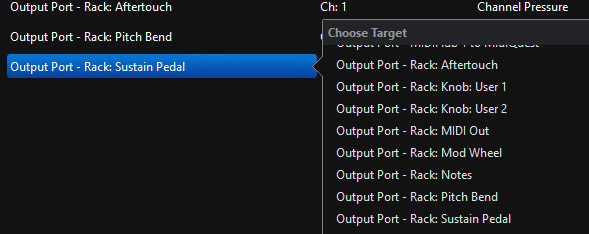
So, here is my completed bindings - click to enlarge:
You’ll notice I have not added anything to the Routings page. That is because, in this example, I used the “Rack:Midi In” as my source for all of these connections in the Bindings. That was not a requirement - I could have dedicated this my hardware device in the Routings, and then used that. This example keeps things “Generic” for the purpose of this demonstration only. It actually also becomes handy later on.
Ok, here is the nitty-gritty part where I’ll demonstrate a stumbling point you will encounter doing things this way. So far, this has all been setup, and nothing has actually been SENT to anything yet! I’ll send to my Kawai K5000s so you see how this step might be accomplished (but don’t do it yet… you’ll see why in a moment).
Save your rack so far and exit it, and then add the Rack outputs:
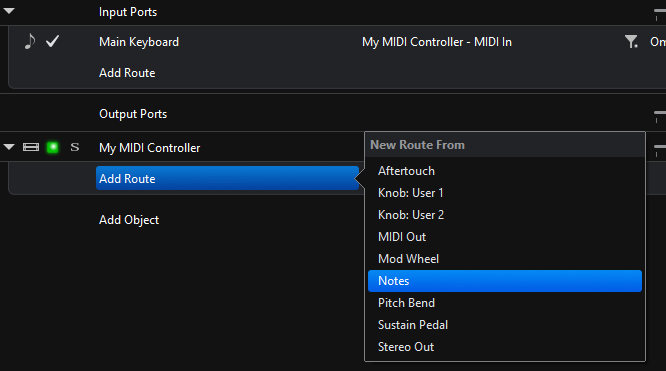
Here’s the result:
Now, save your song - mission accomplished! Well, sort of…
Make a new song and add this same “My MIDI Controller” rack to it. Like so:
/
WHERE DID MY OUTPUTS GO??? As you can see, there are no routes in the newly added rack – you’ll have to add them back all over again. MAJOR BUMMER if you have a lot of assignments already!
Here my clever workaround for that - Torsten pointed out that Embedded Racks “were cheap”, and I listened.
Make a new rack, called “My Very Much Improved MIDI Controller Rack” (well, you don’t have to call it that…)
Now do little to nothing else yet, and simply open that rack and click on “Add Object” and you’ll see fewer options now - the one we want is “Embedded Rack (from file)”. Add the “My MIDI Controller” rack now as an embedded file. Keep in mind - any changes you perform on this rack now that it is embedded will only affect THIS instance that you have embedded in your “My Very Much Improved MIDI Controller Rack” - it will not alter the version of the rack saved in your racks folder.
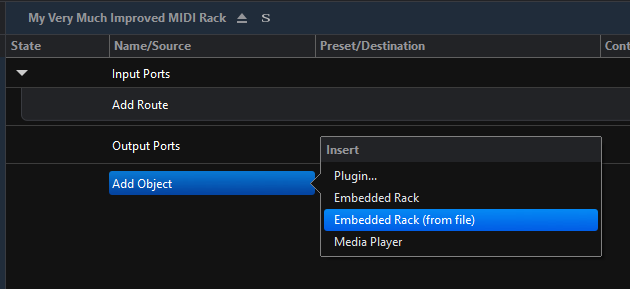
Now, with that present, with this new “My Very Much Improved MIDI Controller Rack” rack open, click on the “Add Route” button beneath the embedded “My MIDI Controller” rack several times and add those routes back again that you’d lost a minute ago.
Notice how we use the Rack:MIDI Out destinations throughout.
Now, anytime you add the “My Very Much Improved MIDI Controller Rack” (or any other set up similar to this one) you will have all of your routes intact all shunted out of the MIDI out of the top rack. So, make sure that MIDI Out exists, and is sent to the desired device. If you want to send to multiple devices on different channels, have a couple there. (You can redirect to different ports using the embedded rack’s “Rack Outputs”)
I can change the controller of my User 1 + 2 from 80 + 81 to 21 +22 in the bindings, and that can be done either in the original file (by loading the first rack we made later embedded) so it will affect all future embeds of that rack, or in the embedded version – the changes applying to the “very much improved etc.” rack that is its parent. If you want changes you made to your base rack “My MIDI Controller” applied to an existing embedded rack, you need to delete that one and insert it again from the file.
That is how I’ve come to understand these workings thus far. Feel free to point out how much I’ve simultaneously misunderstood these same workings below. 
Terry