On a similar note…
I have used a program called AutoHotkey to re-route a simple ROTTAY numerical keypad to functions within Cantabile. You can force focus to a particular program.
Rick
On a similar note…
I have used a program called AutoHotkey to re-route a simple ROTTAY numerical keypad to functions within Cantabile. You can force focus to a particular program.
Rick
Hi Brad to be honest I never try to apply color (if it is possible…I have to check). But I can say that the software is very stable and usefull.
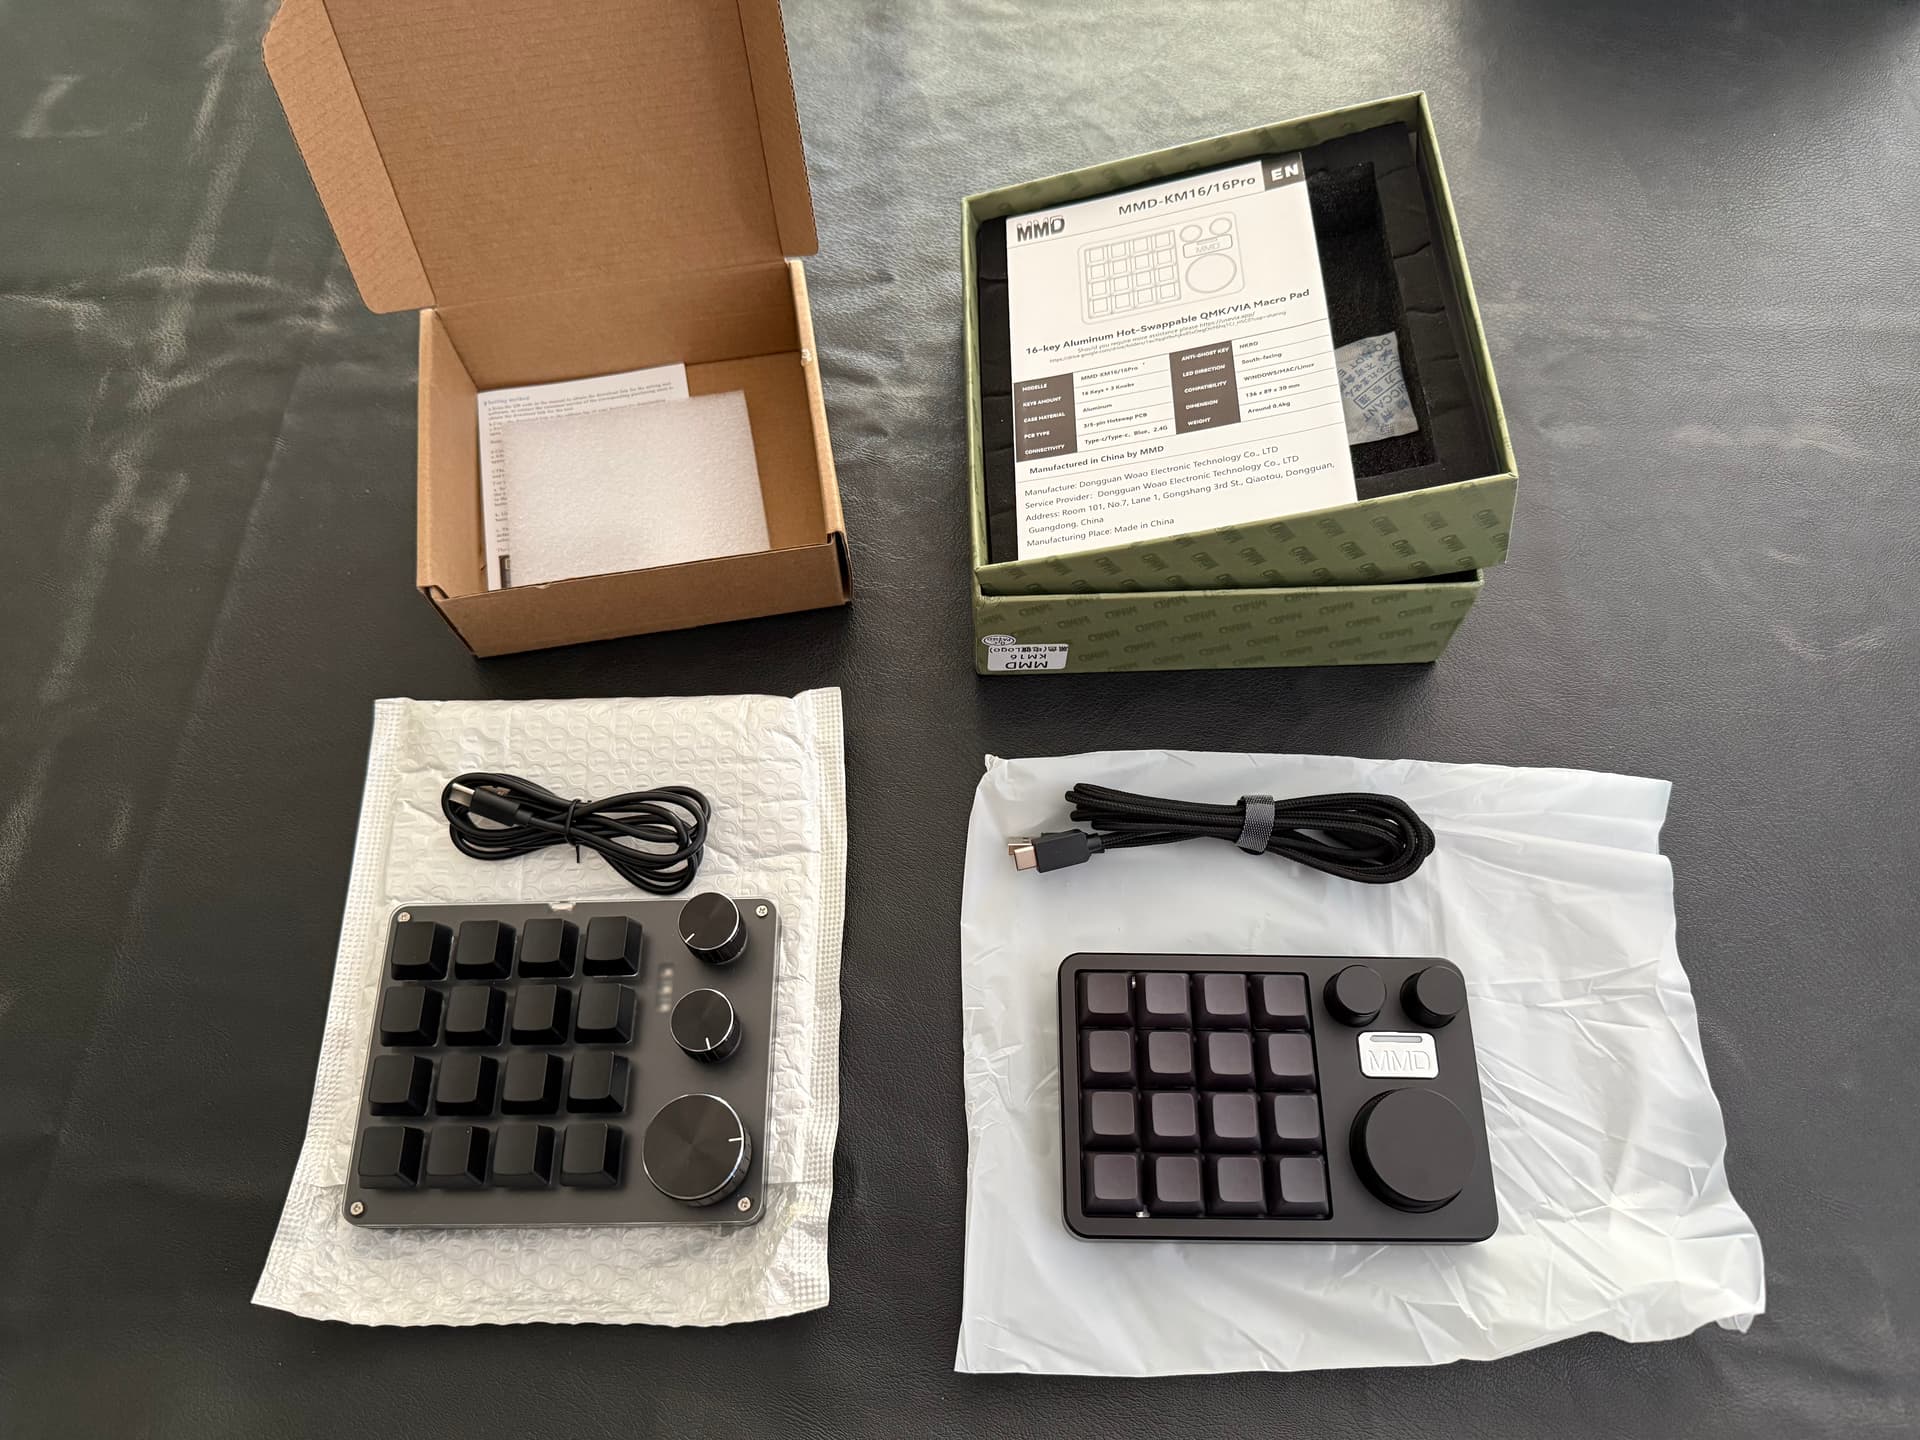
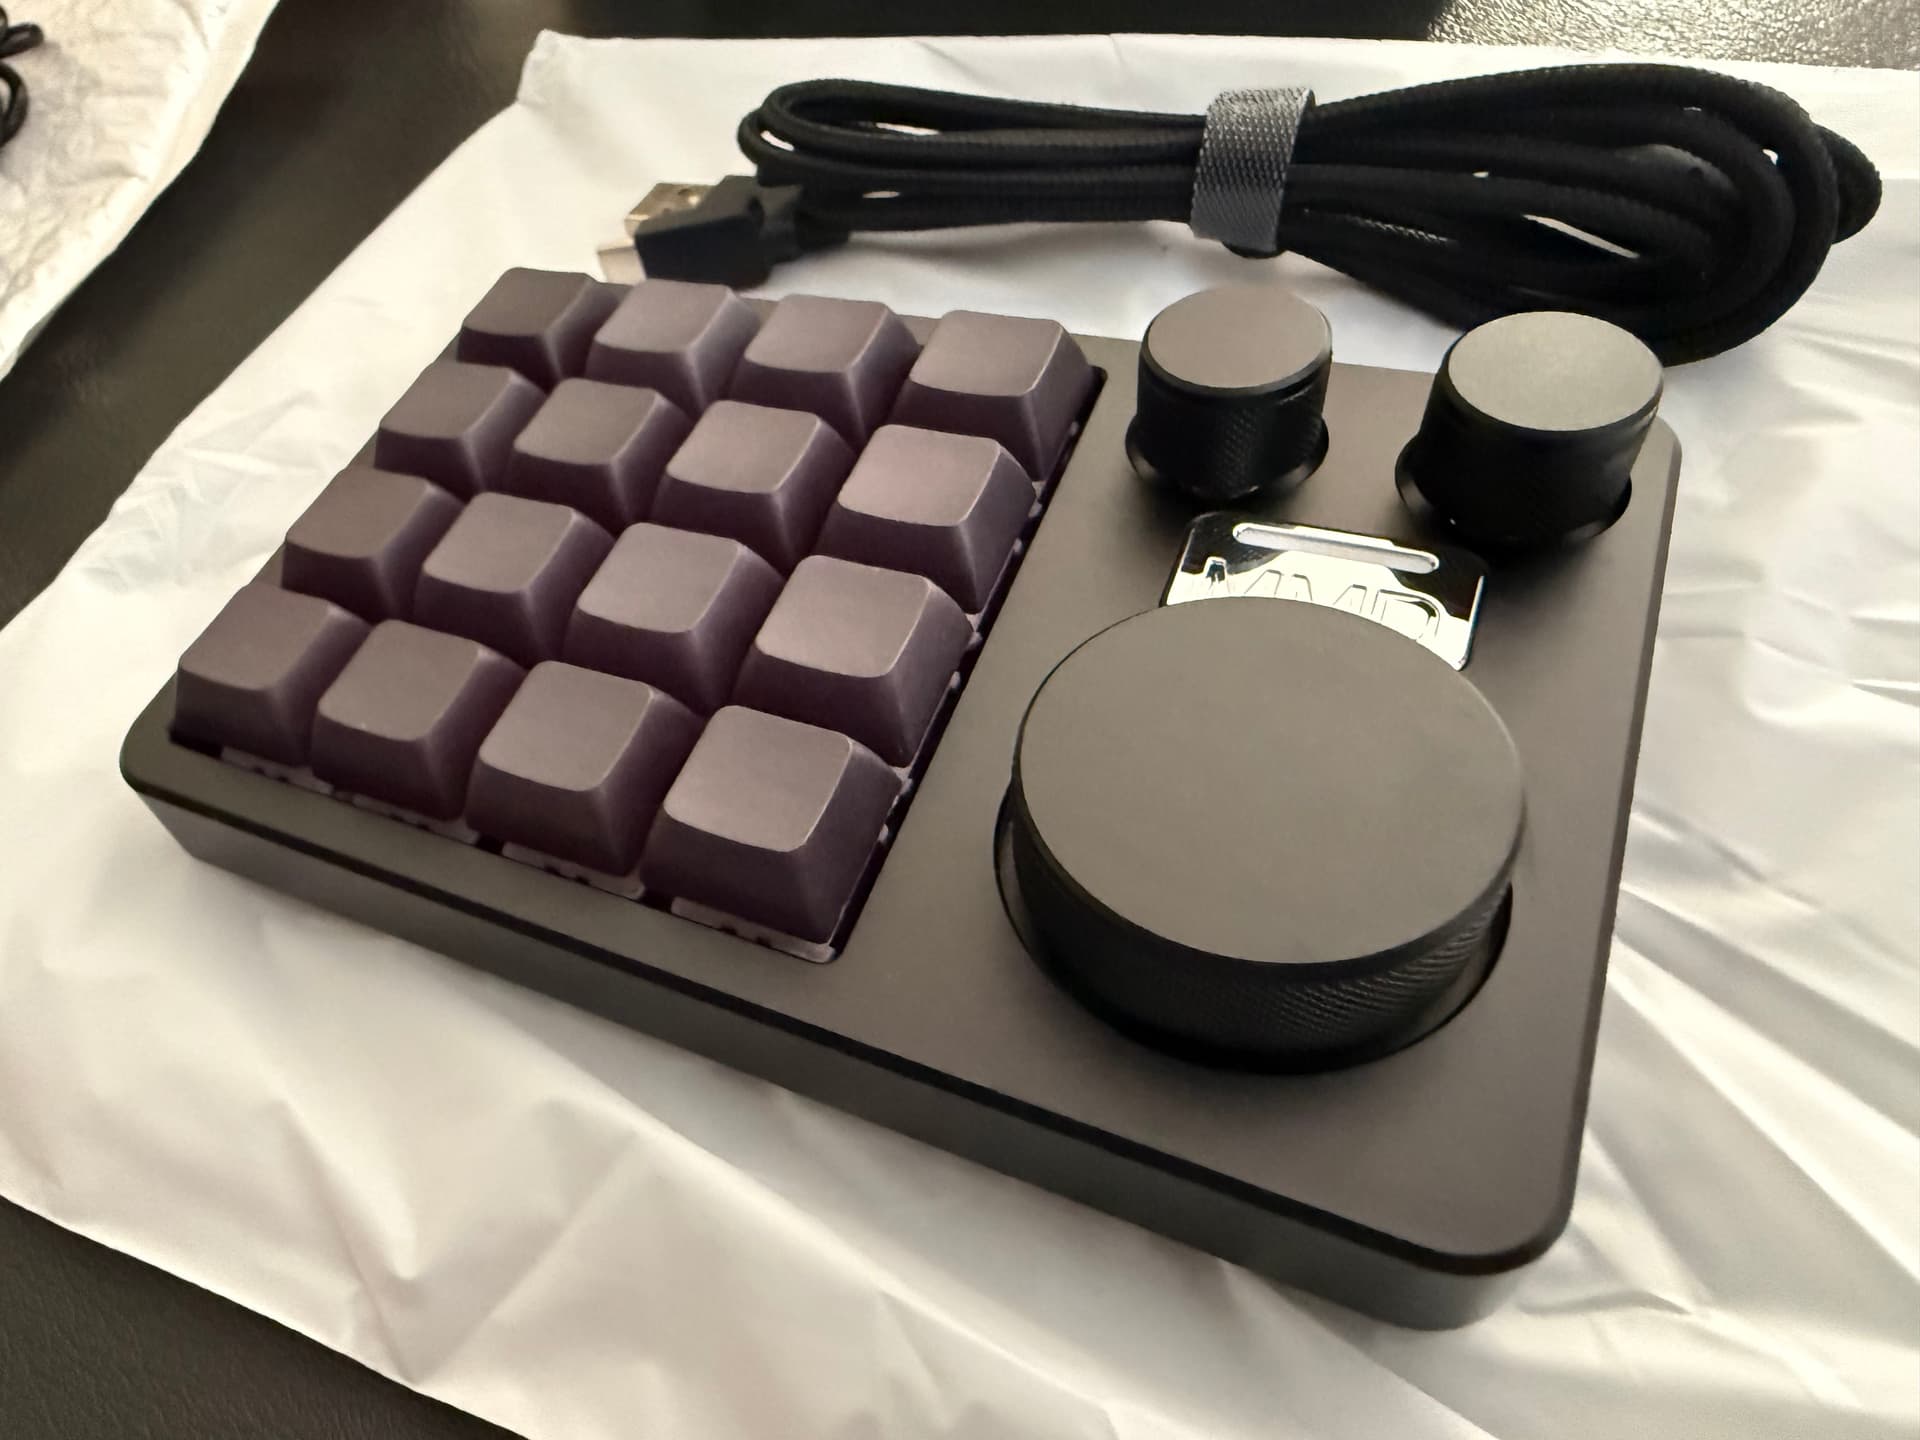
The MMD KM16 keypad arrived today. Haven’t tested it out yet, but everything about it is a notch up in quality compared to the cheap one. I didn’t think there would be that much difference but it’s very apparent…
I hope the software/firmware is as good…
(To be fair, there was nothing really terrible about the build quality of the cheap one, just not as good as this one and it was the firmware that let it down more than anything).
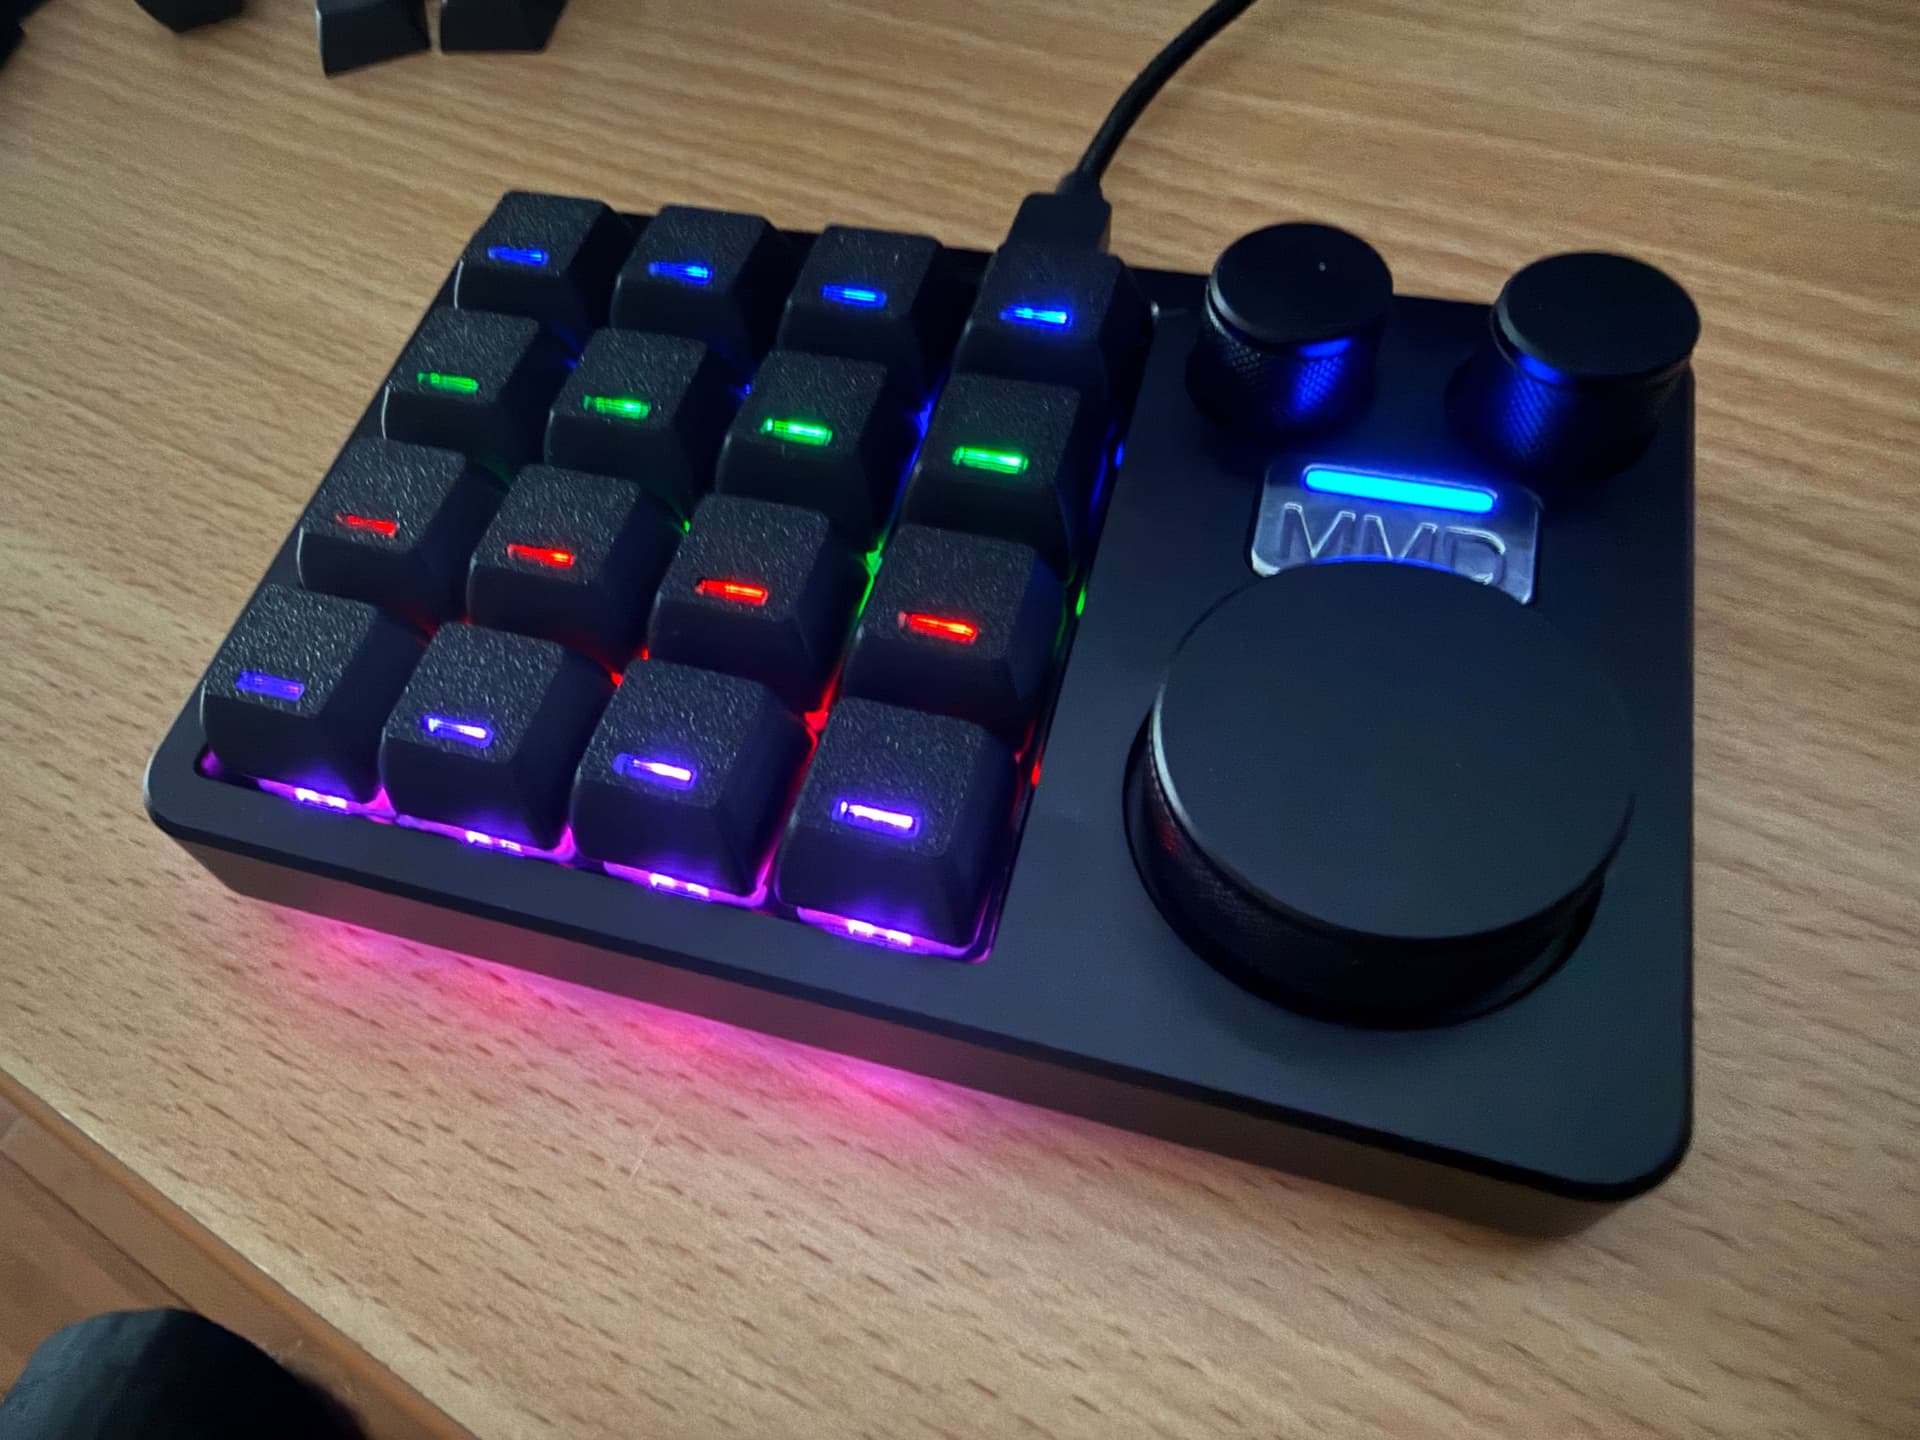
Played around with this a little…
All this means this is a much more flexible device. Even out of the box it works better, but it should also be possible to reflash it with either a custom QMK, or from-scratch firmware. eg:
So far, the device/firmware is great. The documentation not so much - no-where does it mention how to enter bootloader mode (top-left key while plugging in), nor does it mention where to get the VIA config file from (which is needed to use VIA).
Looks promising… (but for now, back to coding other stuff).
Inferred some more info:
MCU is probably a STM32F103 based on bootloader id: 1EAF:0003, which means:
That info about the flash write cycle count means care needs to be taken to avoid flash wear. ie: any LED animations (eg: flashing in time with tempo, showing keyboard state etc…) need to update the LEDs without writing to flash memory - which will probably require custom firmware.
Peeking inside the firmware dump combined with info from dfu-util, suggests flash memory layout:
Bootloader:         8K (0x08000000-0x08001FFF)
Firmware area:    116K (0x08002000-0x0801EFFF)
EEPROM emu:         4K (0x0801F000-0x0801FFFF)
Total flash:      128K
And it looks like the stock firmware uses about 53K of the 116K available.
Also, tested and confirmed it supports NKRO.
The cheap device had 6KRO meaning only 6 pressed keys could be detected at a time. This one is not limited in that way.
Compare desk slide factor and key noise:
So I’ve gone down a complete rabbit hole on this. The original idea was a simple cheap controller for Cantabile but has ended up a slightly more expensive, not so simple controller with a custom firmware. But I think it’s been worth it and some interesting ideas and possibility have come from it.
What have I done?
First, I completely reverse engineered the hardware - all LEDs, keypad buttons and encoder rotations. This was done by disassembling the original firmware for the basics and then a bunch of test programs to confirm hunches and assumptions.
Next, I wrote a custom firmware that:
The custom USB stack is important as it allows bypassing Windows keyboard input and input can be directed to a dedicated app (ie: Cantabile via custom script) rather than to the focused application.
Finally, I wrote a NodeJS library that can communicate with it (both receive input events and control all the LEDs).
Here’s a little demo (watch video) showing: the flashing red watch dog error indicator, script starting and watch dog indicator stopping, the encoders being used to control the LED colors and key presses and encoder movements logged on screen.
Some notes about the LEDs:
Next step is to connect it to Cantabile…
For anyone interested here’s the script used in the demo video:
import { KM16 } from "./km16.js";

// Create KM16 instance
let km16 = new KM16();

// Start the watchdog timer with 2 second time out
km16.setWatchDog(2000);

// Current color number for each of LEDs
let indicator = 1;
let underglow = 0;
let keys = 0;

// LED defaults
km16.setIndicator(indicator);
km16.enableUnderglow(true);
km16.enableKeyLeds(true);

// Input handler
km16.on("input", (e) => {

    // Log it
    console.log(e);

    // Main encoder controls key LEDs
    if (e.encoder == 0)
    {
        keys = (keys + e.delta + 8) % 8;
        km16.setKeyLeds(mapColorIndexToRGB(keys));
    }

    // Top left encoder controls underglow LEDs
    if (e.encoder == 1)
    {
        underglow = (underglow + e.delta + 8) % 8;
        km16.setUnderglow(mapColorIndexToRGB(underglow));
    }

    // Top right encoder controls indicator LED
    if (e.encoder == 2)
    {
        indicator = (indicator + e.delta + 8) % 8;
        km16.setIndicator(indicator);
    }
});

function mapColorIndexToRGB(index)
{
    return (index & 0x04 ? 0xFF0000 : 0) |
            (index & 0x02 ? 0x00FF00 : 0) |
            (index & 0x01 ? 0x0000FF : 0)
}
Another demo, this time controlling Cantabile… Watch
import Cantabile from "cantabile-js";
import { KM16 } from "@toptensoftware/km16";

// Setup KM16
let km16 = new KM16();
km16.setWatchDog(2000);
km16.setIndicator(0);
km16.enableUnderglow(true);
km16.enableKeyLeds(true);

// Setup Cantabile
let C = new Cantabile();
C.connect();
C.transport.open();
C.on('stateChanged', () => console.log(C.state));

// LED tempo flasher
C.bindings4.watch("transport", "flasherBeat", null, null, (x) => {
    km16.setKeyLeds(x ? 0x002000 : 0);
});
C.bindings4.watch("transport", "flasherMeasure", null, null, (x) => {
    km16.setKeyLeds(x ? 0x00FF00 : 0);
    km16.setUnderglow(x ? 0x00FF00 : 0);
});
C.bindings4.open();

// Input handling from KM16
km16.on('input', ev => {

    // Main encoder adjusts tempo
    if (ev.encoder == 0)
    {
        C.bindings4.invoke("metronome", ev.delta < 0 ? "decreaseTempo" : "increaseTempo");
    }

    if (ev.press)
    {
        switch (ev.key)
        {
            case 15:
                // Bottom right key on toggles play/stop
                C.transport.togglePlayStop();
                break;

            case 16:
                // Pressing main encoder toggles sounds
                C.bindings4.invoke("metronome", "enableSounds", null);
                break;
        }
    }
});
A controller designed specifically for Cantabile is very exciting, love it.
Did you replace the HID firmware with your own version that will talk to Cantabile?
I replaced the stock firmware with a custom one that presents itself as a RAW HID device instead of a Keyboard HID device. This means Windows doesn’t know it’s a keyboard and doesn’t take control of it.
The new firmware doesn’t talk directly to Cantabile per-se - there’s a script (like those shown above) that runs in the background and provides the connection between Cantabile and the macropad.
There’s another important reason for the custom firmware… to prevent flash wear when updating LEDs. With the stock firmware, there are methods to update the LEDs, but they also write to flash memory each time. Flash memory in the device has a write cycle lifetime of about 10,000 writes - sounds a lot until you realize you’re writing twice for every tempo flash.
I can see the attraction of a low-cost controller, but Stream Deck is already so good - and @Brad 's Cantabile plug-in implementation so beautifully ingenius, that I’d rather pay the extra for a Stream Deck.
Yep, I like the stream deck too, but I also really like this macropad, it’s also got three rotary encoders and the programming model for it is much more direct (if you don’t count writing a custom firmware ![]() )
)
The StreamDeck is good, but it feels like about 10 layers between Cantabile and the actual device (but this is more a development issue than a user issue). Also, I can’t help but think the StreamDeck+ with its four rotary encoders and display panel is a better fit for Cantabile.
Question 1: Do you use the StreamDeck exclusively for Cantabile or also for other desktop tasks?
Reason I ask: there’s now a third-party SDK to connect directly to the StreamDeck which I’ve been planning to check out. But it would mean choosing (or switching) between the desktop app and any new integration I might build using it.
If you’re only using for Cantabile and I wrote an integration using the new SDK you might even be able to get away with not installing the StreamDeck desktop app.
But… maybe you like/want/need the desktop app?
Question 2: with the StreamDeck - are you using the key layout profiles included in the plugin, or have you customized your own layout? I’m curious about which functions/layouts are actually useful.
I definitely wouldn’t dedicate my SD to Cantabile - it’s useful for almost everything I do, from web browsing to Cubase and from home automation (Home Assistant) to photo editing - even my TV controls. I simply could not give up all the useful functions it provides.
I have a custom Cantabile Profile, mainly because (you may recall) I need cue lights and countdowns to keep us informed on stage. My Cantabile Profile includes my own method of ‘paging’ and groups the controls most important to me. I also have utility buttons on my main page to allow me to time our set, and to see the current time. The beauty of the SD with Cantabile is the dynamic display - Songs and States displayed on each button is fantastic, as is the metronome flasher button!
Personally I have no use for the SD+. There are too few buttons for me and the rotary controls are of little interest. For rotary controls I’d rather have an MCU-compatible controller.
But I absolutely love the Cantabile facilities on my SD. I’d weep if they went away!
I’m familiar with that. I often see flash used for storing settings. It’s a way to save few cents on an EEPROM or battery-powered RAM.
OK. What if when Cantabile started it automatically closed the SD desktop app and took control of the device and then when Cantabile closed it restart the SD app? Just thinking out loud and wondering whether this unofficial SDK is worth investigating…
Don’t worry it’s not going away.
I can’t say that this would be ideal. It’s a rare rehearsal where I’m not nipping out to other applications. The whole point of SD is that it switches Profiles depending on which one has focus; this is a hugely significant part of its appeal.
In short, I’m happy with things just as they are.