Hopefully one of the deep experts in Cantabile tricks can help me, as I was looking at this last night, but a solution was eluding me…
My use case is that I am setting up a looper within Cantabile for some future solo ambient noodling shows where I want to noodle as I see fit (in Welsh Floyd our backing was always linear start to finish).
I have scene buttons on my Yamaha Montage that I wish to do the scene selection with the looper, and I have that working nicely. I have
An existing Rack that takes the CC94 that the Montage uses to show Scene Changes, which I have mapped using Cantabile filters to program changes PC1 to PC8
In the Looper Rack I have bindings to change those program changes to notes (as the looper scene map uses notes)
And that is all working nicely in my demo song.
However, I would like to get feedback that the loop has actually changed - I am setting the looper so that I can command a scene change any time, but the current loop will finish first before moving to the next.
So it would be nice for the Cantabile UI to show the current scene (as opposed to my commanded scene), so I know it changes
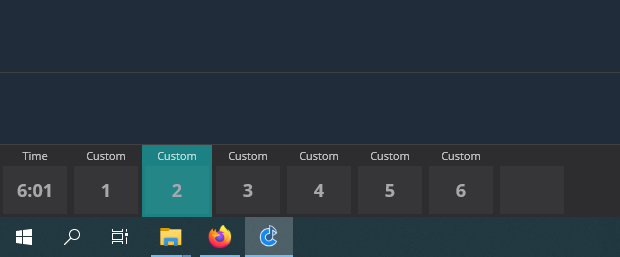
Something like this to show Scene 1…
And then once I command a change to Scene 2 (for example) and the Scene 1 loop finishes and Scene 2 is now active…
My idea is to have some unique MIDI event common across the scenes but with a unique value in each scene to identify the scene, e.g.
Scene 1 = Note C1, Scene 2 = Note C#2, etc., or
Scene 1 = PC 1, Scene 2 = PC2, etc., or
Scene 1 = CC 94, val 1, Scene 2 = CC94, val 2, etc.
But I need to translate that to a GUI change in Cantabile, which is where I was stumped last night.
Any ideas if this is possible in Cantabile?
PS when I have the looper working as I want, I will add to my guide series on how to setup Cantabile with my chosen looper (MuLab Plugin).
When you say looper do you mean a Cantabile looper rack with a media player set up to loop using play ranges?
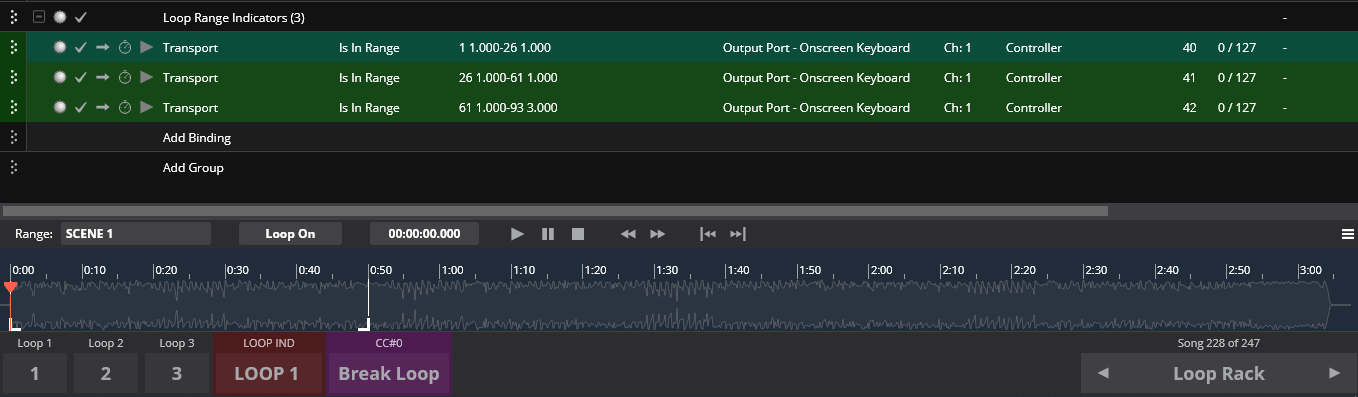
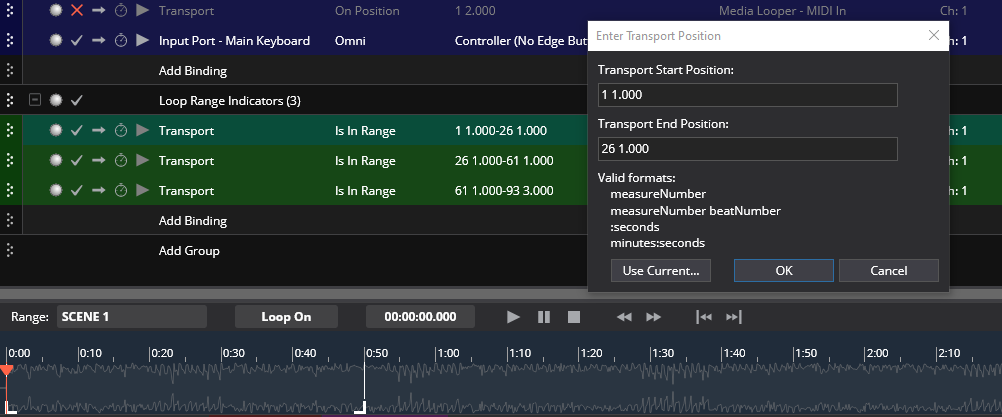
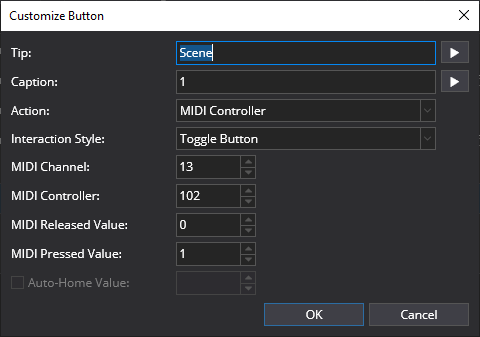
If so you can use the transport position ‘Is In Range’ source action to toggle an onscreen button on and off. below you see the example bindings for the controller bar indicators.
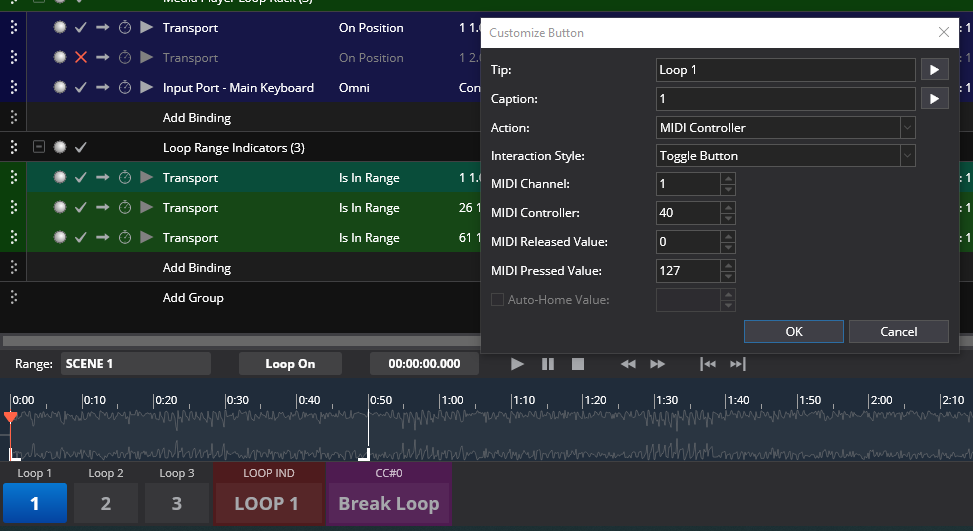
The controller bar buttons are set up like this so that they highlight when the current looped range is active. The CC numbers can be whatever you want, I used 40~42.
The other loop ranges are set up in the same fashion.
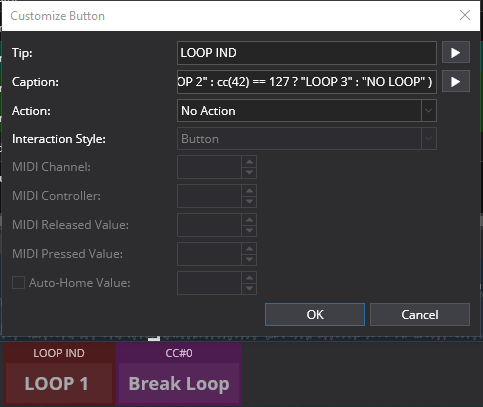
If you want to get fancy you can use ternary statements like this in either of the controller bar button text fields and you would have a single button that reacted to the same bindings but indicated the current loop number using text. The maroon button in the picture is set this way.
The syntax used for this would be like this $(cc(40) == 127 ? "LOOP 1" :cc(41) == 127 ? "LOOP 2" : cc(42) == 127 ? "LOOP 3" : "NO LOOP" )
NO LOOP could be blank with just the quotes left as the final conditional entry. You can enter as many conditions as you need separating them with the colon.
I was not using the media player looping, I did look at that, but felt a dedicated looper would give me more flexibility. After a little research I downloaded and evaluated the MuLab plugin, and pulled the trigger on it.
But hopefully what you have described above will service the same purpose with the MuLab looper
Thanks to your pointers, I have it working like a charm.
Starting off, in my source Cubase song, which gets chopped into scenes for the looper, I have a MIDI track for CH13 (my “control channel” in my set up) set up so that at the start of each scene, CC 102 (an unallocated CC I have selected for this) is sent, with the value incrementing for each scene, which is easier to see in an event list editor as shown below.
Now when I press a Scene button my Montage, when the scene does starts playing (after the current one has finished) and CC 102 is sent on Channel 13 with the relevant value to identify the scene, I get the relevant scene indicator on the controller bar lighting up.
For completeness in the looper rack I have some transport related bindings
A binding that starts the transport when any scene button on the Montage is pressed. My Montage rack listening to the CC that the Montage sends for scene changes translates the CC to program changes 1 - 8, so I am looking for any program change.
A binding that sends a CC value of zero to the controller bar when the transport is stopped to show no scene is active. I guess I could also reset to scene 1 on both the Montage and the Controller bar
Thanks again for your help, it got me going in the right direction.
Ingenious solution! Thanks for sharing with such detail, I picked up some tips from you as a result. I have found many uses for the controller bar for keeping me informed so I understand your choice to use it this way. The Mu-Lab is a monster of an app, you are right about the flexibility. It would take me a while to learn it from what I gathered.
If you have learnt something back from me, then that is Karma.
You are right, MuLab is a bit of a learning curve, but as of tonight I have a rack to encapsulate it, with two MuLab songs that can be selected by state changes, embedded in two Cantabile songs.
One has two loops, one extends it to four, and it all appears to be working nicely
I need to expand that to create a default 8 scene starter song, and experiment a little more with audio in the looper.
Once all that is done, I will write it all up into a guide to go with my other ones to share the knowledge.
But for me, mission accomplished in principle. I have a means of looping in Cantabile and keeping it all internal to Cantabile songs without trying to sync it to Ableton, which I was also evaluating on demo. But MuLab seems to do everything I need within Cantabile, so I can quietly forget Ableton for now.