Use Cantabile 3 with a Tablet via TouchOSC and TouchOSC Bridge

This was mentioned in a general thread on wireless access, but I thought TouchOSC deserved its own thread, so here it is!

I have been experimenting using TouchOSC Bridge (Link to docs) with Cantabile 3 and other software.

I could easily use most of the layouts to send controller messages to Cantabile from my Android. (Works on IOS as well.)

http://hexler.net/software/touchosc-android

http://hexler.net/software/touchosc (for IOS)

Very important for this to work with Cantabile or other software:

TouchOSC Bridge

You might want these (require Java)

32-Bit TouchOSC Editor

64-bit TouchOSC Editor

Try the simpler layouts, like “Simple” and “Keys” and “Mix 2” to test it. I will be posting the built-in mappings for those control layouts and a video on setting it up and using it pretty soon.

Terry

5 Likes

MIDI Controller Assignments in TouchOSC

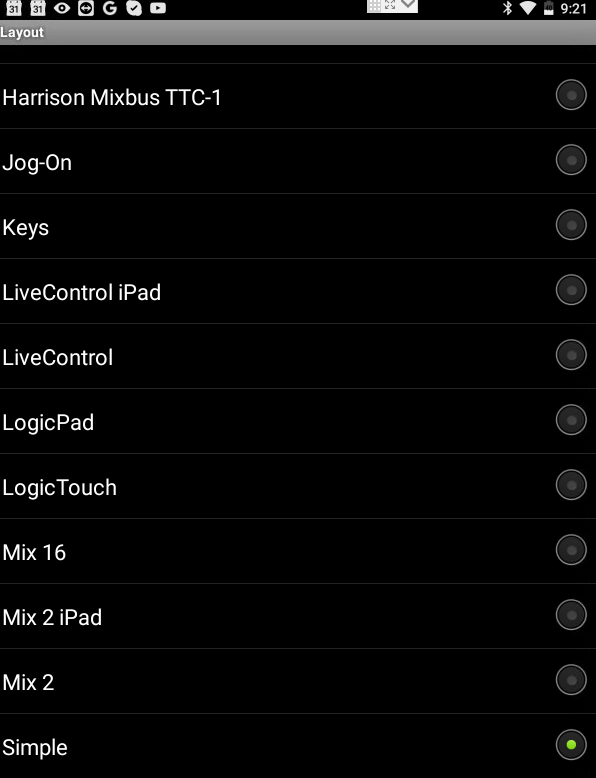
Covering three basic layouts that come with TouchOSC out of the box: Simple, Mix2 and Keys

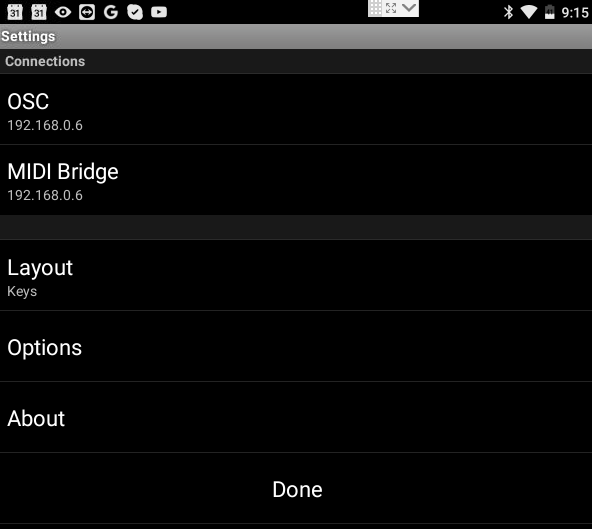
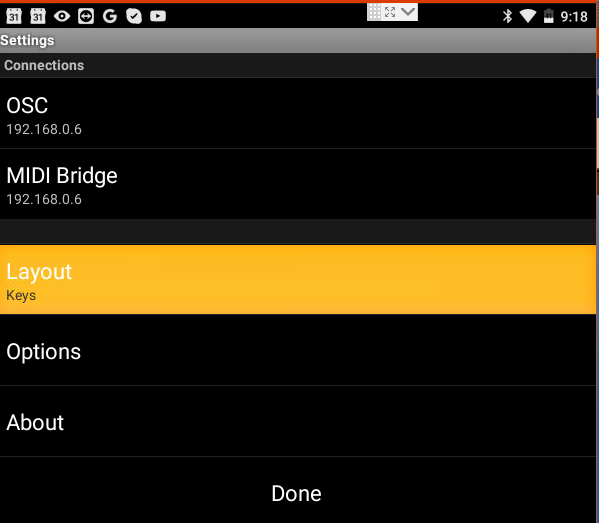
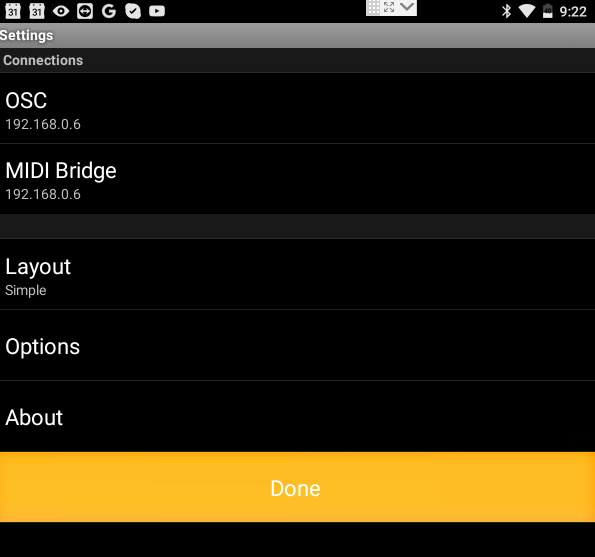
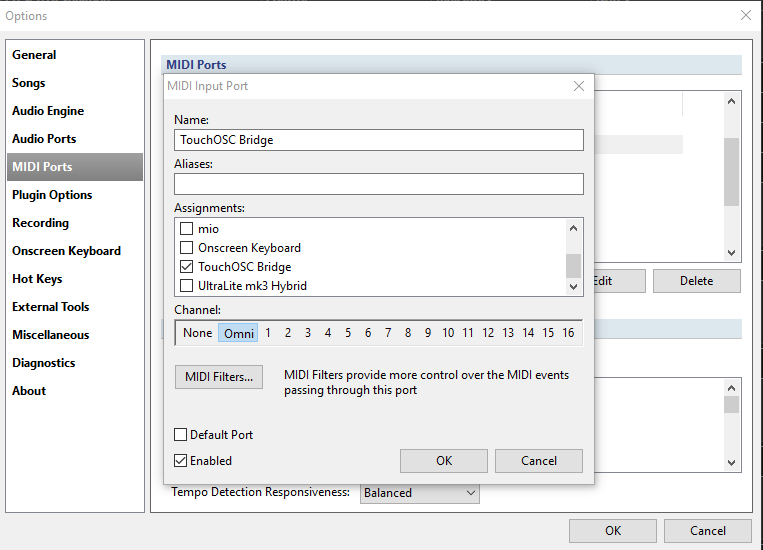
Be certain to have TouchOSC Bridge running on the PC so it can intercept the tablet MIDI input.

Setup TouchOSC input in Cantabile as Omni
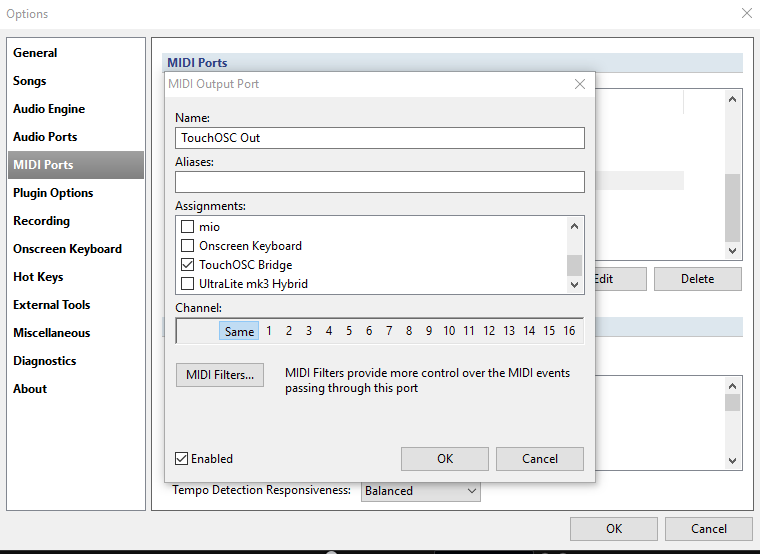
Output as Same

Then you can create a TouchOSC Rack with in to OutPort - Rack:MIDI Out

Since the TouchOSC Bridge is its own controller, you can re-assign these channel, controller and note assignments as you desire using Cantabile’s powerful mapping tools and filters.

All screens transmit on channel 1 except “Simple” screen 4, which transmits on channel 2.
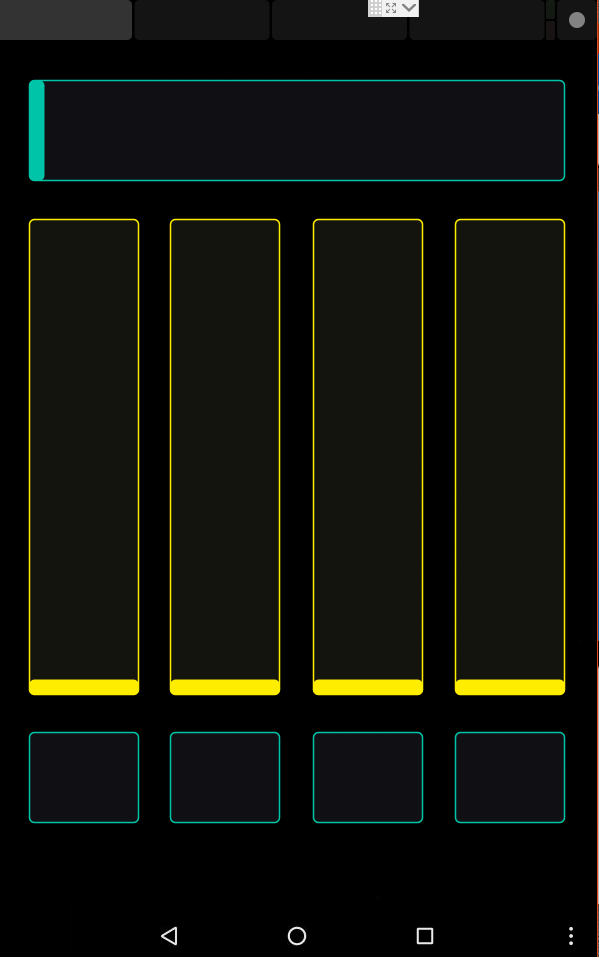
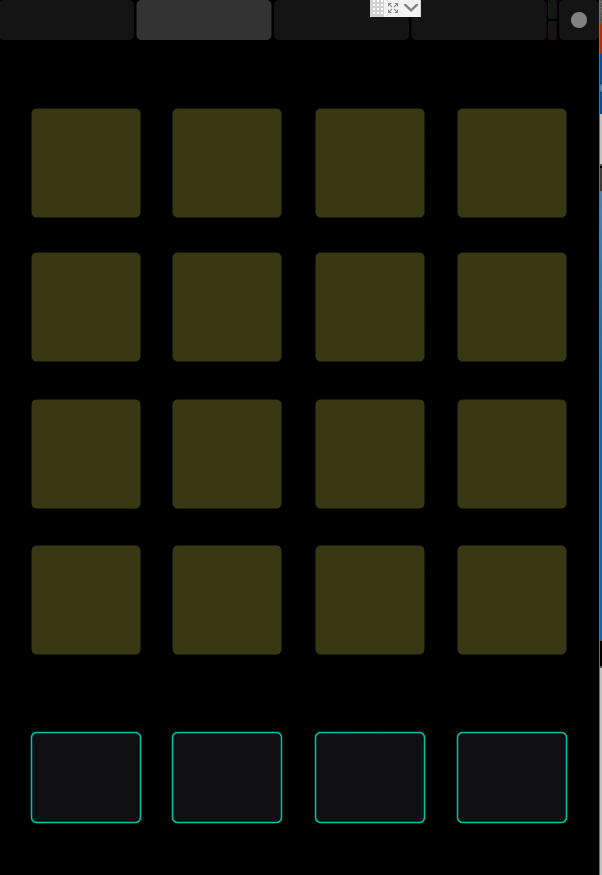
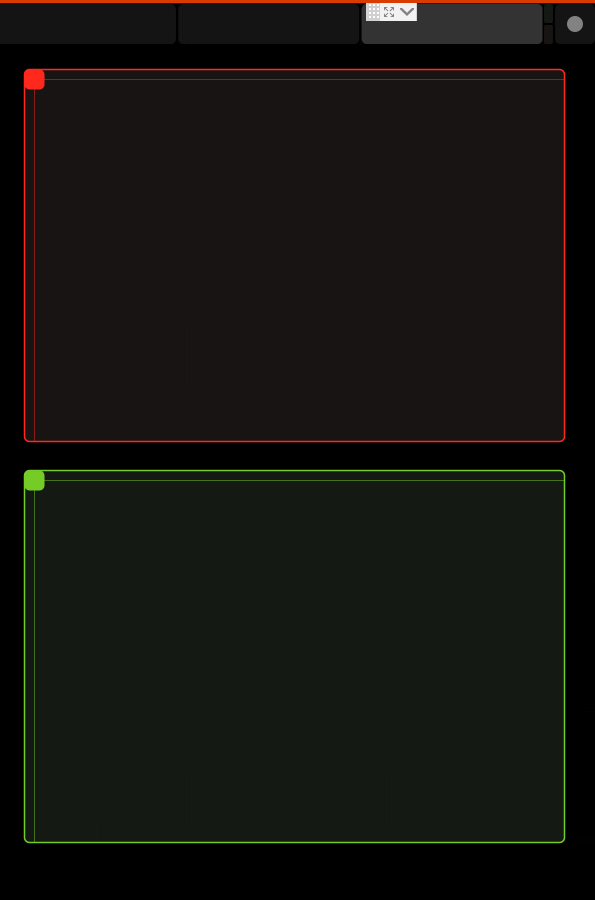
Simple

Screen 1

Left slider - CC#0
2nd slider - CC#1
3rd slider - CC#2
4th slider - CC#3
Top slider - CC#4

Toggle buttons at bottom - toggle 0/127

CC#5 CC#6 CC#7 CC#8

Screen 2

Note buttons in a grid

C2 - C#2 - D2 - D#2
G#1 - A1 - A#1 - B1
E1 - F1 - F#1 - G1
C1 - C#1 - D1 - D#1

Toggle buttons at bottom - toggle 0/127

CC#9 CC#10 CC#11 CC#12
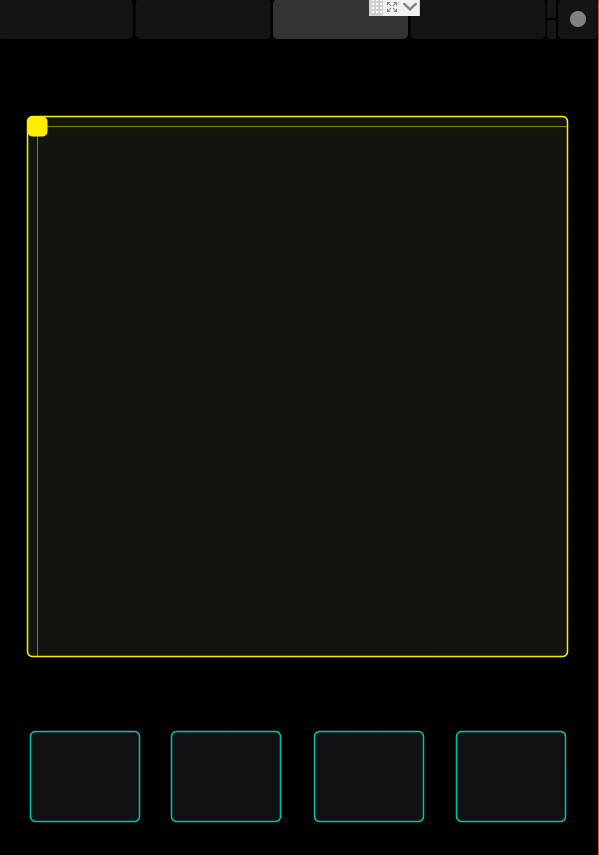
Screen 3

X/Y Axis Controller

Top-left CC#13 and CC#14 both at Zero
Bottom-left CC#13 at zero and CC#14 at 127
Bottom-right Both at 127
Top-right CC#13 at 127 and CC#14 at zero

Toggle buttons at bottom - toggle 0/127

CC#15 CC#16 CC#17 CC#18

Screen 4

Small toggle-buttons grid

All small buttons toggle 0/127 on channel 2:

CC#0 thru CC#7
CC#8 thru CC#15
CC#16 thru CC#23
CC#24 thru CC#31
CC#32 thru CC#39
CC#40 thru CC#47
CC#48 thru CC#55
CC#56 thru CC#63

Large toggle buttons at bottom - toggle 0/127 on channel 1

CC#19 CC#20 CC#21 CC#22

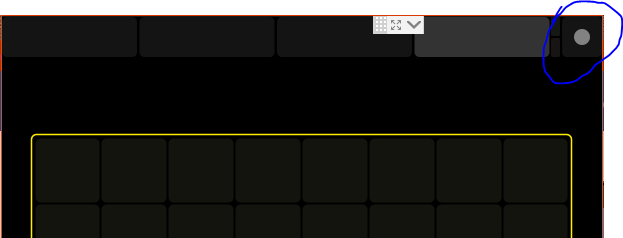
When done with a layout, hit the button at the top-right to return to the options screen.
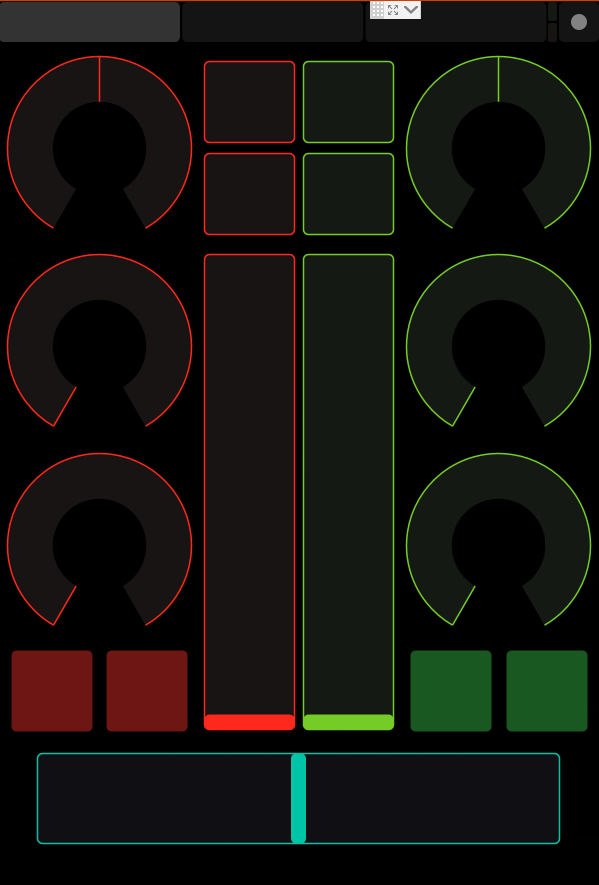
Mix2

Screen 1

Top-Left “knob” with center mark: CC#7 0 – 64 – 127
Middle-Left “knob”: CC#8 0-127
Bottom-Left “knob”: CC#9 0-127

Top-Right “knob” with center mark: CC#10 0 – 64 – 127
Middle-Right “knob”: CC#11 0-127
Bottom-Right “knob”: CC#12 0-127

Topmost Left-of-Center Toggle Button: CC#3 0/127
Lower Left-of-Center Toggle Button: CC#4 0/127
Left-of-Center Slider: CC#1 0/127

Topmost Right-of-Center Toggle Button: CC#5 0/127
Lower Right-of-Center Toggle Button: CC#6 0/127
Right-of-Center Slider: CC#2 0/127

Bottom-left “red” button 1: Note C1
Bottom-left “red” button 2: Note C#1

Bottom-right “green” button 1: Note D1
Bottom-right"green" button 2: Note D#1

Bottom Slider: CC#0 0 – 64 – 127
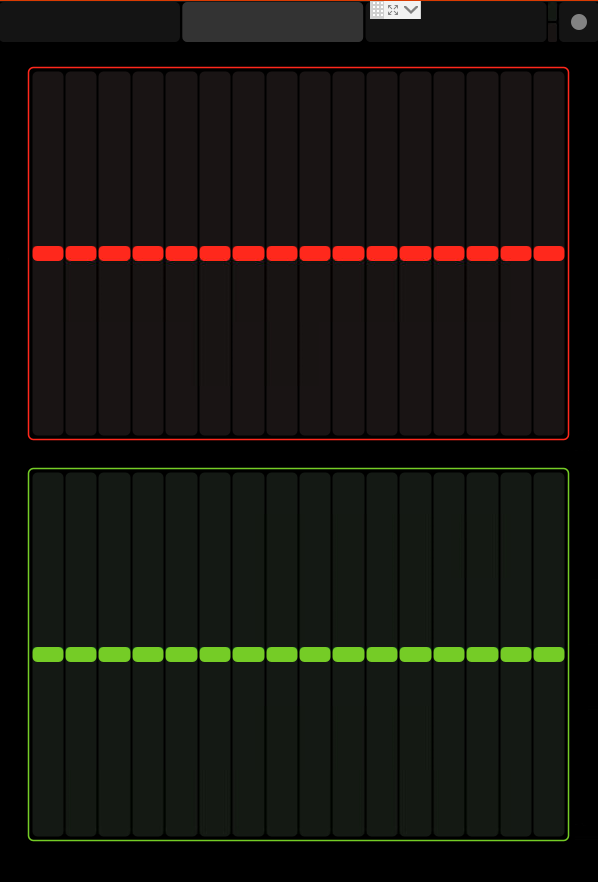
Screen 2

Upper 16 sliders: CC#13 through CC#28 0 – 64 – 127

Lower 16 sliders: CC#29 through CC#44 0 – 64 – 127

Screen 3

Upper X/Y Controller:
Top-left CC#45 and CC#46 both at Zero
Bottom-left CC#45 at zero and CC#46 at 127
Bottom-right Both at 127
Top-right CC#45 at 127 and CC#46 at zero

Lower X/Y Controller:
Top-left CC#47 and CC#48 both at Zero
Bottom-left CC#47 at zero and CC#48 at 127
Bottom-right Both at 127
Top-right CC#47 at 127 and CC#48 at zero
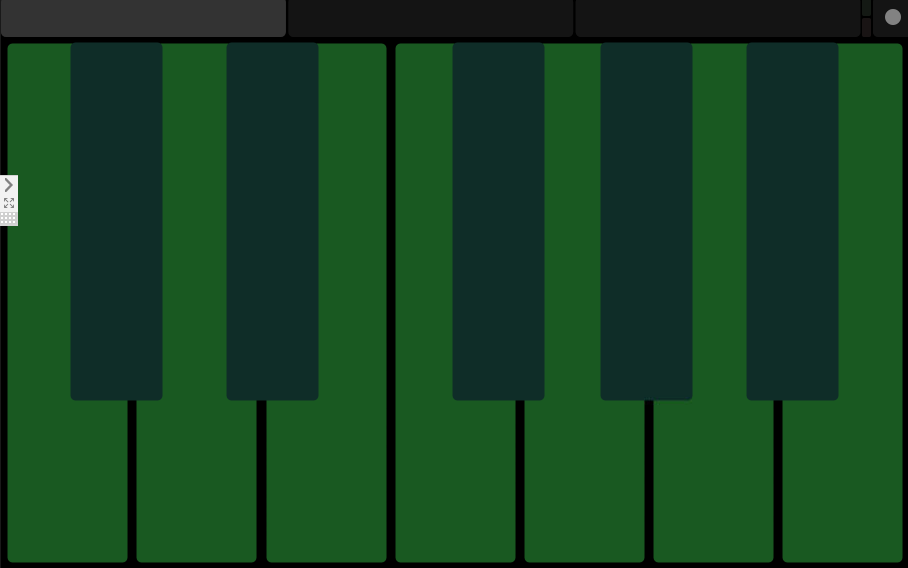
Keys

Screen 1

C1 - C#1 - D1 - D#1 - E1 - F1 - F#1 - G1 - G#1 - A1 - A#1 - B1
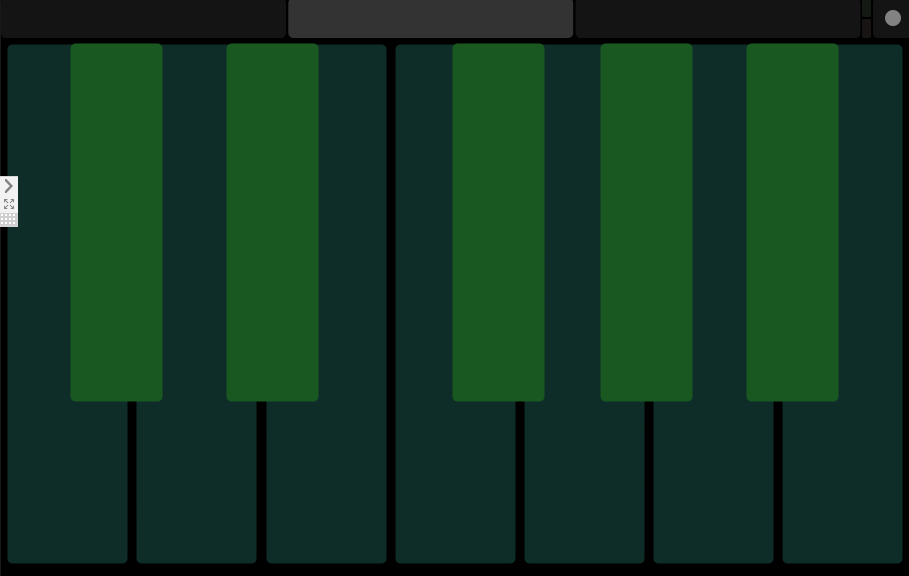
Screen 2

C2 - C#2 - D2 - D#2 - E2 - F2 - F#2 - G2 - G#2 - A2 - A#2 - B2
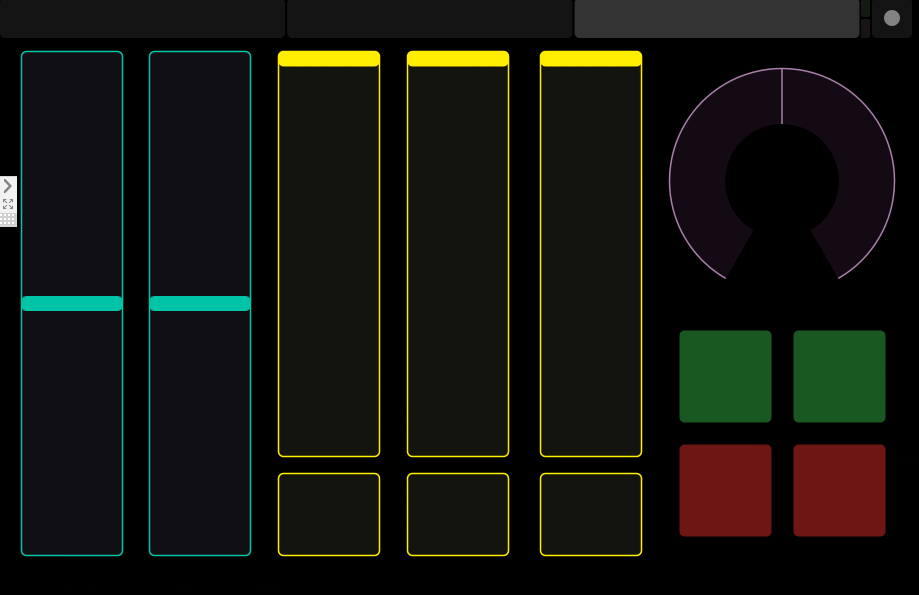
Screen 3

Slider 1: CC#0 0 – 64 – 127
Slider 2: CC#1 0 – 64 – 127

Slider 3: CC#2 0 - 127
Slider 4: CC#4 0 - 127
Slider 5: CC#6 0 - 127

Toggle-button 1: CC#3 0/127
Toggle-button 2: CC#5 0/127
Toggle-button 3: CC#7 0/127

Top-Right “Knob”: CC#8 0 – 64 – 127

Top Left “green” momentary-switch button: CC#9 0/127
Top Right “green” momentary-switch button: CC#10 0/127
Bottom left “red” momentary-switch button: CC#11 0/127
Bottom Right “red” momentary-switch button: CC#12 0/127

4 Likes

Very usefull! Thanks! I didn’t know these app!

Andrew

1 Like

That’s good to hear - this is very cool software for a tablet! :slight_smile:

Hi Terry,

it’s 100% full working here!
did you develloped your own template on OSC Editor?

1 Like

Only a few so far. I’ve found the ones that come with it are so adaptable via MIDI-learn functions that I’ve mostly been using those!

Terry

I’m a new convert to TouchOSC, having tried Lemur and TouchDaw.
Lemur just won’t play ball with USB tethering on Android. TouchDaw is neat but not flexible.
TouchOSC is the best of all worlds (not tested it live yet though). The editor is easy to work with and the objects have the right balance of flexibility vs complexity.
And it tethers just fine over USB; providing network and power (phone charges well, tablet trickles on low brightness).

1 Like

Many Thanks Terry for information about this app. I have some problem to install TouchOSC bridge though, the version is 32 bit and my pc is 64 bit. Do you think that’s the problem?

1 Like

I’m not sure what the problem with it is - that is, I’ve had problems connecting the OSC Bridge part, though the MIDI Bridge portion works just fine. I’ve given up getting the Harrison Mixbus template to work… quite frustrating! If I receive any enlightenment on the topic, I’ll be certain to post it here. :slight_smile:

Terry

BTW - I’ve found some handy-looking OSC tools here:

https://code.google.com/archive/p/osc-tools/downloads

The OSC Monitor at the top has already proven useful, showing that the MIDI-Bridge worked fine.

Terry

So you are using the TouchOSC bridge 32 bit version on 64 bit pc and don’t have any problems?

Quite the opposite - I am definitely having problems. I’m not sure it has anything to do with the 32-bit on a 64-bit machine, as we run lots of 32-bit programs in 64-bit Windows.

Here is the author’s page for the OSC Monitor that I just unearthed:

Interesting info. I’ll keep you posted what I find out.

Terry

Many thanks Terry :hugs:…I will continue to try to solve the problem.

1 Like

Hello, I’m fairly new to Cantabile and TouchOSC. What I am trying to accomplish is configure an audio level meter with the LED’s in TouchOSC. I have a controller layout that works fine with Cantabile but cannot figure out how to get midi out of Cantabile to TouchOSC. I’m trying to create a Rack that will send the midi out to tosc. The whole “Rack” concept confuses me, being they seem to act more as patch bays than typical racks. I’m sure I’m missing something here.
Anyway, if anyone has any suggestions as how to get LED’s to work on a TouchOSC MIDI controller layout to read the audio output from Cantabile, I would really appreciate it. Thanks

steve d

1 Like

I’ll dabble around with that a bit. Currently, I can get MIDI working fine with TouchOSC, but I’ve been having some trouble connecting to “hosts” - I don’t know why, perhaps a firewall thing.

With racks, the secret-sauce is often in the fact that they can have such complex bindings set up to use with them. See this guide for the overview, but there is so much to bindings that it really takes some determined exploration to fathom all that can be accomplished.

https://www.cantabilesoftware.com/guides/bindings

I’m constantly surprising myself! But the tasks are often quite use-specific, so it is complicated sharing “recipes” - however, there are several fantastic posts around here - do a search on “Bindings” and you’ll see what I mean!

Terry

Thanks for the reply. I understand the bindings and the basic point of using racks. However, I can’t configure Cantabile Rack and TouchOsc to do what I think it is supposed to do.

As a test, I have plugin slot 1 (piano) routed to stereo out and a second route set to midi pass through to touchosc rack that is aimed at touchosc ‘out’. I suppose I could actually eliminate the rack all together and just route straight to tosc out, now that I think about it.

when I hit a note on the piano,I am getting the little red light in the upper left corner of touchosc indicating (I think?) that tosc is receiving midi from Cantabile but I can’t make it light an LED.

My ultimate goal is to have all the faders and buttons in touch osc reflect the settings in Cantabile and possibly.
This way I won’t have to keep resetting all the faders and knobs in tosc every time I connect it to Cantabile.

I was having trouble connecting to host also until I discovered that my PC was changing IP adresses on me every once in a while, which I thought wasn’t possible unless the PC was being used elsewhere, using different internet.

Anyway, I just disconnected from internet, put tablet in airplane mode and tehered via usb. I thought it would be silly of me to risk wireless being my tablet is less that 4 ft. away from my PC.

Have had no problems since.

Please let me know if you figure this out, then break it down to a 5 year old’s level…LOL

Thanks, Steve D

1 Like

Will do - sounds like a worthy weekend project! :slight_smile:

Terry

Well, the problem is, that you don’t have a plugin running, that even sends the necessary midi data.

You say you want to have levelmeters in tosc. So you need to convert the audio-signal to a midi stream first and that can than be used to control LEDs, buttons and so on. Just google for “audio to midi” and you’ll find some plugins. I think the guys from pizmidi have one too.

Cantabile does not do the conversion by itself. If you send the midi pass through to an midi output, you’ll send out the notes you play on your keybed. That’s why tosc shows the red led. It receives midi (which is a good start), but only notes!

1 Like

Thanks, and good luck.

1 Like

ahh, thanks FantomXR, I knew I was probably overlooking something. I’ll research this.
Thanks