
Always good to see someone else with an FC300! Amazingly flexible MIDI foot controller. 
BTW for my current guitar (not keyboard) oriented project, I am using a Line6 Helix and its “Command Centre” features (ability to program the stomp switchs to send MIDI messages) means I don’t need the FC300 for that project. I.e. I have been able to program the Helix stomp switches to allow me to start and stop the Cantabile songs, and Cantabile bindings are listening out for Helix patch changes to select the right song for playback.
I just finished my first professional musical production with 3 Cantabile machines (2x Intel Nuc, 1X HP Laptop). All went smooth without any problems as far as Cantabile is concerned.
MD

This was my setup: Nord Stage II, HP Laptop i5 for (Multitrack-) Clicktracks & Piano Sound.
I didn’t have to switch songs, because I made a trigger and Binding to select next song as soon as MediaPlayers stopped.
The switch pedal on the left on the Keyboard is to start the Clicktracks. (via an Expression to USB thingy from Audiofront )
Tascam us16-08 soundcard.
Keyboard 1
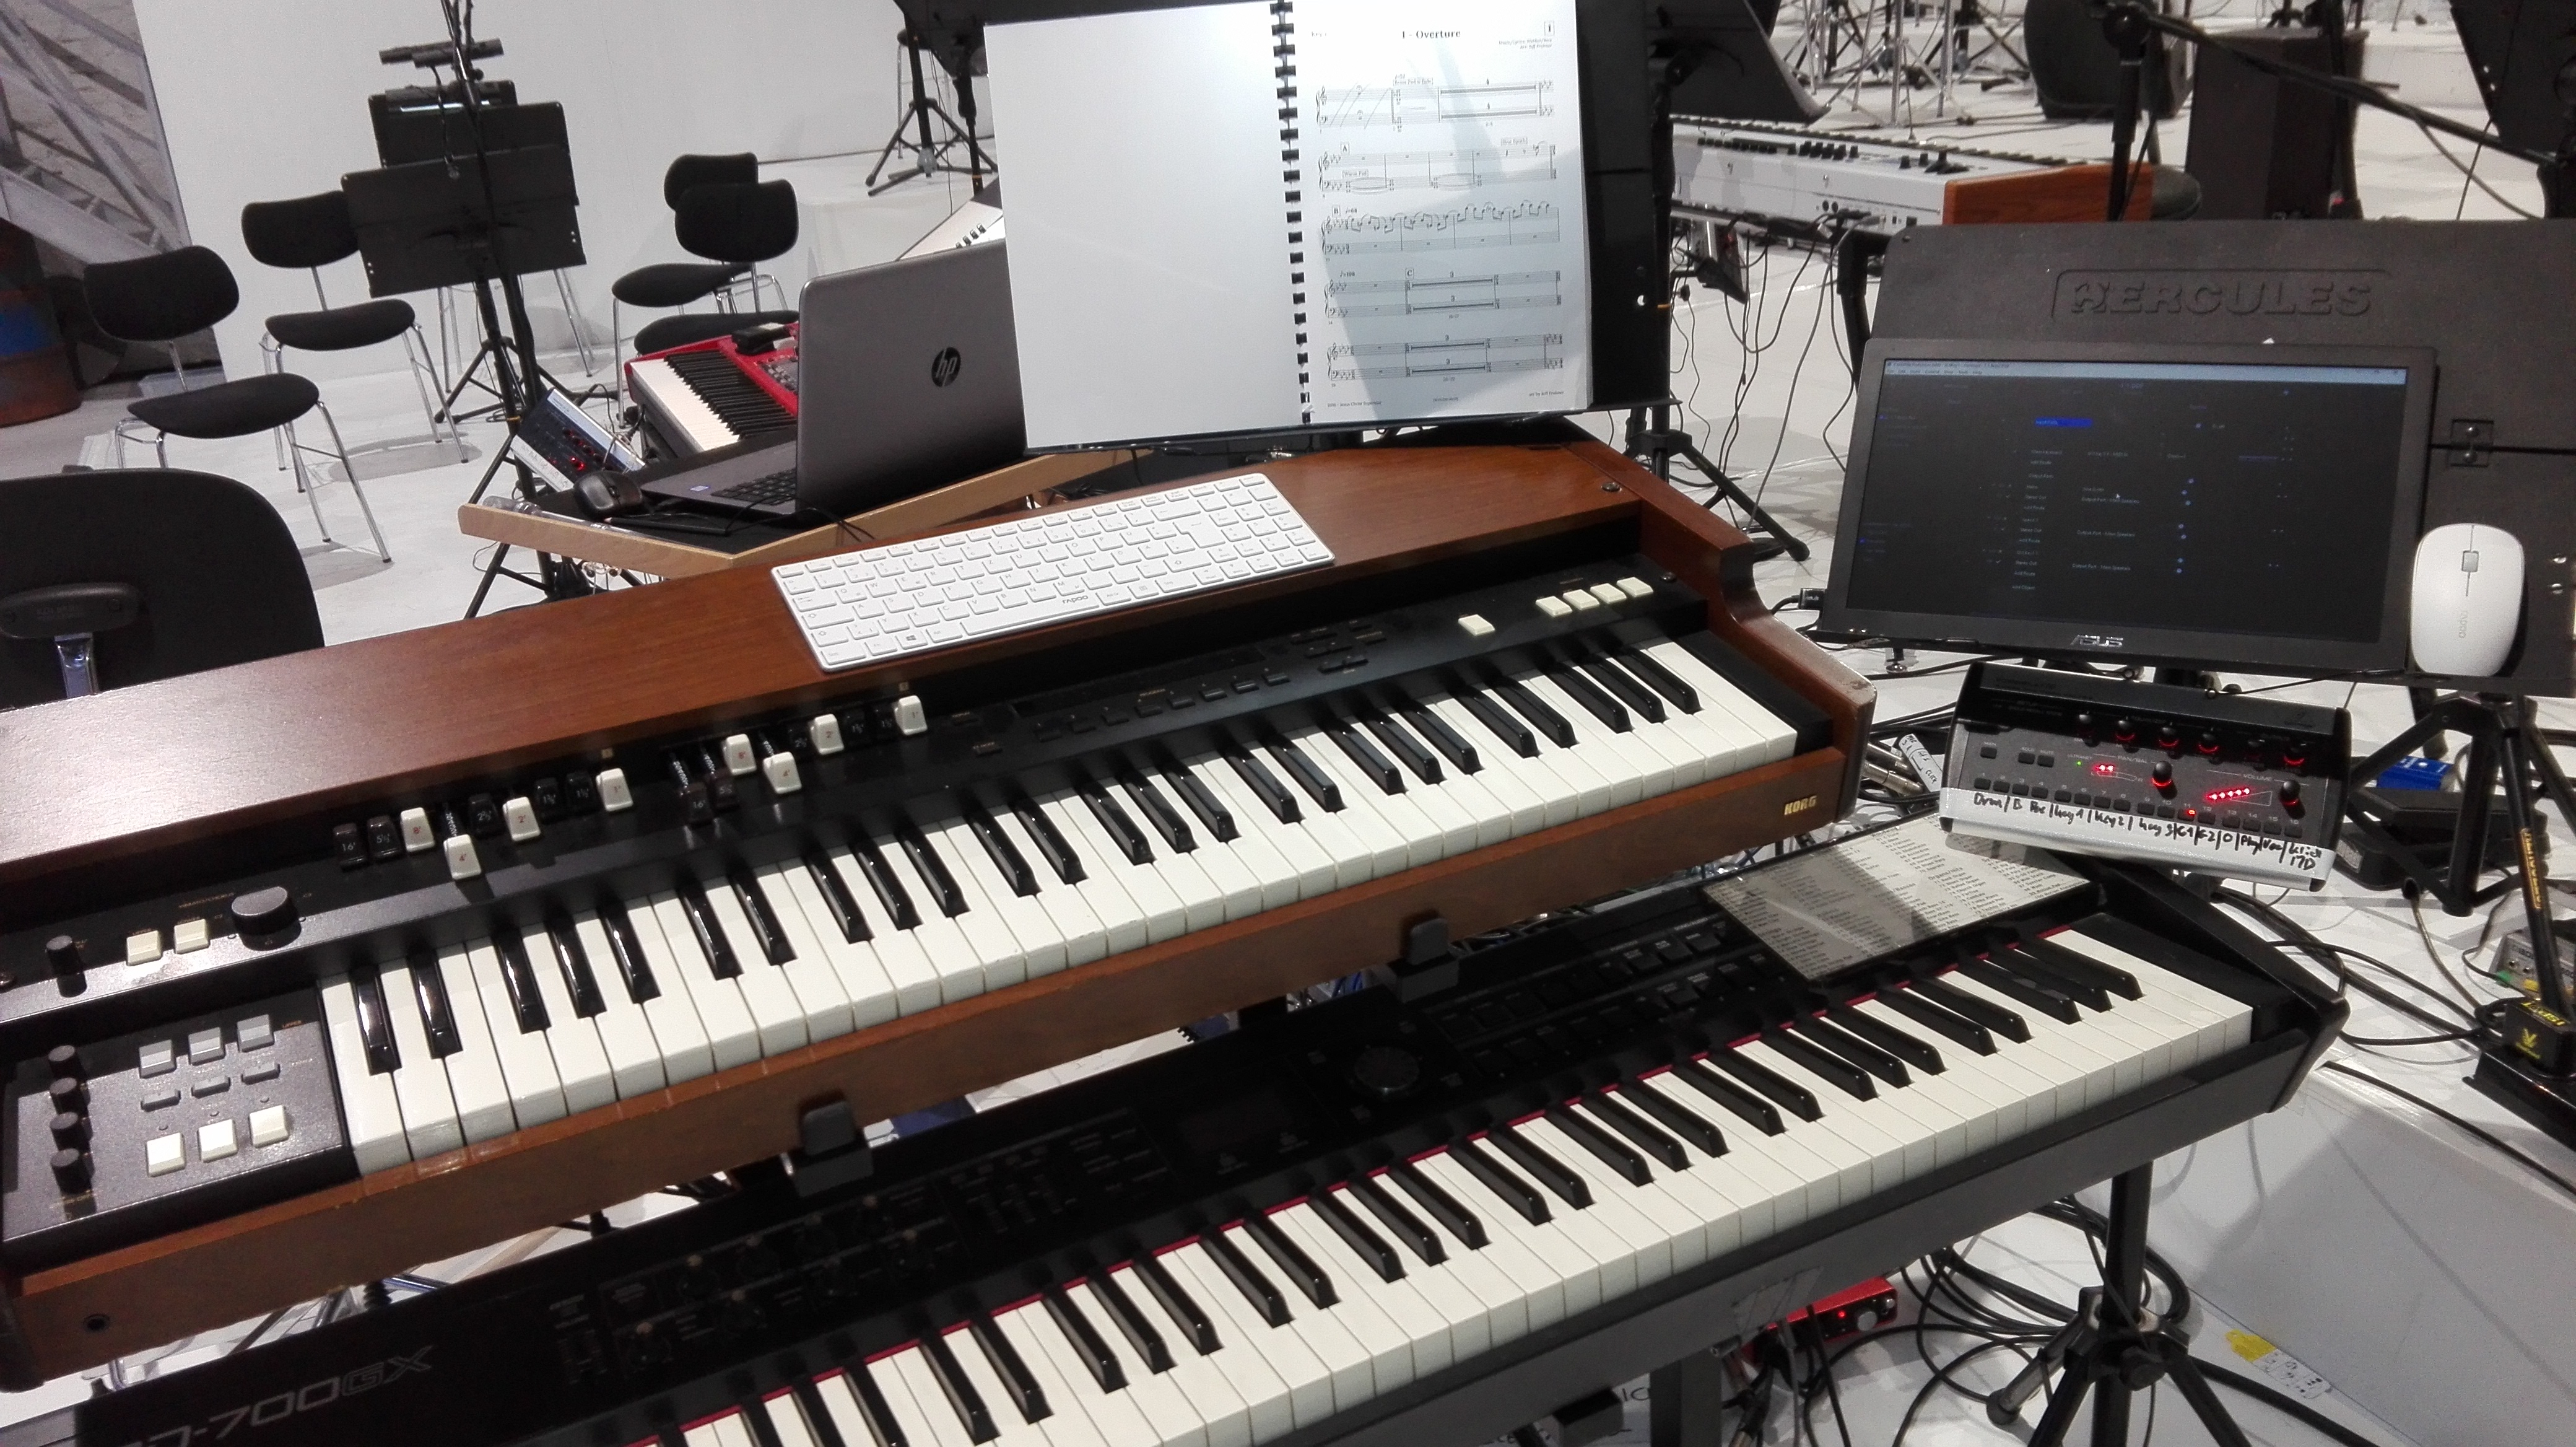
Intel Nuc (i5, 16GB Ram), an USB Monitor from Asus, RME Fireface
Keyboard 2
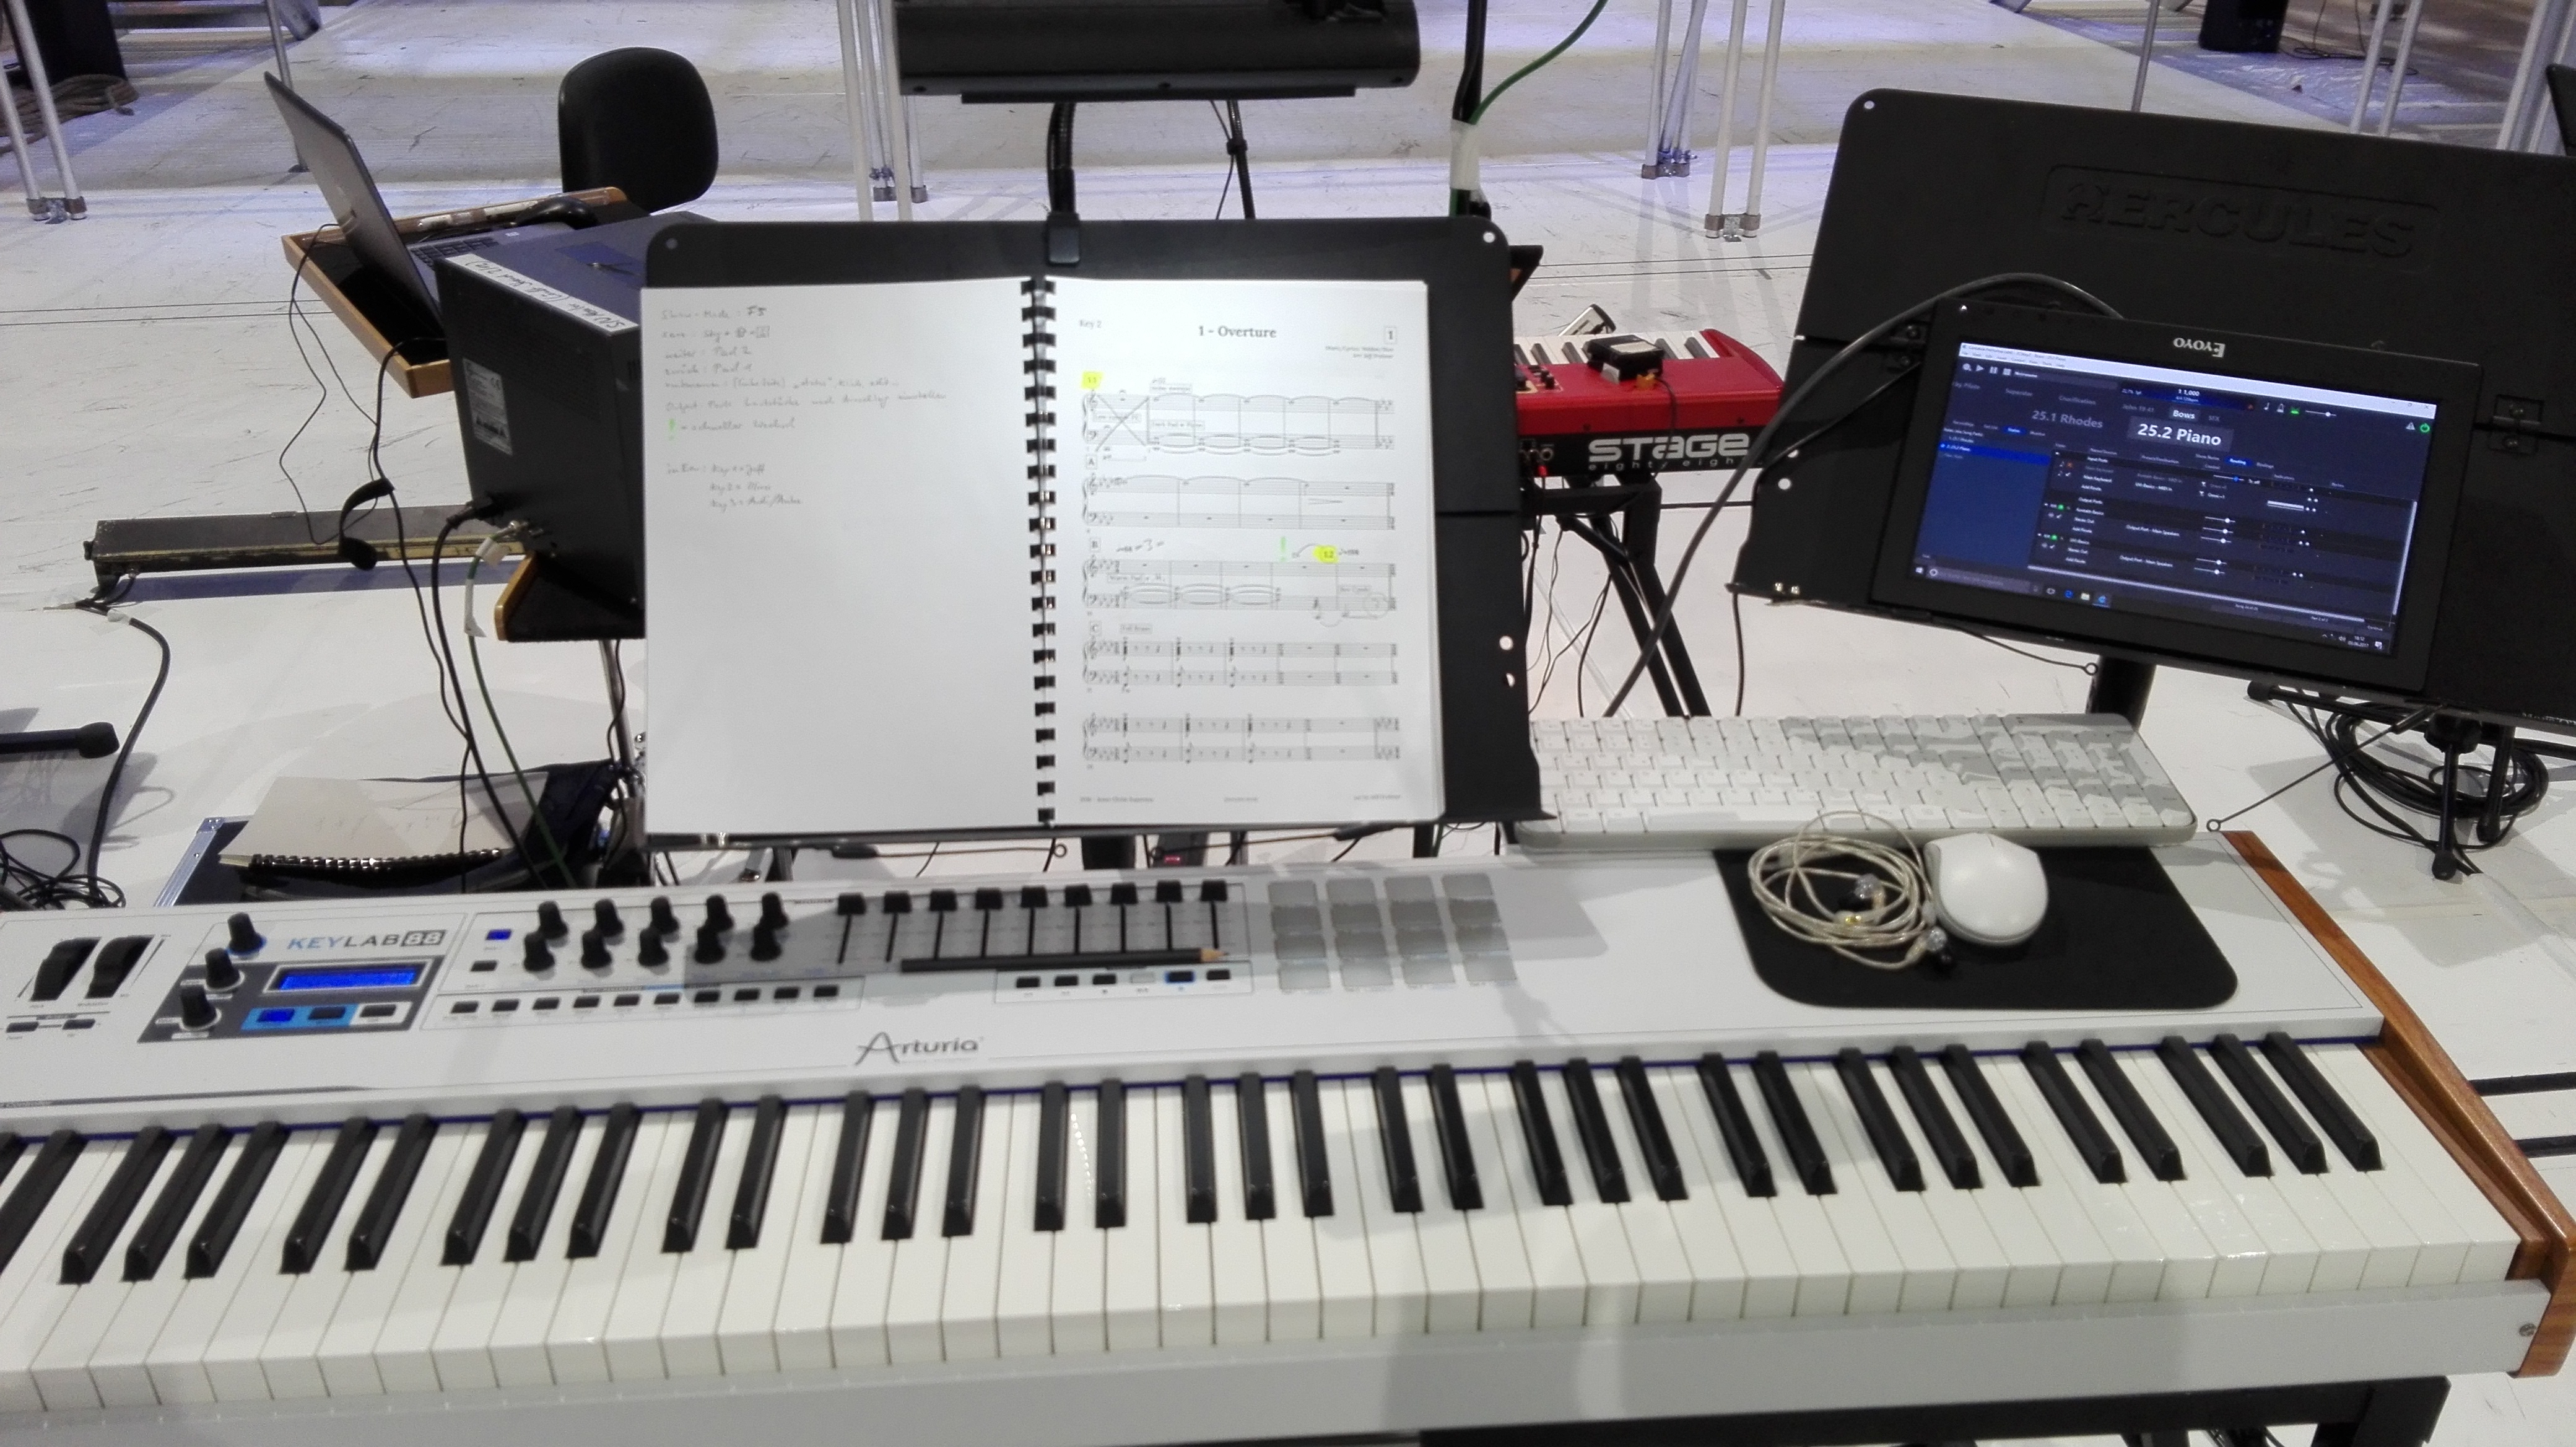
Intel Nuc (i7, 32GB Ram), a small 10’’ Monitor.
Overview
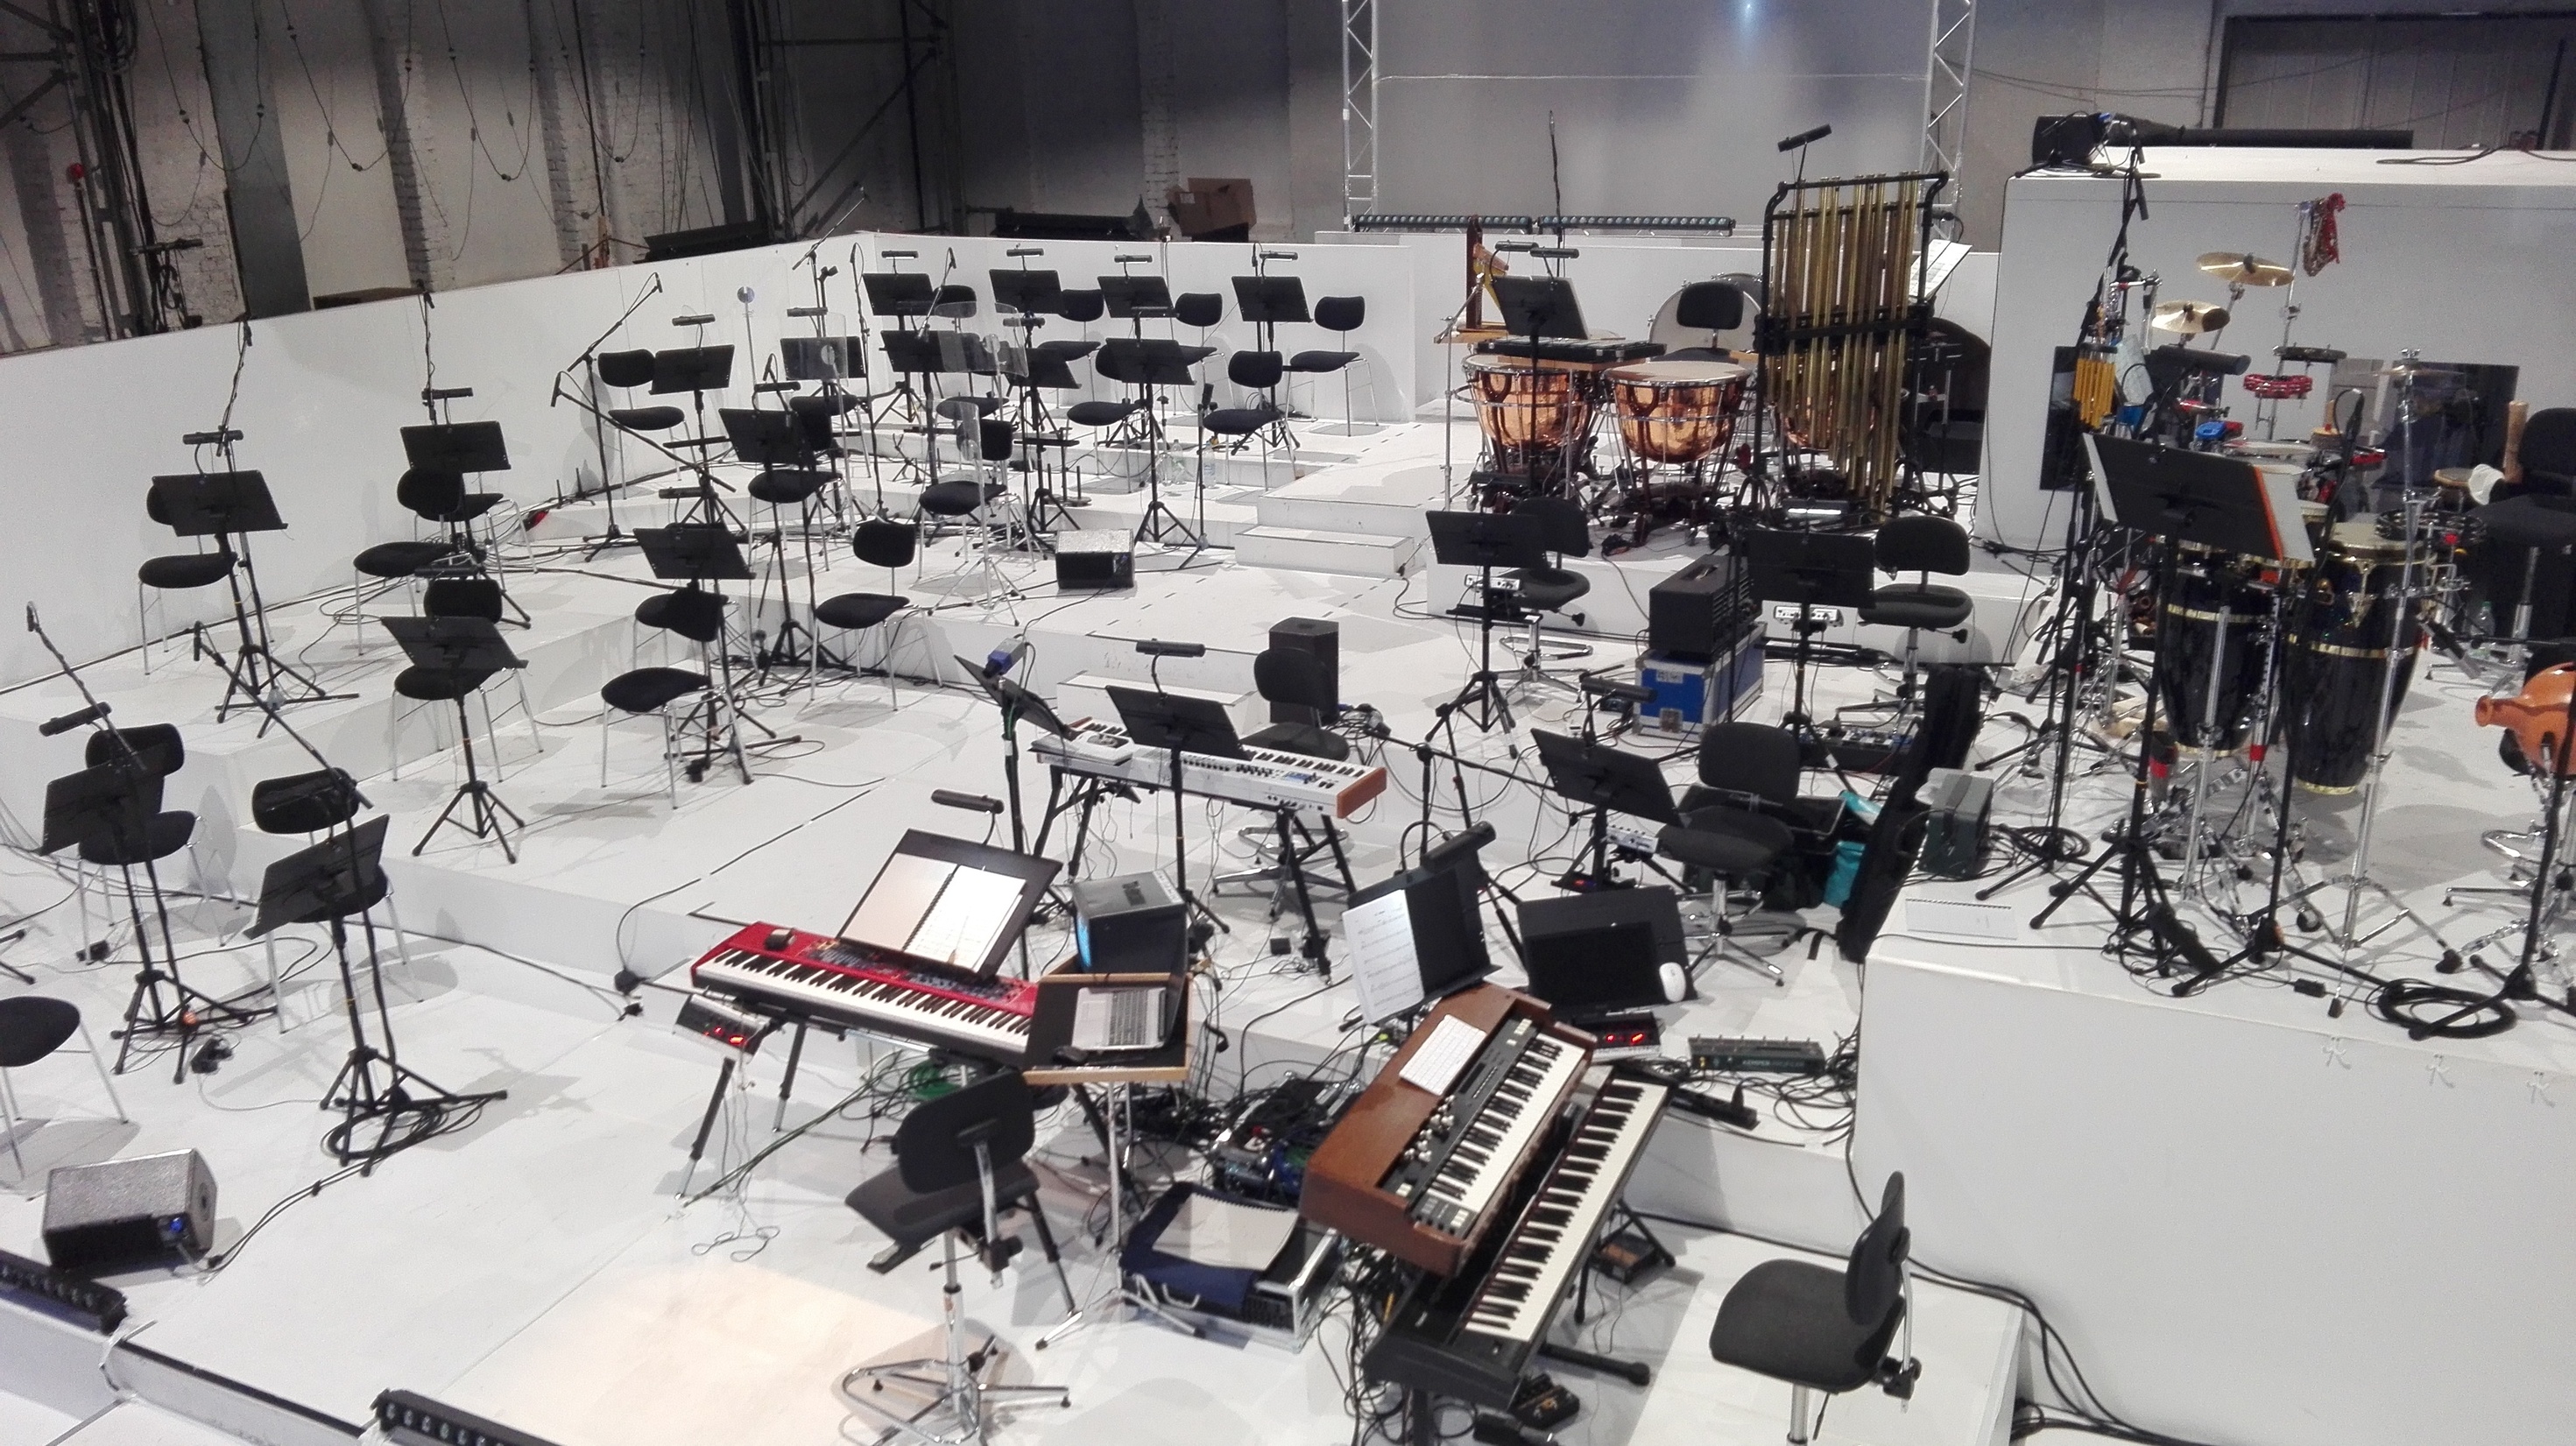
Great setup, Jeff!! I wonder if this achieves the record for the largest band Cantabile has been a part of? 
Neil
I might have the record for that. Did a piece with an 80 member junior high concert band that needed synth sounds. Used C3. I don’t think I have a picture though.
Roelli…if you can get all that in a case and make it work, I say go for it. A friend on the forum suggested I post my rig after sending him some photos, so here it is.
I wanted something that could make life easier. After 45 years of setting stuff up (back in the day I actually used an upright acoustic, a B3, a Rhodes and a Wurlitzer) I was ready to economize. Being mostly old school, I decided to take the plunge, and sold off two keyboards and some extraneous gear and jumped into the midi pool. I bought an Audiobox interface (came with StudioOne Artist, which I upgraded) a Studio Logic SL88 controller, SampleTank, Komplete 11, Cantabile and a new laptop to host it all.
I was going stand alone on Kontakt, until my sales guy suggested Cantabile. After watching the videos, I was hooked. It’s taken a little bit, but with some assistance…I’ve gotten a pretty decent handle on the whole thing. I continue to gig with my controller and my backup keyboard which is a Yamaha MX49 synth, and Kontakt while I finish up all the details in Cantabile. We have over 100 songs on our list, so it’s been a process.
In the meantime, I have an OnStage Z stand, and although they give you a nifty carry bag with it, it weighs a ton and has to be carried separately since it does not pile well. I had already done modifications to my existing equipment to make life easier. I retrofitted some older Peavey cabinets with new speakers/X-over/horns and bought two subs. First thing was to put casters on the subs. Then I got the bright idea to join them together, so I went to Home Depot and got some heavy duty hook and eye connectors and they now hook together nicely. I was driving through my neighborhood and saw a neighbor who was throwing out a mower with a perfectly good handle and I thought…wagon! I grabbed the mower, removed the handle and put the mower out to the curb. I attached the handle to the sub (it detaches easily) and it became a wagon of sorts. I noticed that my PA cabs were the exact width of the sub, so a few more hook and eye connectors later, the cabinets now ride aboard the subs which are hooked together. They are on heavy duty casters which face away from the crowd, so nobody is the wiser. I can push it or pull it.
I hate making multiple trips to the truck for gear…what musician does? So, the next thing to tackle was all this new gear…controller/keyboard/laptop, etc. and of course the dreaded stand. I play standing (I used to do a 50/50 split depending on the gig), but I’ve committed to being on my feet. So, how to fix the problem of all this gear and the stand and this is what I came up with:

By itself, it is a super sturdy road case. I had no case for my SL88 and my old road case was built for 61 key keyboards, so I decided to kill two birds with one stone…and then I decided, why not three? I need to solve the stand issue so here is the solution:
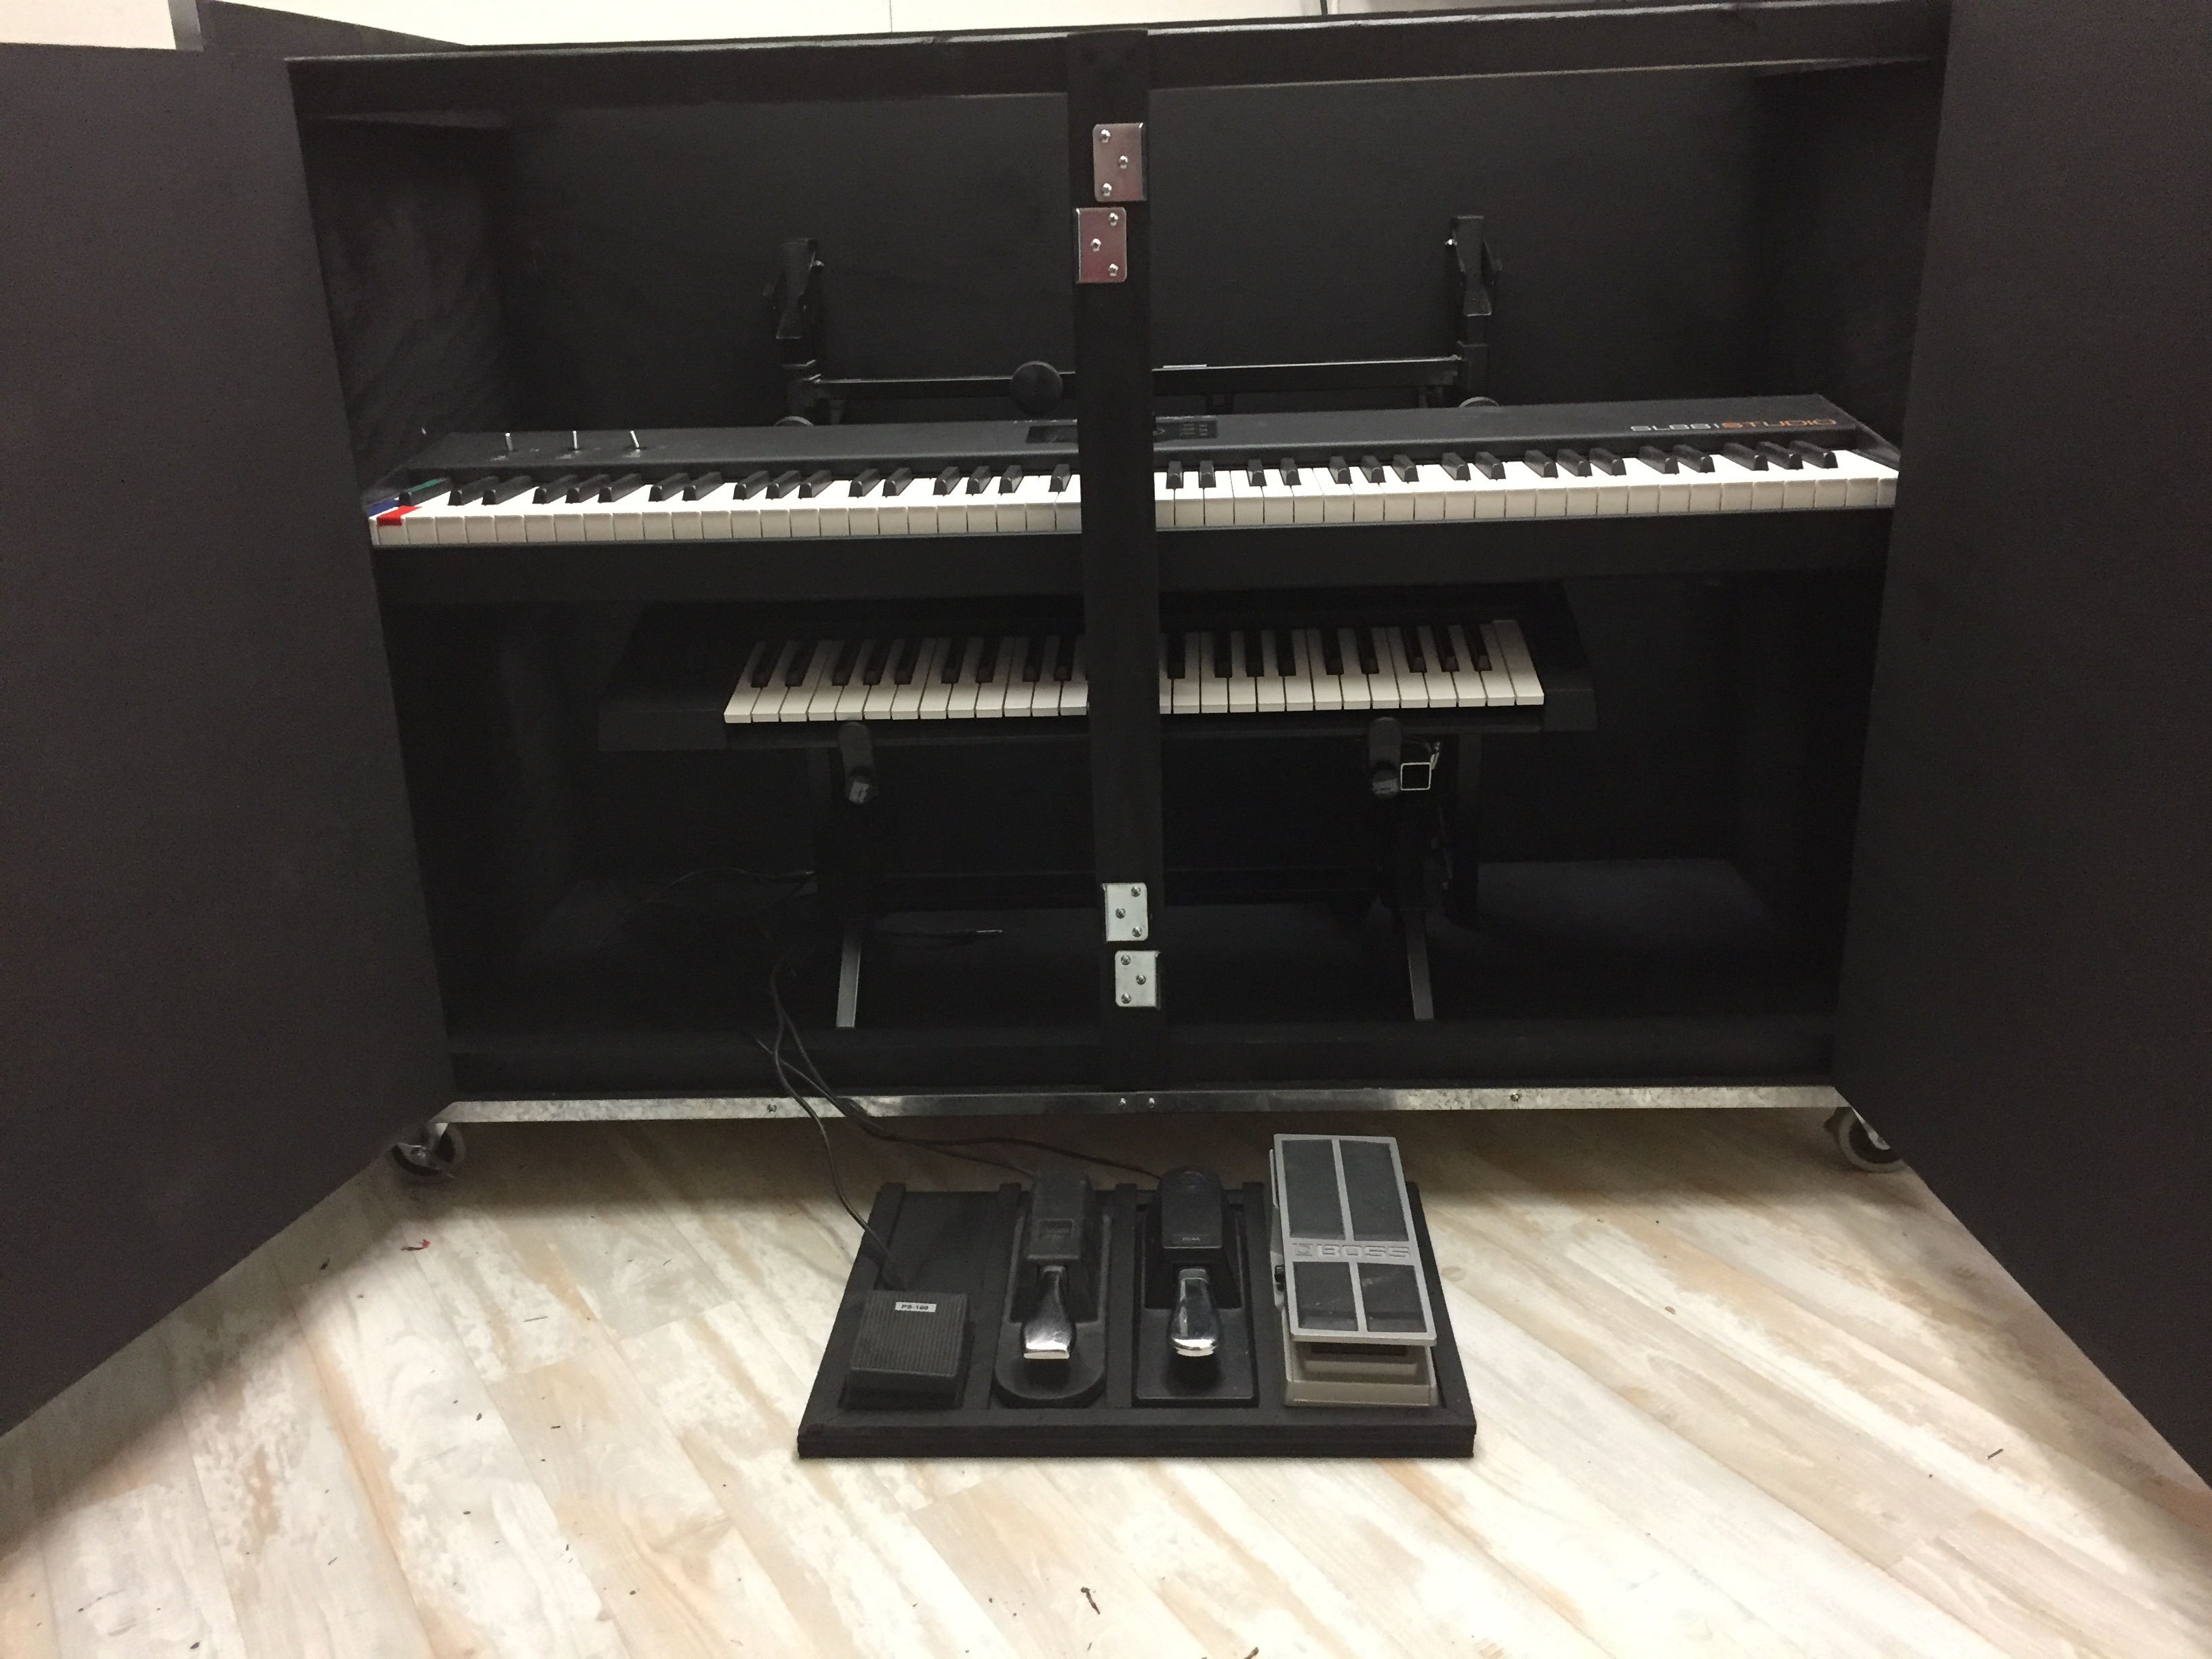
I partially disassembled the rack by removing the upper tier and flipping the legs of the bottom over and now it all stacks neatly against the back wall. I was using a rubber mat for my pedals but they would migrate, so a pedal board was in order…no more migrating.
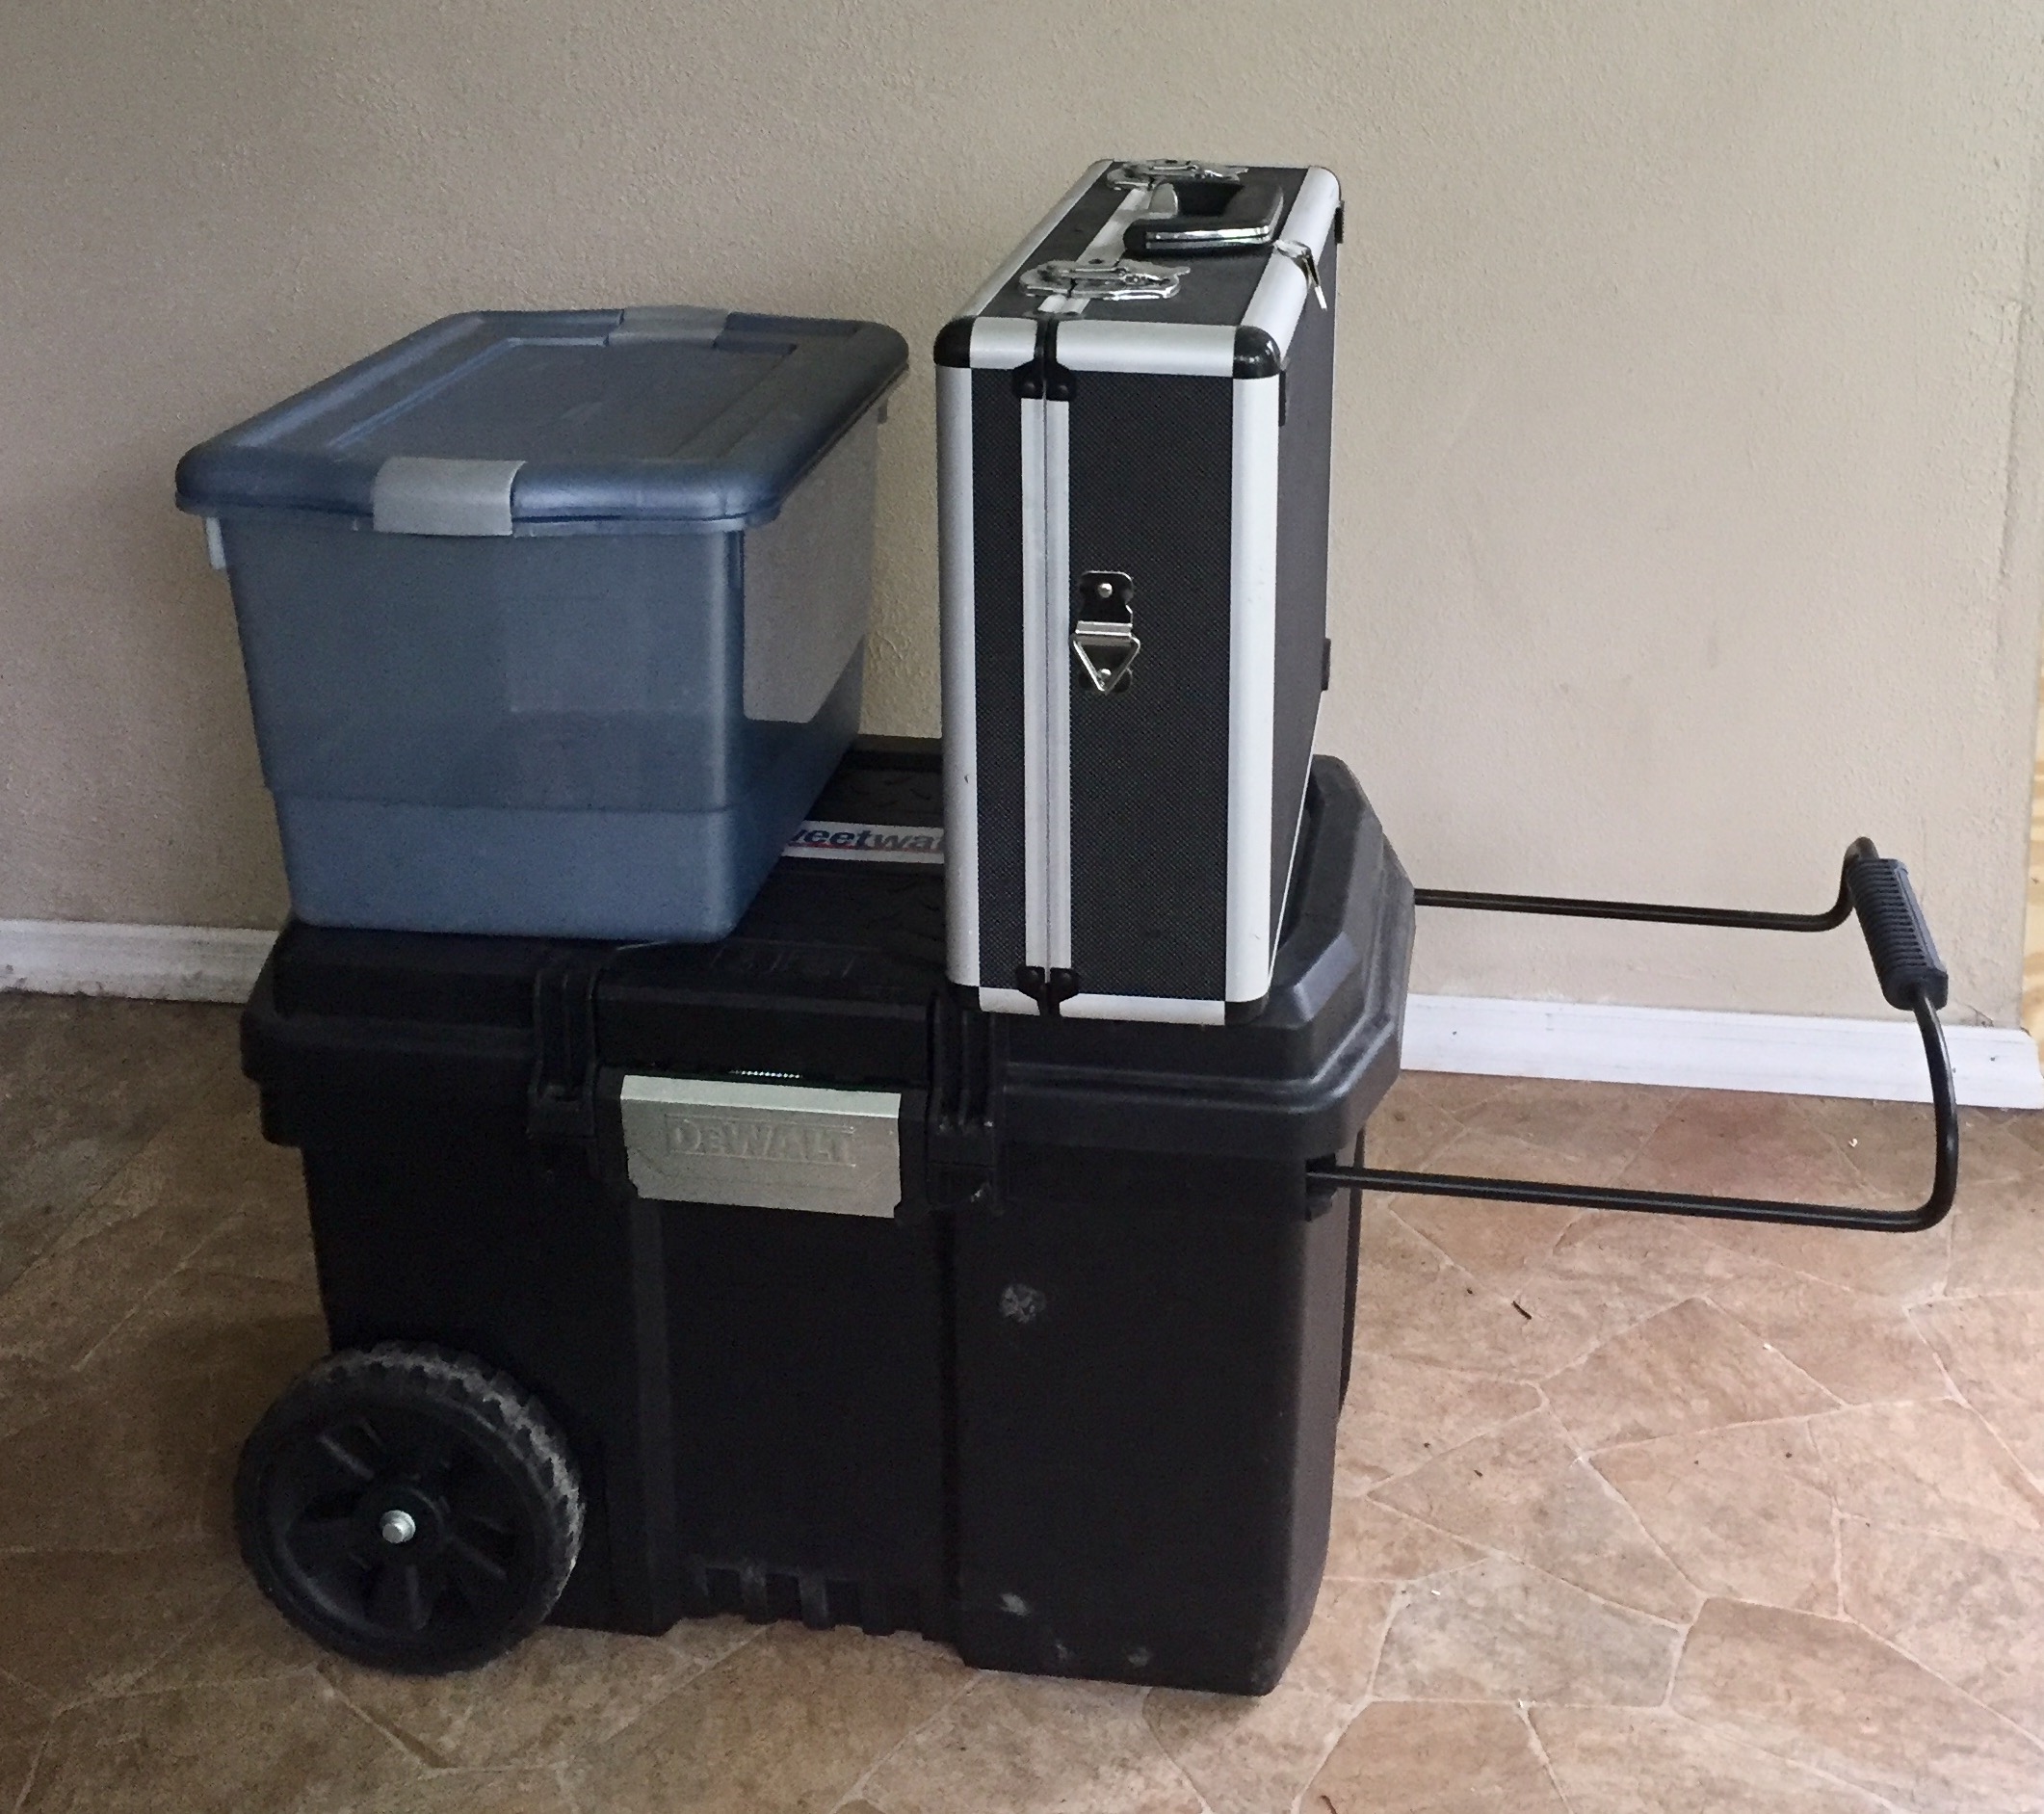
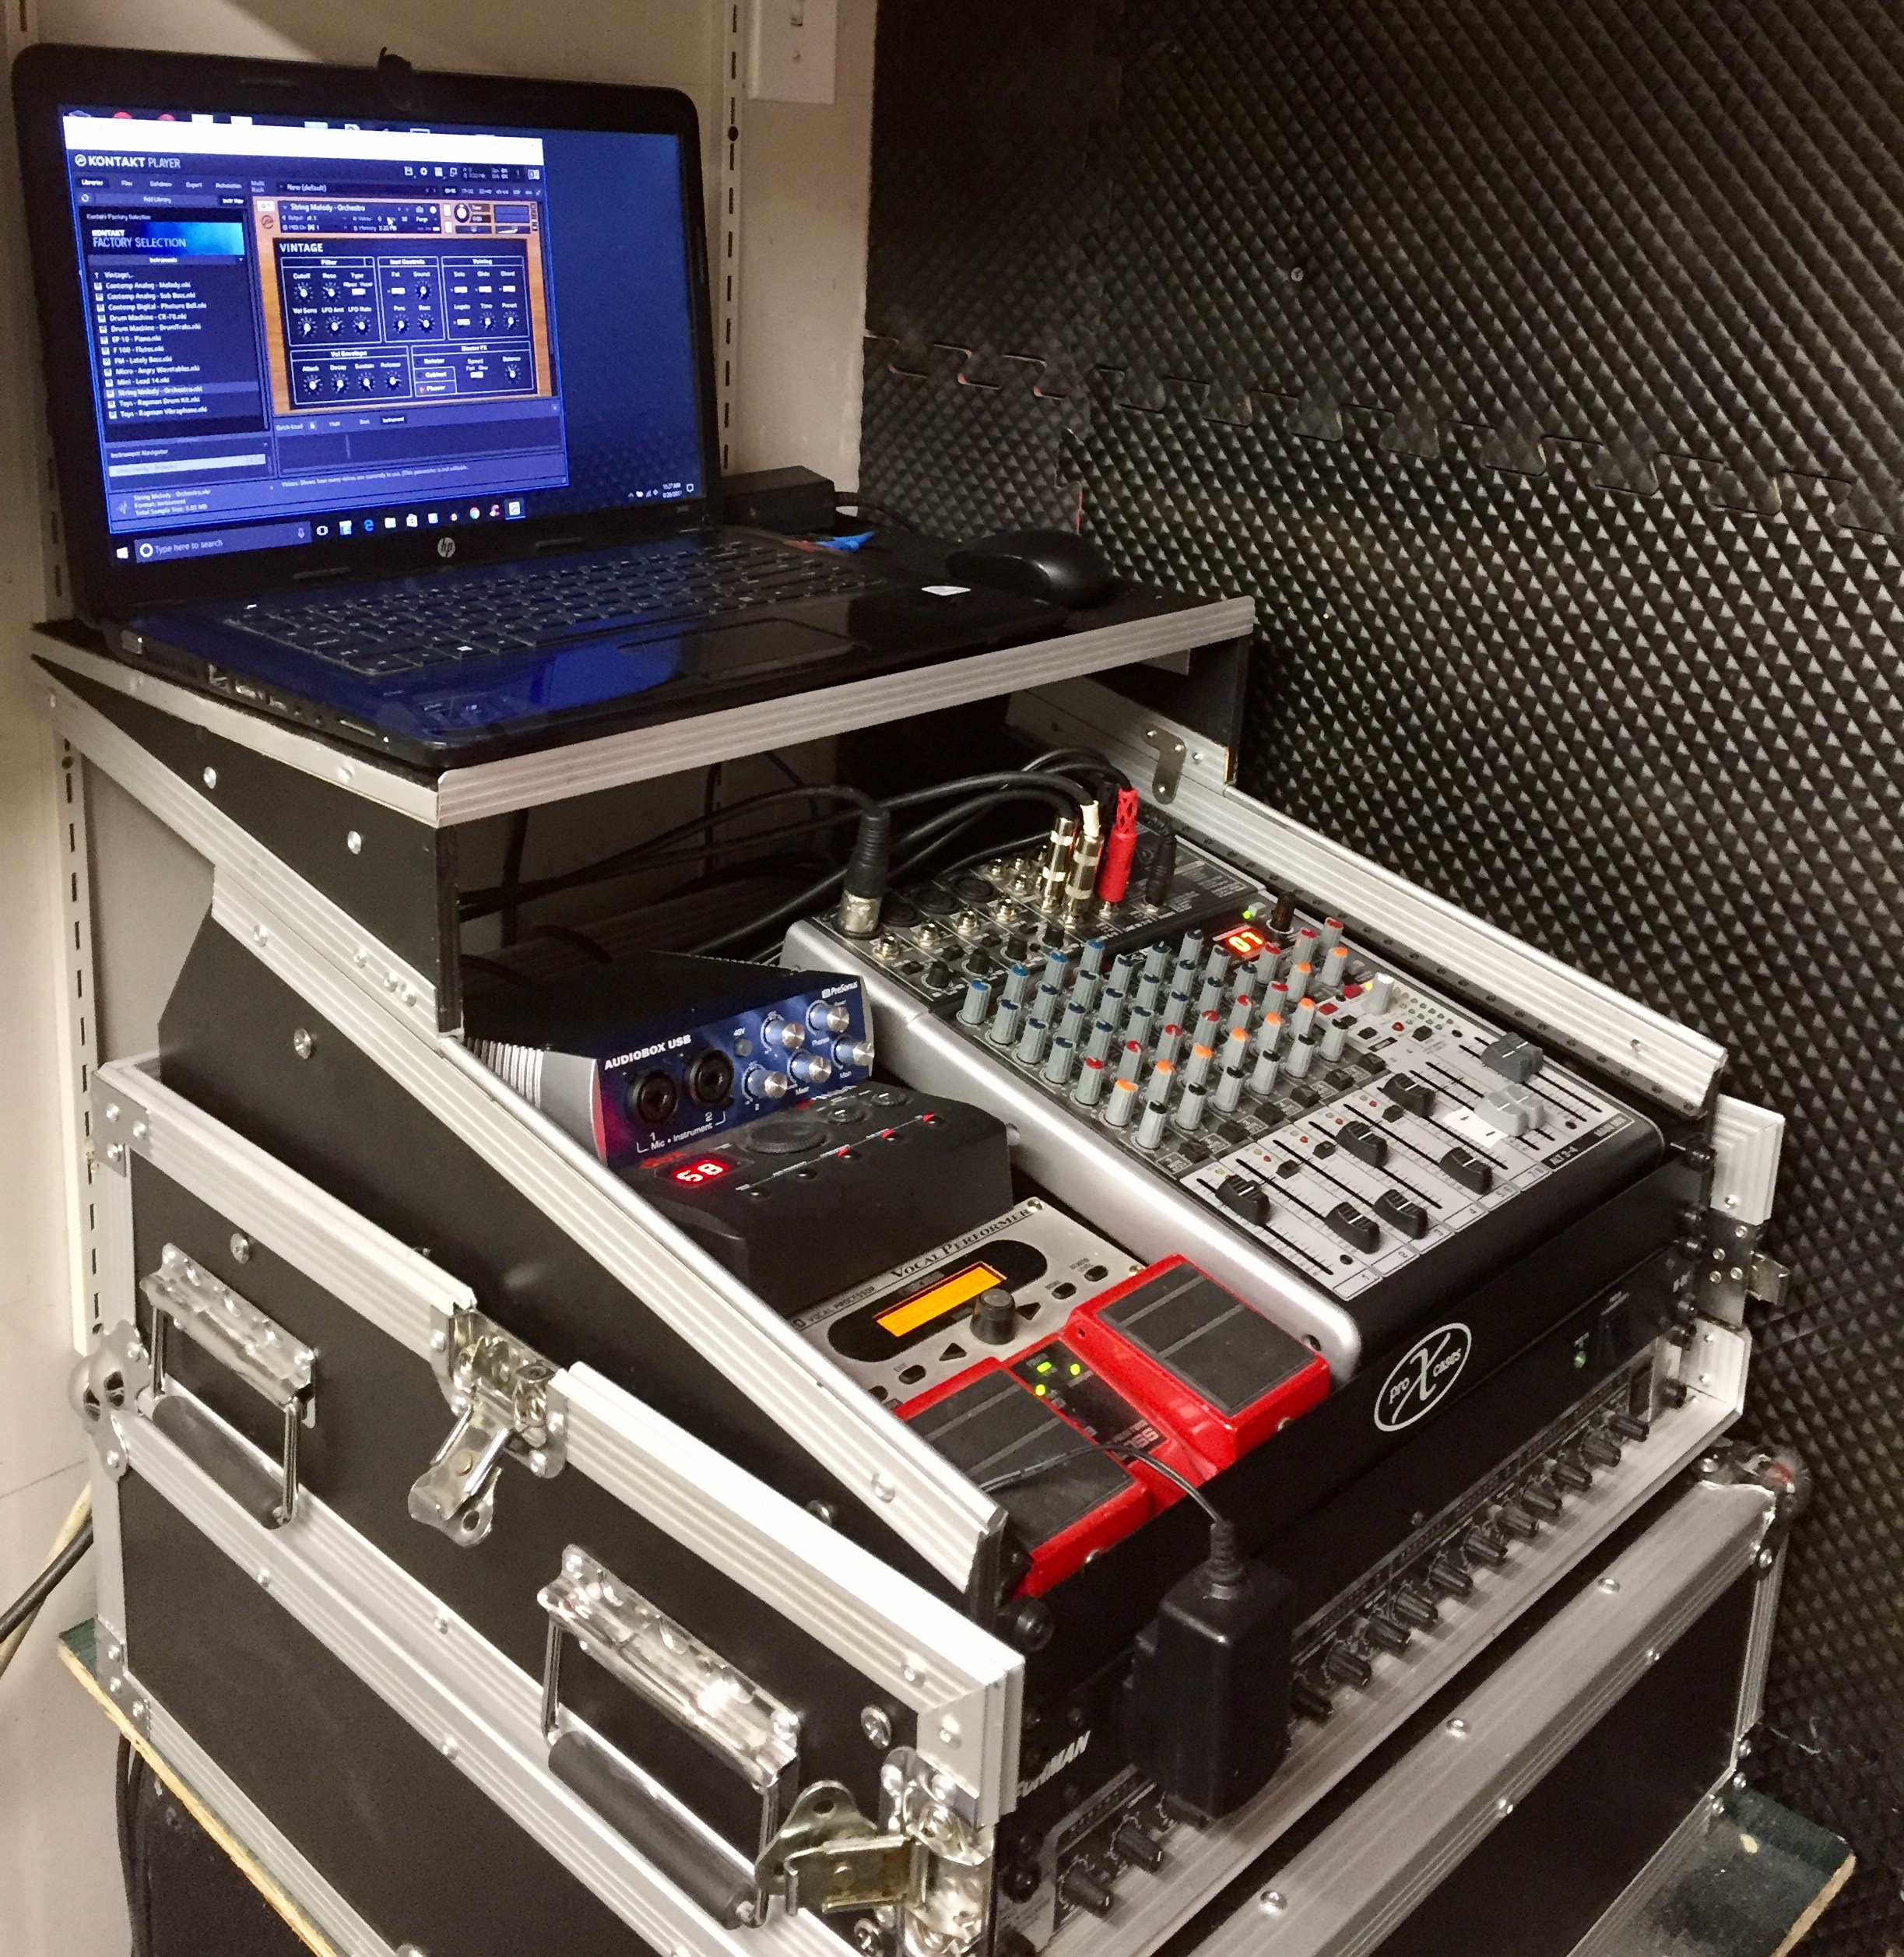
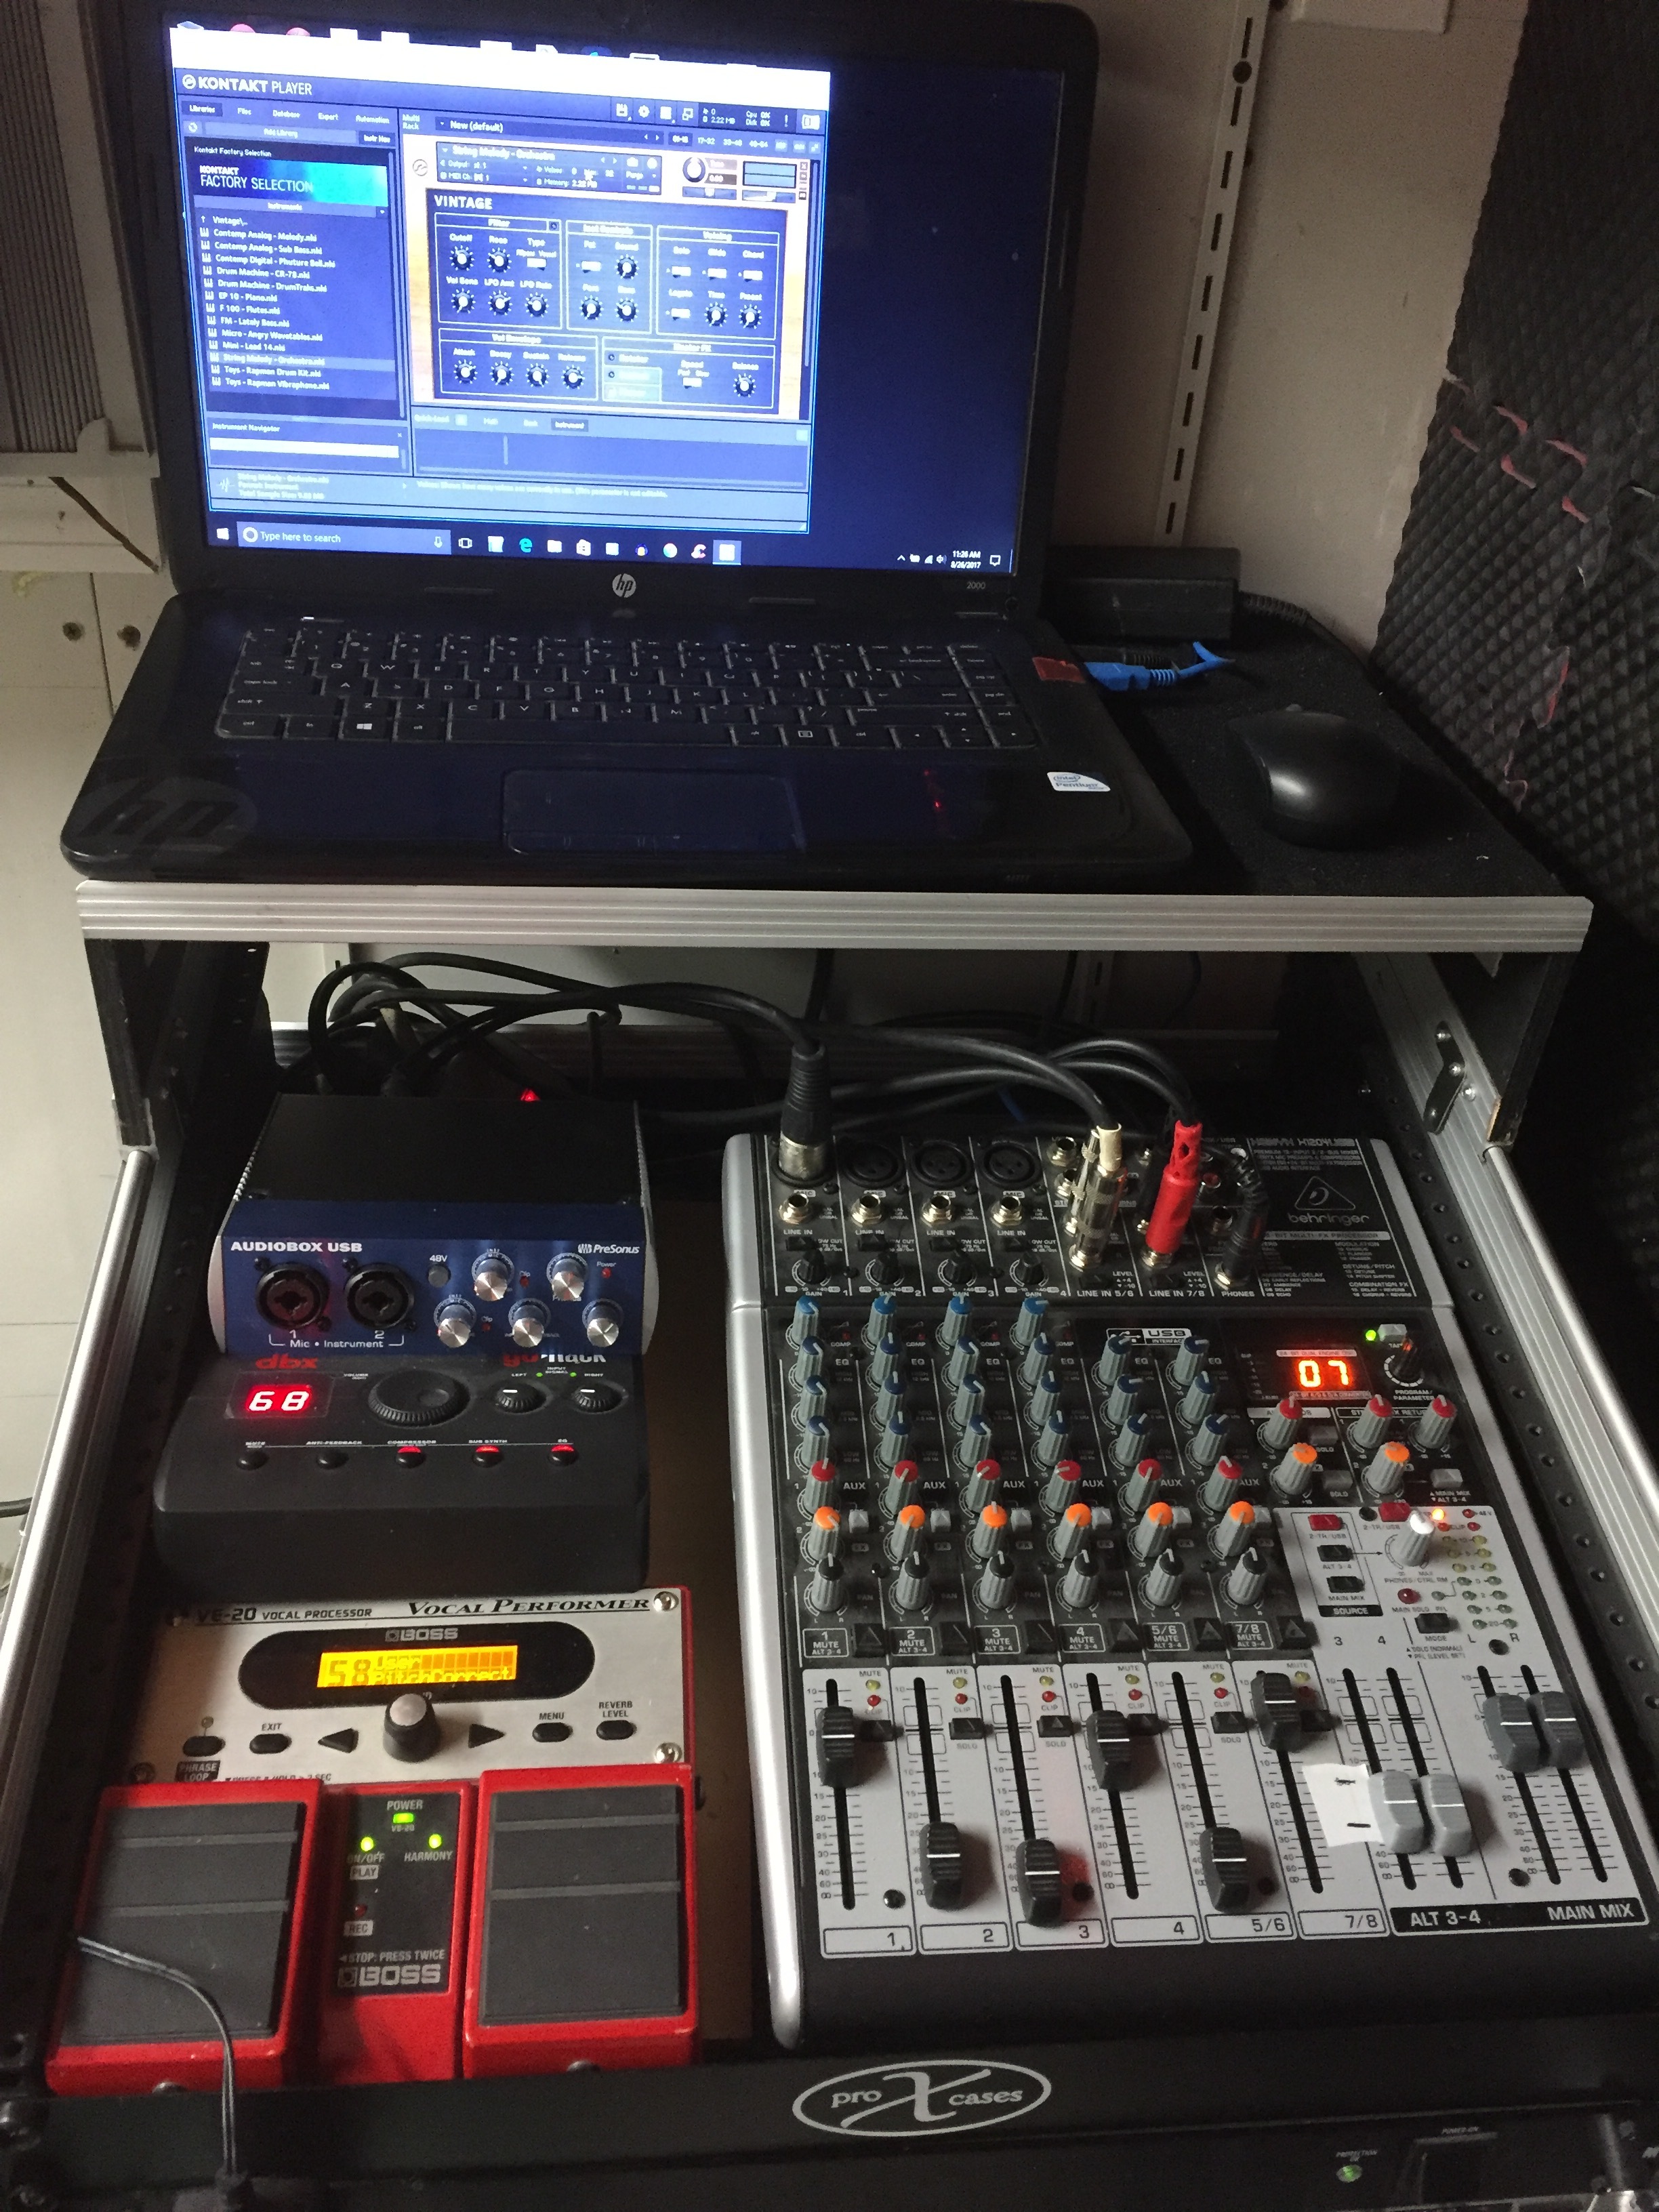
Anyway, the controller sits on two cleats mounted to the side walls which are appropriately padded with weatherstripping. Wherever the controller touches the plywood is padded. There is a shelf that fits above the controller that goes from side to side and has 2" of foam glued to it to keep just enough pressure on the controller. Each of the keyboards have bungie cords that add extra security. On that shelf above the controller is 4 bins of cords and a mic case. I have a small little case on wheels (thank you Dewalt) that I bring in last. It contains an external mp3 player, my laptop, a spare laptop, music binder (all of which are a parachute in case of a crash) and assorted items.
From my last trip in from the truck (3 in total) it takes me 9:30 to go from the first photo to this:
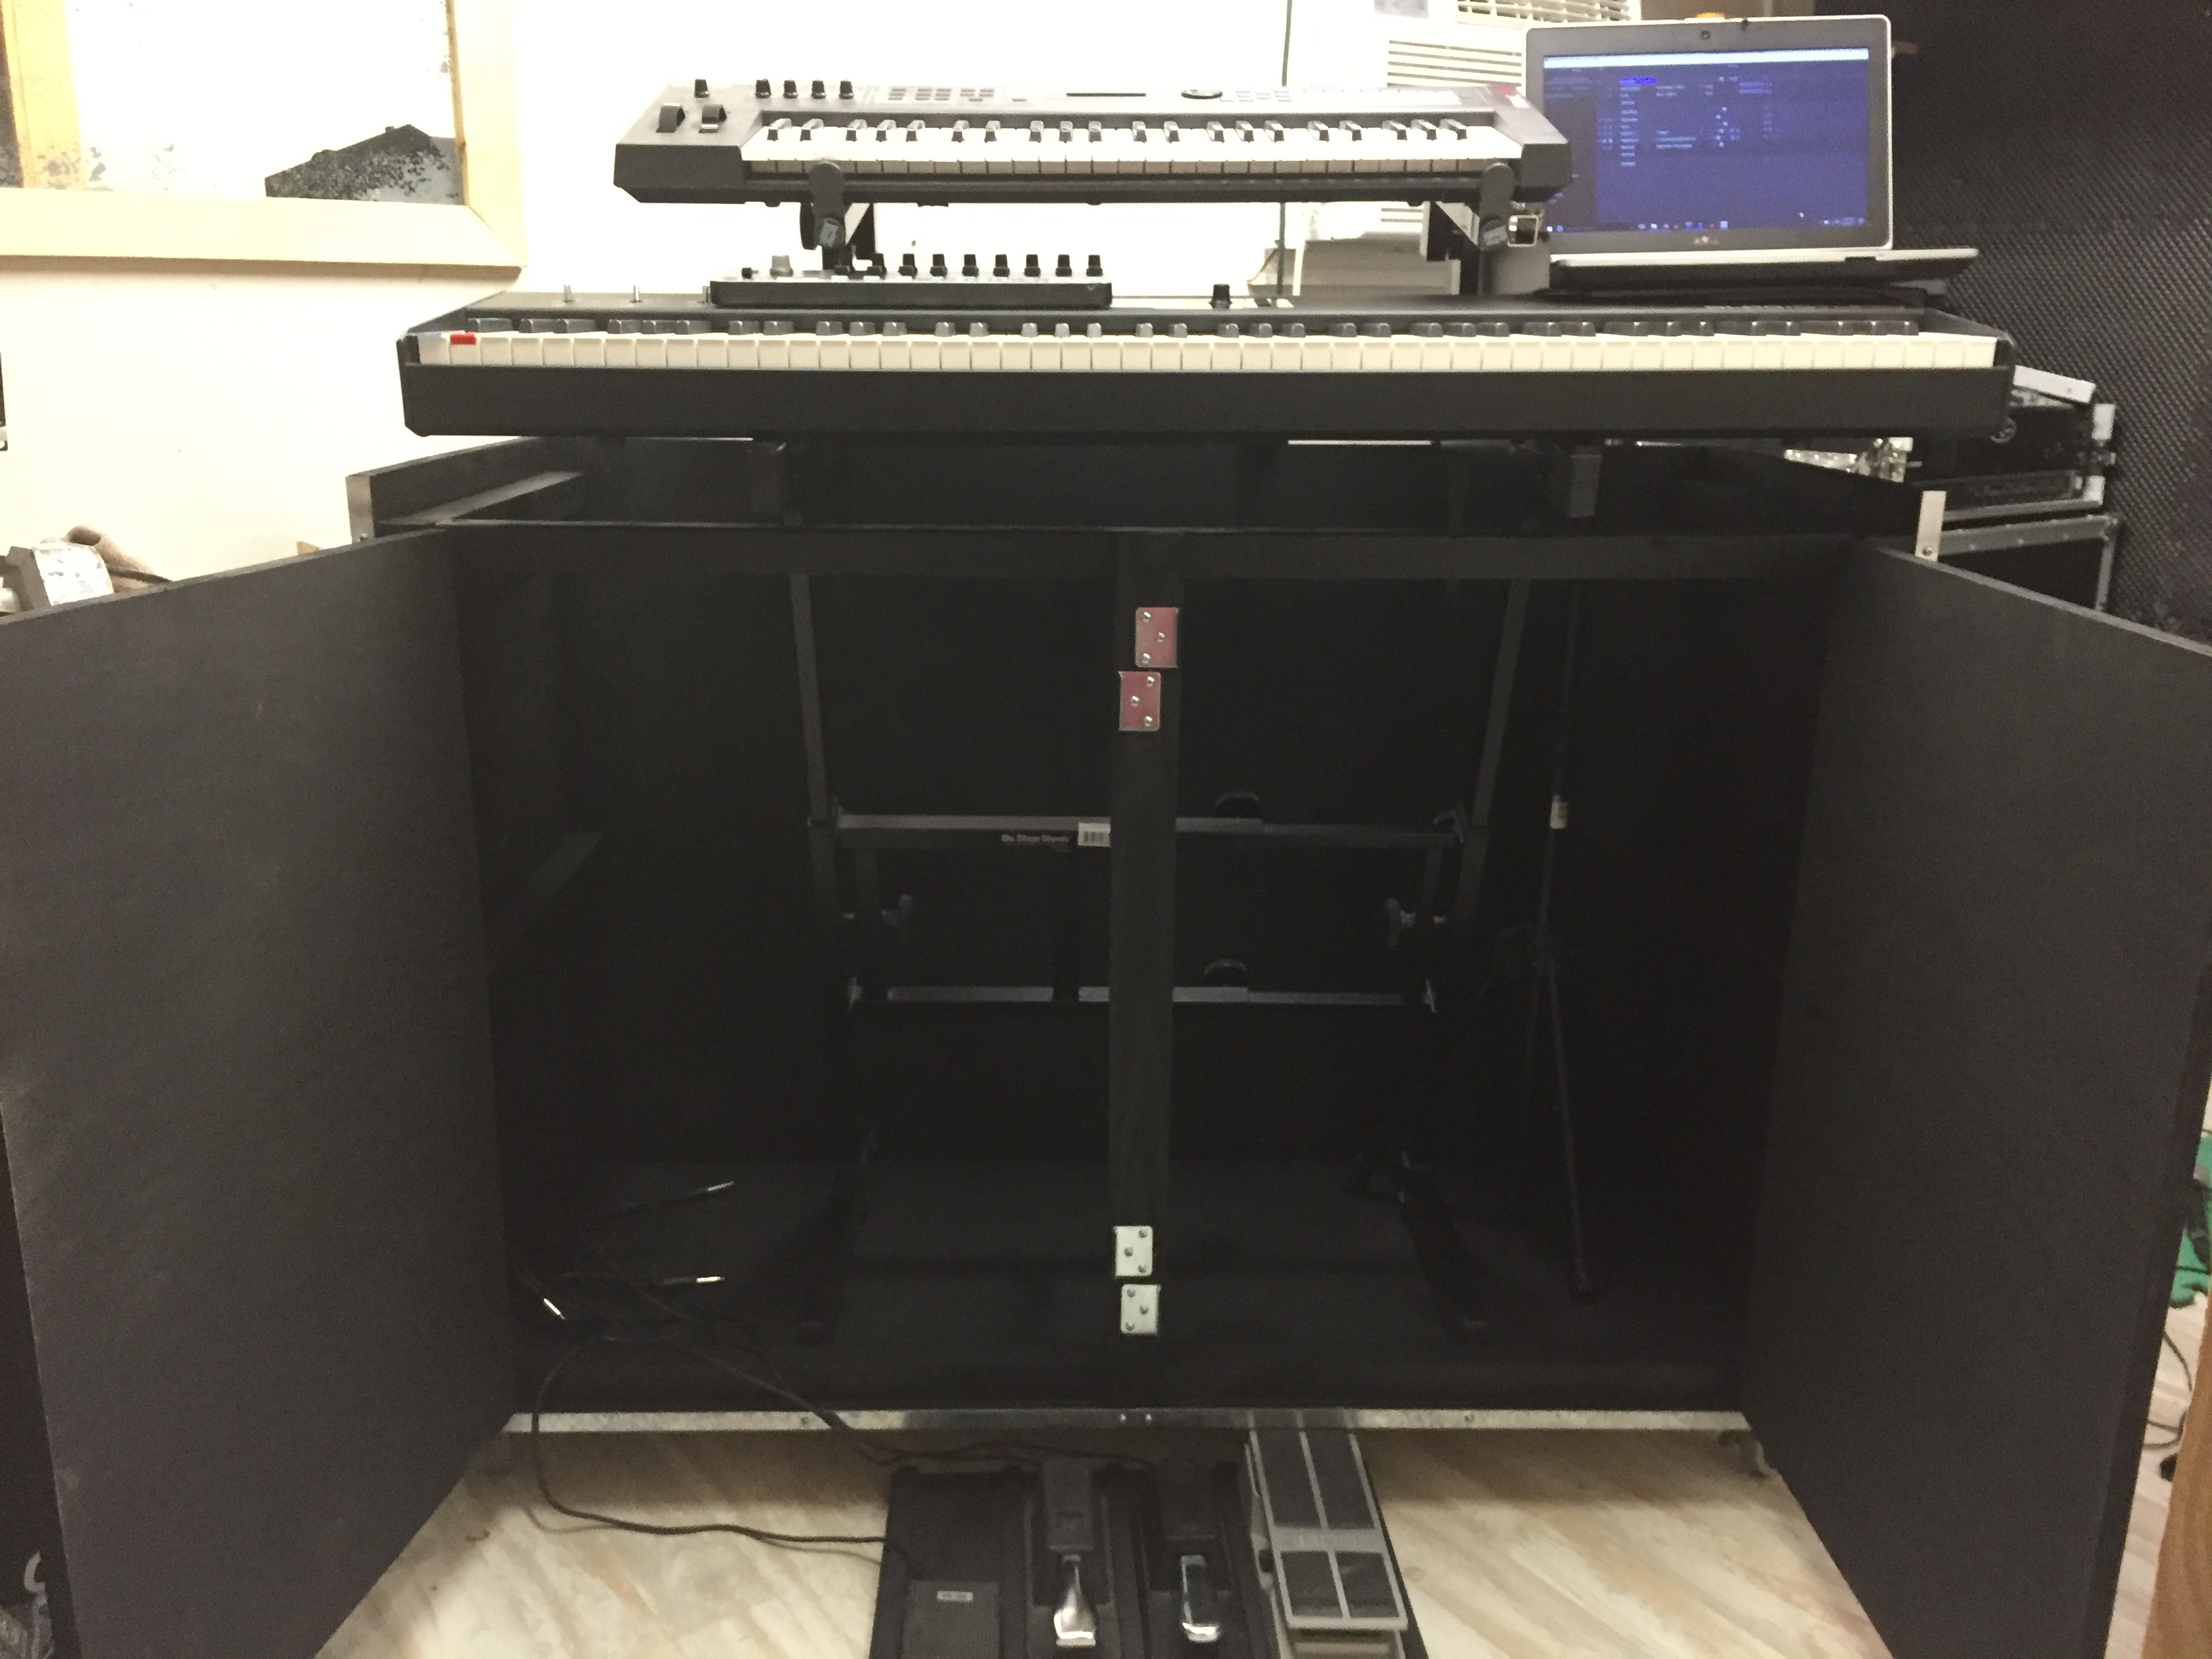
I made two supports to keep the case in place and provide stability. They slide right under each end of the case and are made out of stair stepped 2" x 4"'s. I just lift up each end of the case and slide them in place and the case wedges right in tight. I then take the bins out and stack them up and then remove the shelf and take out the controller and then the synth still attached to the top tier. I grab the bottom of the rack and flip the legs back over as well as the support arms and slide it right back into the stand. I then insert the upper tier and tighten the knobs. I have all my USB’s and power cords in a harness of sorts that sits in the bottom along with my pedal board, the supports and a power strip, so I just grab the end and start plugging. Everything is color coded with different colored plastic tape, so it makes it super easy. I fire up the laptop and then start on the PA. I separate the subs, pop in the poles and mount the cabinets. I grab a bin and start plugging. Providing power is readily available (short of running a 3 mile extension cord), PA takes about 12 min. Forgot to mention this rides on top of the case cause it’s the only thing that doesn’t have wheels.
After I’m done with the cabinets, this sits on an empty sub (also on casters) right next to me since I am the sound guy as well. We are a duo and we play with tracks. I have redundancy for everything, so unless the building blows up, we can limp through the gig. I keep two smaller cabinets in the truck, just in case.
Here’s a closeup of the setup:
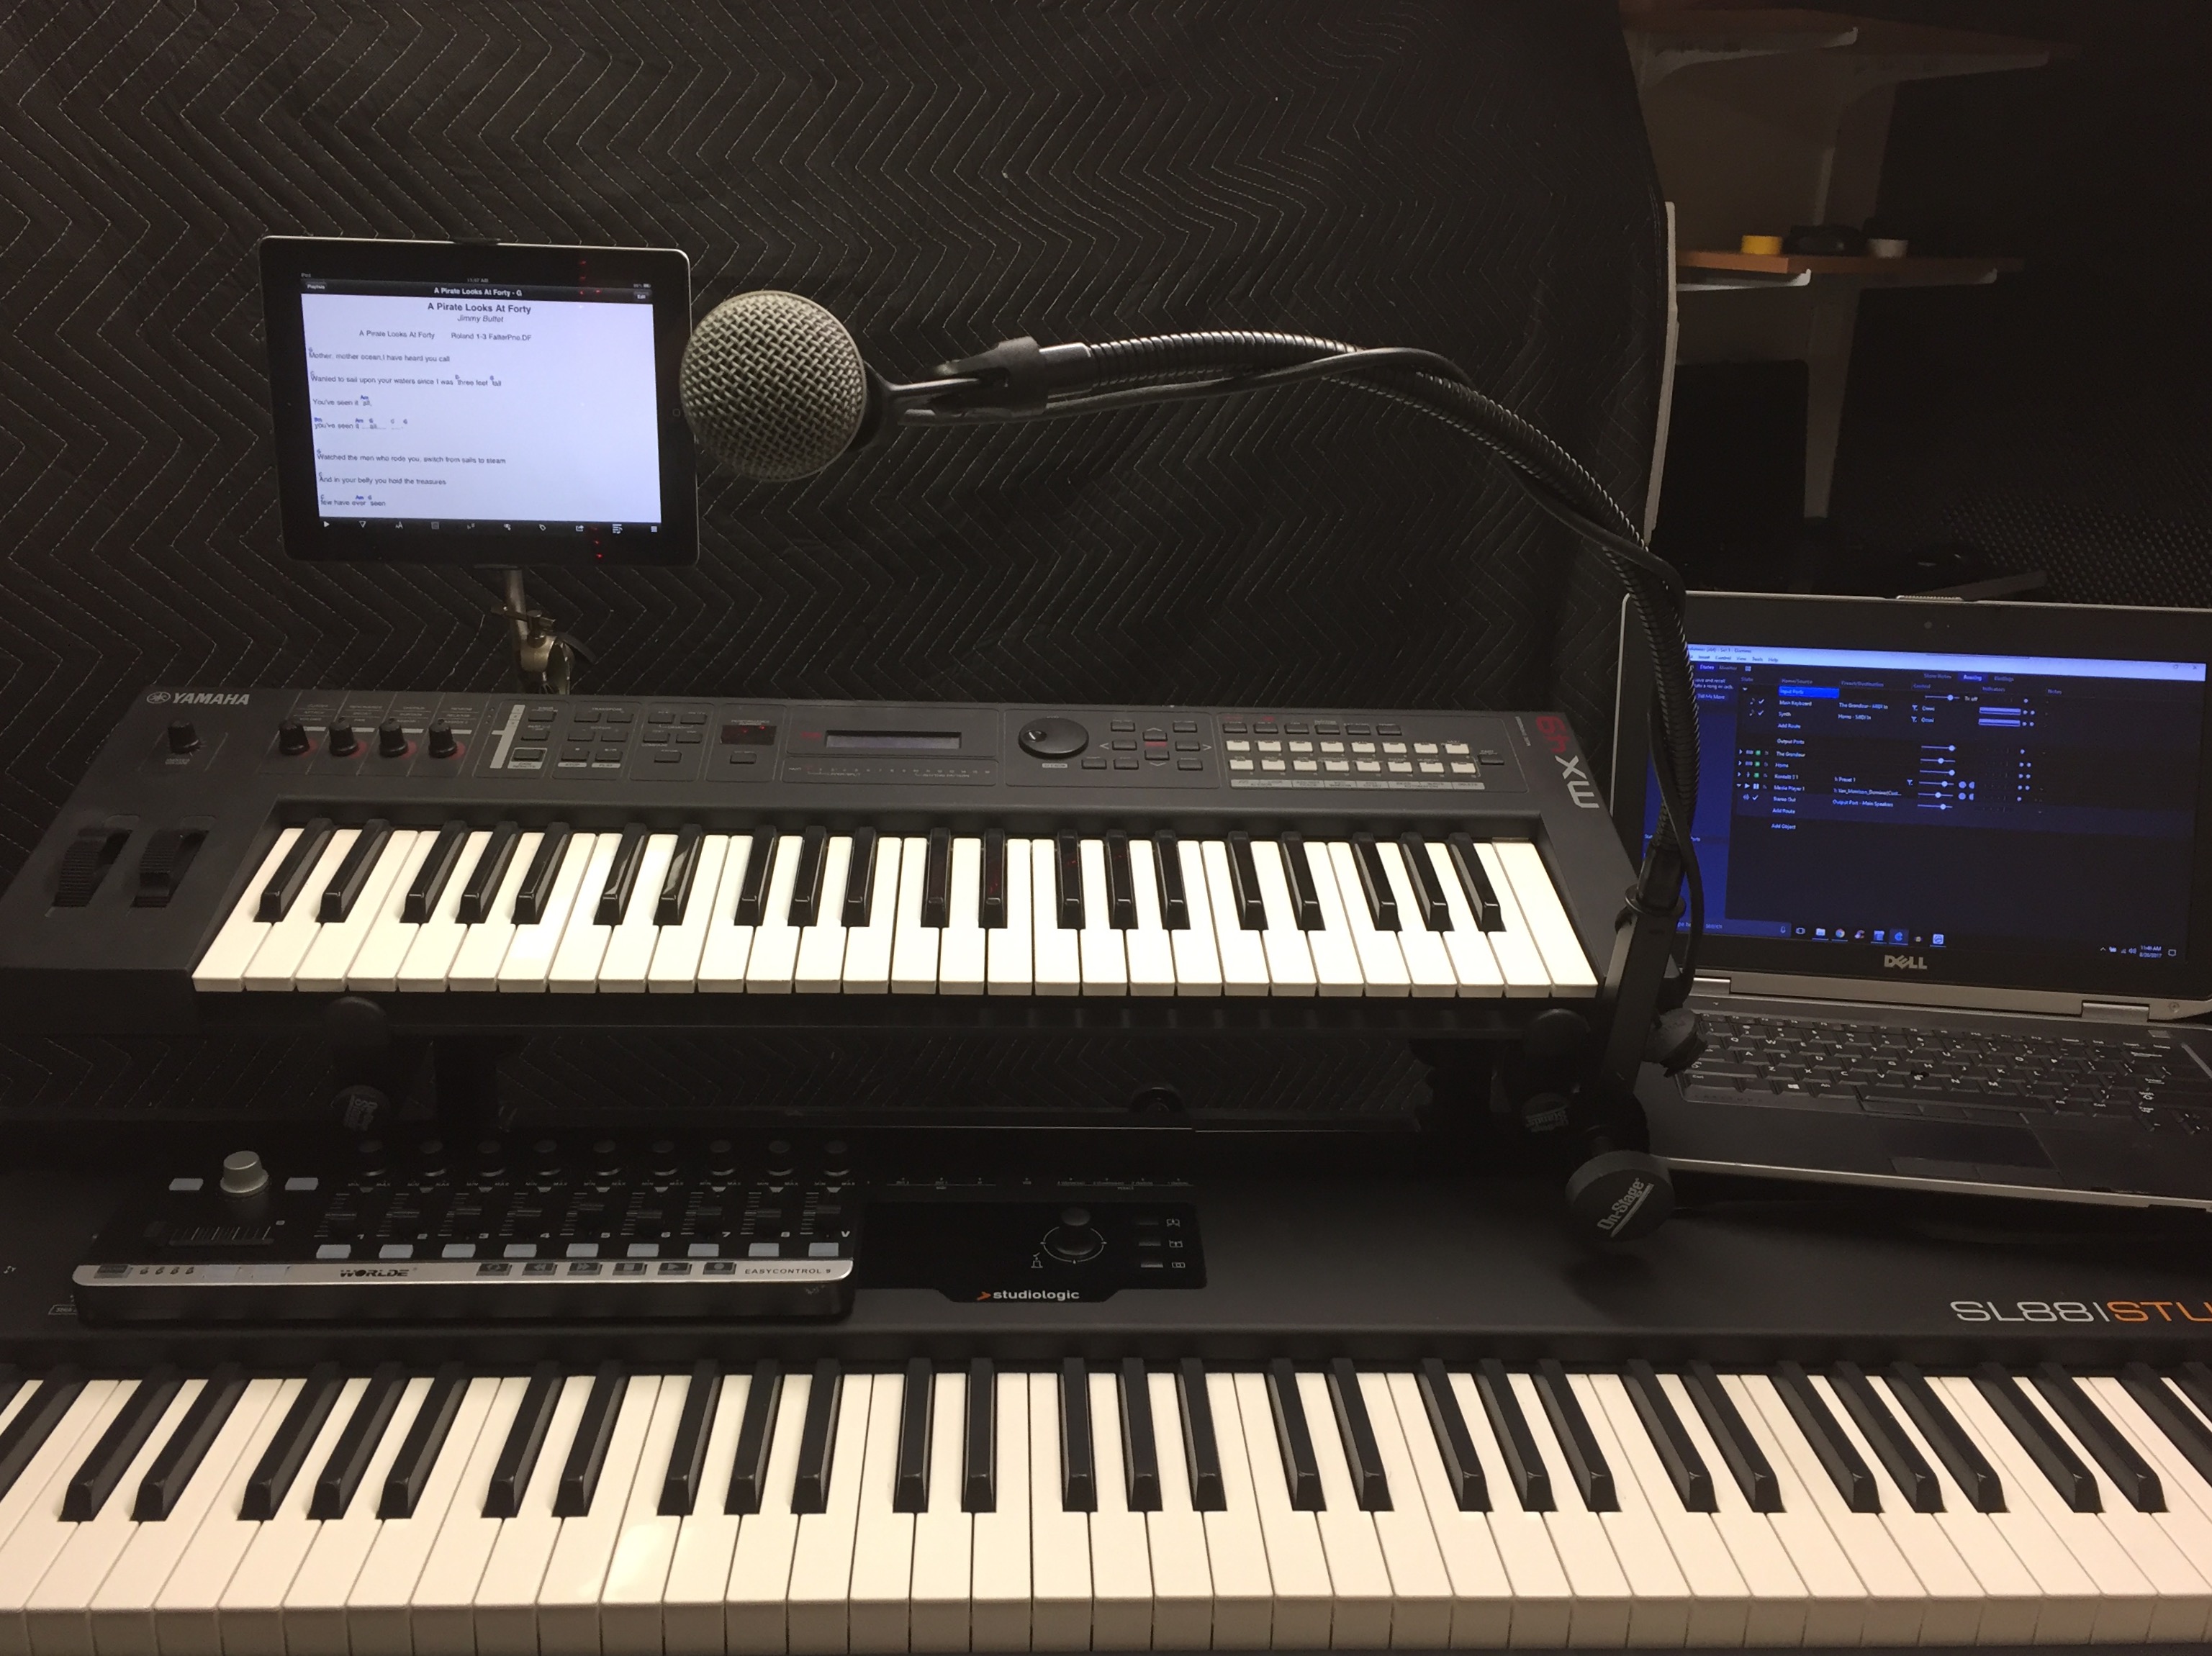
Thanks to my fellow Cantabile users, I decided to grab the Worlde Easycontrol.9. I’m in the process of re-editing things in Cantabile so I can take full advantage of its capabilities. I also use an ipad 2 with Songbook and thanks to the recent mention of midimux here on the forum, I won’t have to dump more money into some form of interface to continue with Songbook. I did just fire this up from Amazon
Running short on USB ports so we’ll see how this works out. If it simply handles the iPad, I’ll be happy.
So there you have it. 25 min. tops, by myself, complete assembly of all gear: my keys, two subs, two PA cabinets, mixer, laptop fired up and ready to go and backup systems active and in place. If it hits the fan, I already have a 5 pin connected from my controller to my MX49 and I can quickly dial up two separate instruments, bring up the volume on the external mp3 player channel which already has all the songs on a thumb drive, grab my 3 ring binder and go old school and get through the gig.
Fortunately, my stuff is pretty basic, so I’m not like some of you guys who are flying the space shuttle with Cantabile. One of the best things about the case/stand is it hides a lot of crap from the audience and you don’t have to find a corner to pile all your cases, etc. or worse yet, run it back out to the truck after setting up. At the end of the night, I simply unplug, and reverse the procedure. 20 min. after gigs end, I’m on the way to my truck.
Some of you may be wondering what in the hell my partner does…this was the results of a test to see how long it would take if I had to do it myself. We both do equal amounts, so in 20 min. we are ready to go. He has a Martin acoustic and a Strat and a pedal board. Neither of us play with an amp and we both use in ear monitors. A lot of the places we play, the audience is right on top of us and it makes it hard to balance the stage volume with the PA, so we both play direct to the mixer.
I am looking forward to letting Cantabile run things for me. Right now I’m like an octopus, turning knobs and pushing buttons all over the place. Having my backup in place gives me peace of mind, but so far my experience with Cantabile has been nothing short of awesome.
That’s a heck of a thing! Pretty excellent!
I want one of those !!!
Thanks FredProgGH. I had fun building it. Going from a 3 tier stand with 3 keys to a simplified streamlined setup is a godsend. I had something similar previously, but it was just for gear. I had soft cases for my keys and carried those separately from all the gear. I’d get my daily cardio just running trips to the truck.
Corky…you can have one for the low, low price of…lol. If you know anybody with woodworking skills, it wouldn’t be too hard to make one for yourself. You can tailor it to fit your equipment. I pirated the casters/handles and some of the twist locks from a previous case, but all totaled, it only cost me about $150.00 to make.
You could go more costly and order all the channel and stuff from a place like https://www.parts-express.com/, but I went to Home Depot for everything except the twist locks and the handles. I plan on a coat of Duratex later on, but for now, I rolled on two coats of Rustoleum truck bed liner on the exterior and just flat black for the interior.
Thanks Steve  I have a guitar player that is really a talented woodworker, builds many of his own guitars in fact. After I saw your post I shot this idea by him, and he is willing to help me make this happen. Hope you don’t mind me stealing your idea. I have been exploring ways of less trips to my truck, and having everything mostly pre-wired. Thanks for the info. If I get this working, I will post some pics.
Regards
Corky
Corky…whatever makes your life easier is fine by me. Steal away!
Steve
So_godly, way back on post 32-ish you show a pic of your live setup. What kind of keyboard stand is that? Looks like it folds up and is like an inverted V.
Very cool setup Steve. Looks efficient and productive. Nice one.
Vonnor…it’s an OnStage Z stand. I have since modified my setup even further. Now all I do is take the controller and place it below, lower the second tier as far as it goes and then lower the overall level of the bottom as low as it goes and secure the 2nd tier keyboard with two bungies and away we go (of course after unplugging USB’s and such). Less than 10 min setup and break down
David…thanks. It is both. As I mentioned in the post to Vonnor, I no longer have to separate the stand and fold it up the way it looks in the photo. I simply lower both levels and pop on the lid. Reverse it for setup, plug in and test. It couldn’t be easier unless I had a keyboard roadie…fat chance of that happening.
LOL!! ![]()
That’s something I can definitely relate to!
I had a keyboard roadie for awhile but she divorced me.
Good one!  Those roadies are hard to come by
Before spawning any roadie progeny?