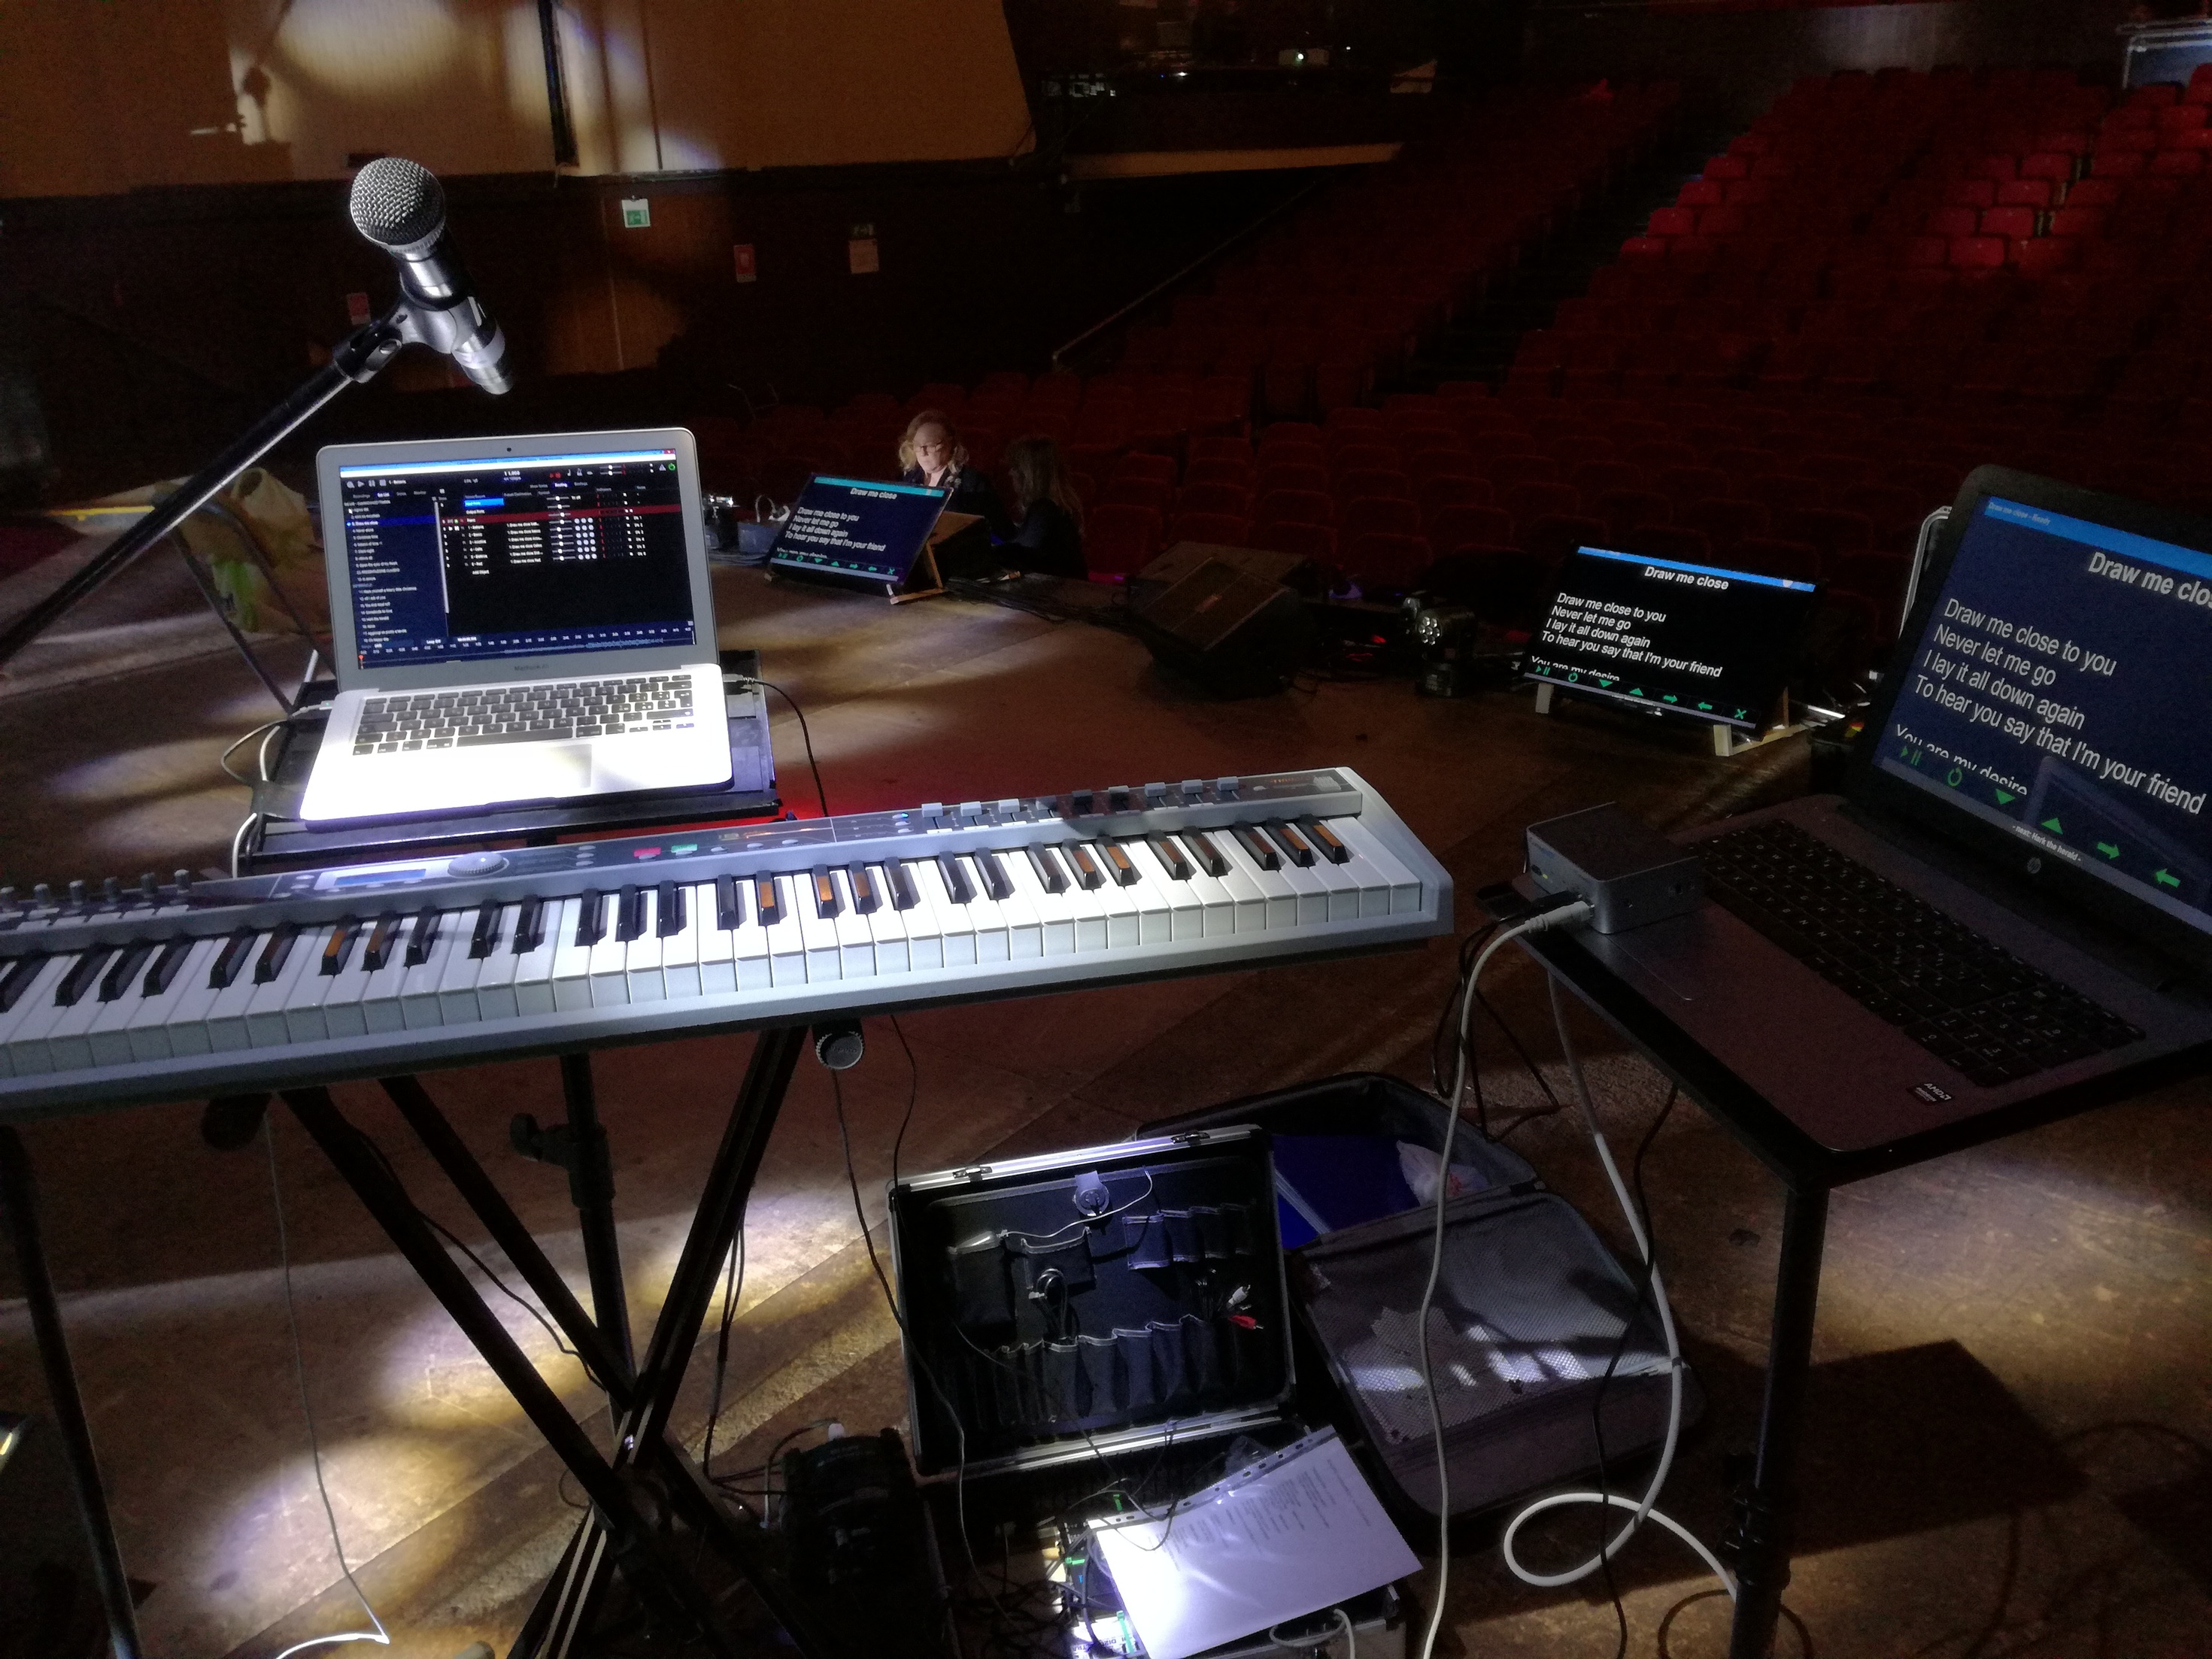
Looks like RME TotalMix running on the lower right monitor…
From last night’s show…
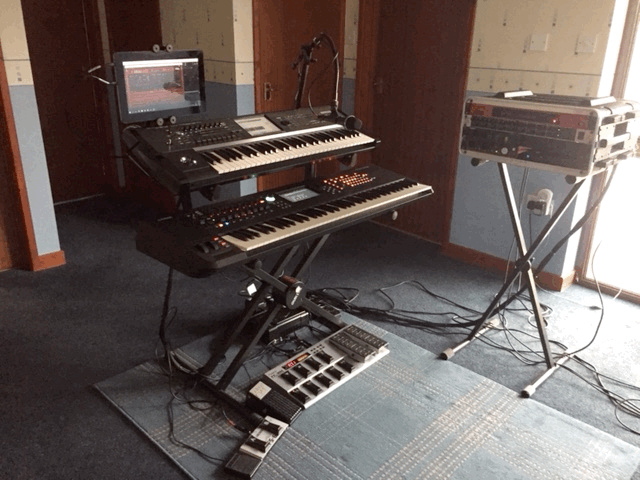
FAMC LiquidFoot+ mini holds the setlists, on-stomp sends program changes to Cantabile3 running on the Dell Inspiron 2in1. All boards run as LOCAL=OFF and go through the MOTU patchbay to the computer. Cantabile handles all the routing, key ranges, layers, controller mapping/scaling, and patch changes (when receiving a PC from the LF+). Halion Sonic 3 also used for some songs. RME Fireface UCX handles USB IO and audio mix. XLR a/b switch for Vocoder routing to Kronos. Custom pedalboard connects via multi-pin snake. Shure PSM-600 ear-bug system.
~ vonnor
9 Likes
It is indeed. My main studio interface is an RME Fireface UFX with two Behringer ADA8200s for extra analog inputs from my keyboard rig and V Drums kit. The UFX ADAT outputs run to two Expert Sleepers ES3 interfaces and an ES5 gate expander so I can control my analog synths with CV/Gate signals from REAPER or Cantabile.
That looks and sounds like a very efficient, well organized live setup Vonnor. Nice to see another RME user too.
1 Like
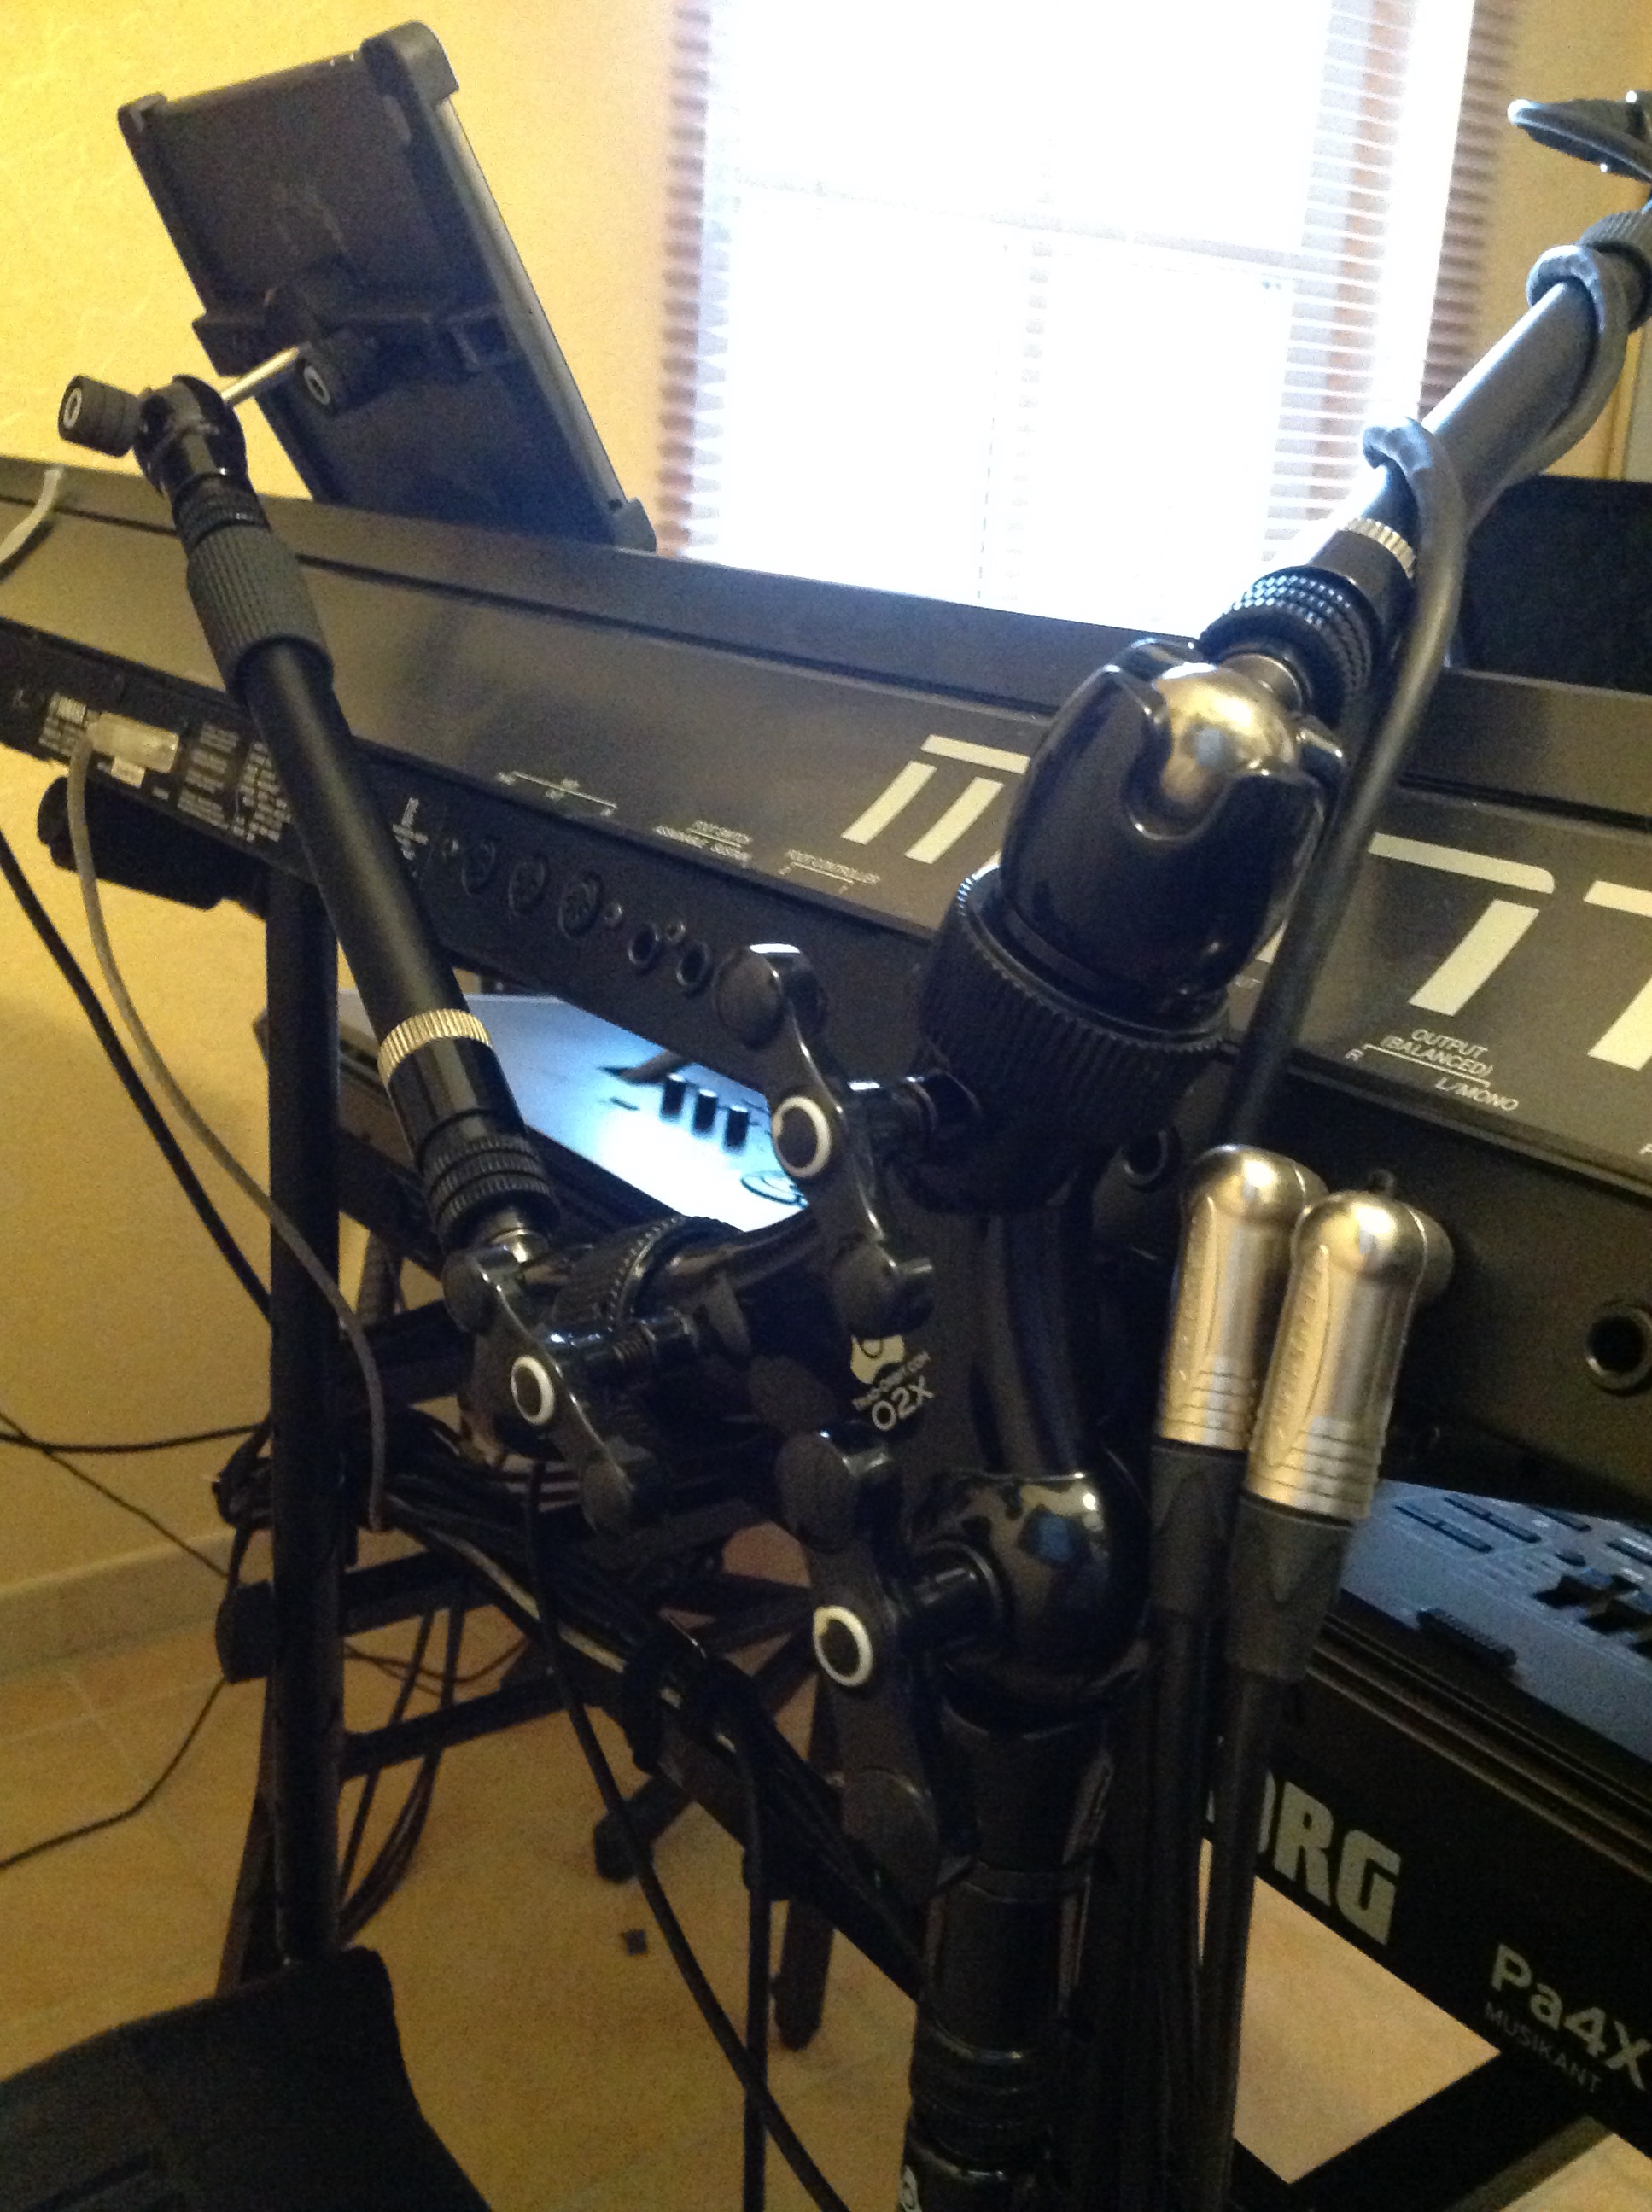
New holder for microfone and tablet… expensive but very cool flexible and stable
no more jumping Lyrics ![]()
Triad Orbit
Advanced Stand System
(on my K&M 18950)


1 Like
Hi, all
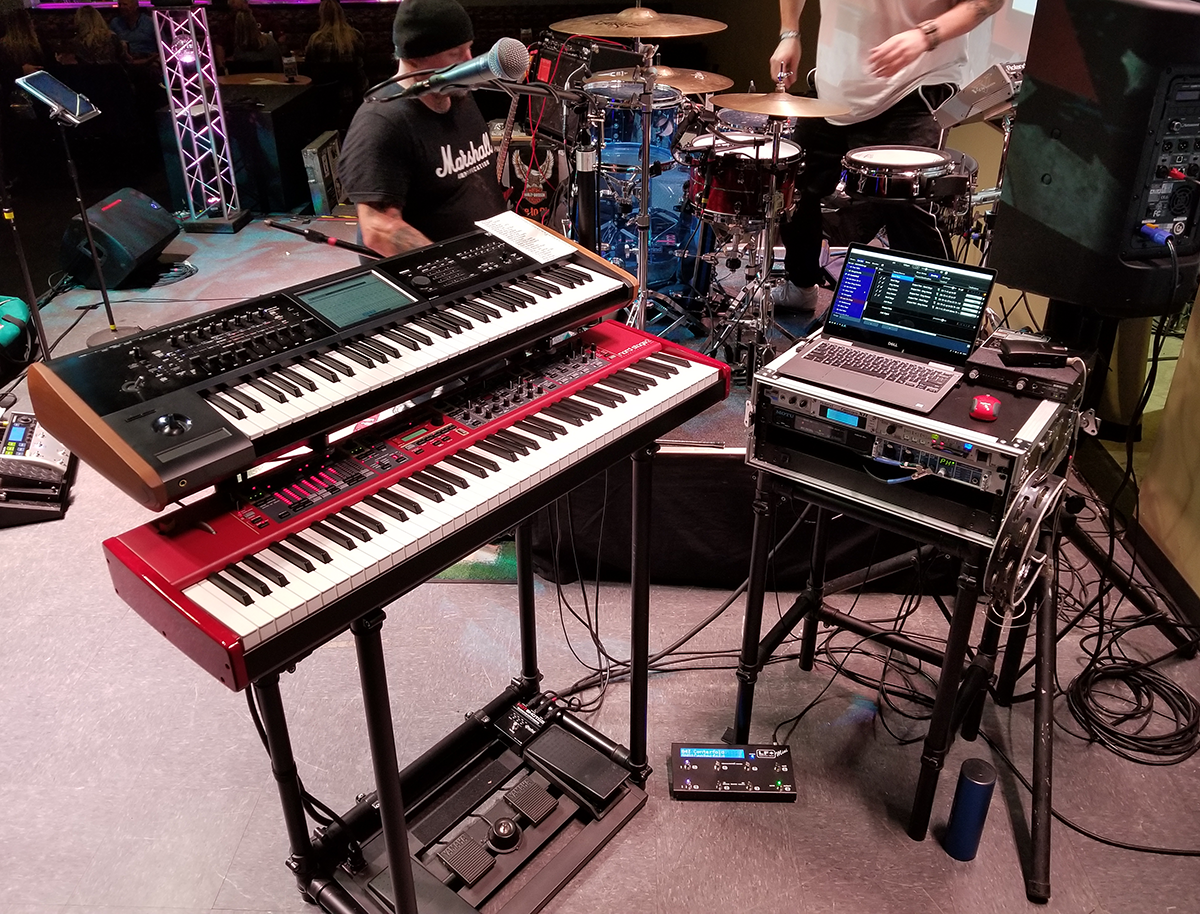
I thought that it was about time to show my new Rig and its current work in progress status now that it is coming together ![]()
With thanks to everybody who contributed for all of the suggestions when we were discussing it earlier in the thread around May this year. It’s taken longer than intended to get to this state due to a really hectic work year.
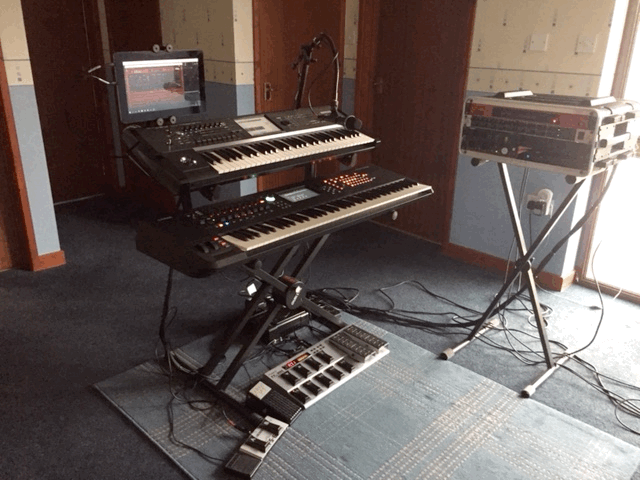
So from bottom to top you have
- Roland FC300 MIDI foot controller (and extra pedals/switches) - this is fully programmable in what the controllers are doing and it means you can keep both hands on the keyboards whilst switching patches, changing Leslie speed, controlling lights/haze, triggering some sound samples, etc. I tend to use the left most pedal (the extra one) for Organ swell, then the 1st one on the FC300 itself for Fades or general part volume, and keep the rightmost one for Leslie speed or other modulations.
- Yamaha Montage 7 (new toy that has replaced my aging EX5, it sounds great and fulfils my desire for a 76 note semi weighted master keyboard)
- Korg Kronos X 61
- GeChic touch monitor for the computer in the gig rack to the right, located in the perfect place to keep an eye on Cantable, make use of the touch screen, etc. Whilst I will carry a wireless mouse and keyboard with me, they are only for emergencies. I can startup and control everything from the touch monitor (a great recommendation from Neil earlier in the thread)
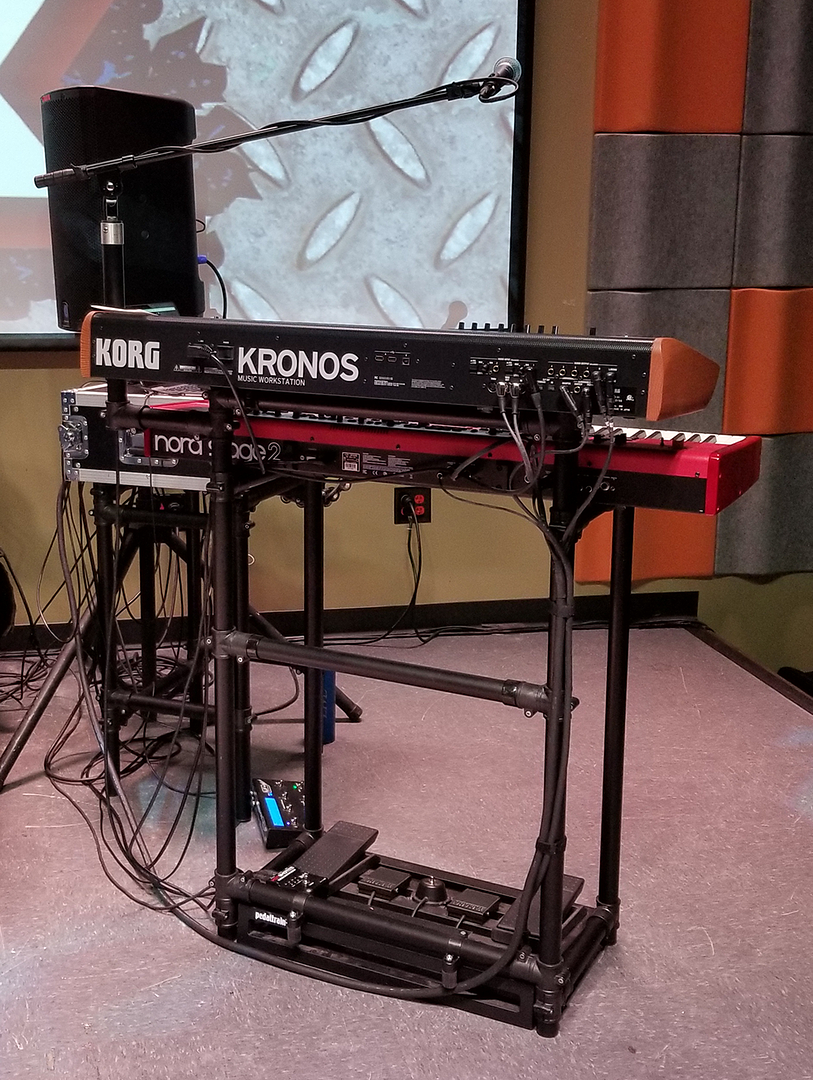
From the rear view, to secure the monitor and also my Mic (I’m fed up of trying to get a boom mic hanging over the keyboard, which usually makes them top heavy and unstable!) I have used Quick-Lok accessories that simply attach to the top tier tubes. I did a bit of metal work to cut the tubes to size to get the snuggest and closest fit to the back of the Kronos. On the floor to the left you might be able to see that I have actually loomed all of the cables between the keyboards, monitor and foot pedal to the rack into one loom, which makes setting up and tear down much easier, and avoids the usual tangled mass of spaghetti!

Onto the rack itself
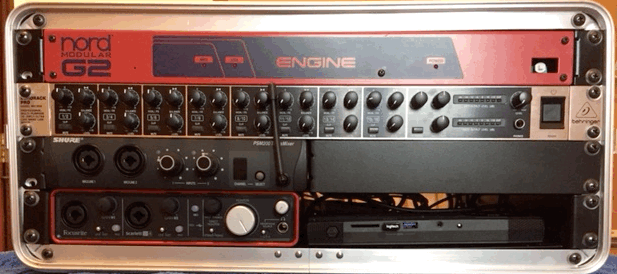
From bottom to top
- Focusrite 2i4 USB sound module to the left and Intel NUC computer to the right for the Cantabile host
- Shure Wireless transmitter for In Ear Monitoring (output 3 of the 2i4 wired direct internally)
- Behinger 8 channel line mixer (six channels in use)
- My beloved Nord G2 Engine (go faster stripe) - the modular synth in a 1U rack. It doesn’t look much, but it is very powerful.
 I haven’t used this for a while, but added it in as it adds very little weight and is a great sound source.
The computer itself is an Intel NUC “Skull Candy” from Ambrose, quad core i7 (3.5GHz from memory) with 32GB memory and 512 GB SSD. So very fast and well suited to CPU hogs like DIVA and also sample streaming VSTis like Omnisphere.
Inside the rack itself are:
- MIDISPORT 2x2 to give me extra MIDI Ports
- DMXIS module for driving DMX lights (using DMXIS VST plugin driven from Media MIDI file)
- Seven port USB hub and PSU
And around the back…
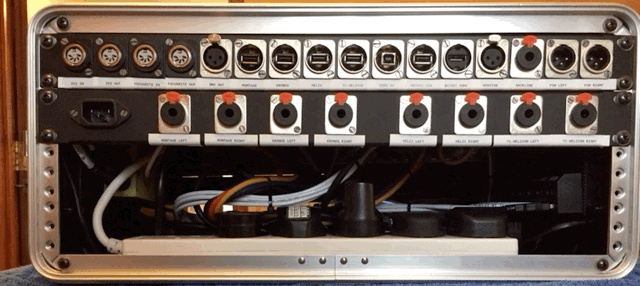
All designed so you are not fumbling around inside the back of the rack for making connections. All connections are made via bulkhead couplers, other than the MIDI connectors, as I could not find any couplers for those, so they are panel connectors with MIDI leads cut and soldered to them.
Here are some pictures of the work in progress inside the rack. You can see how using couplers assists in ease of maintenance. The panels themselves are pre-punched and available from ESR Electronics (I can dig out details if people are interested) and the couplers come from either ESR Electronics or Studio Spares.
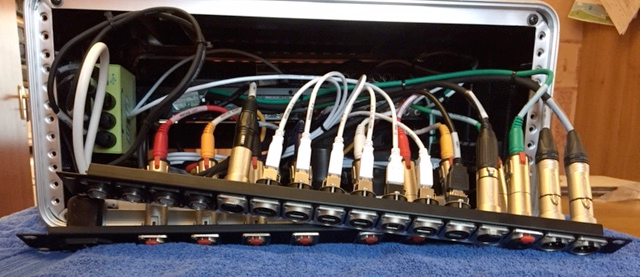
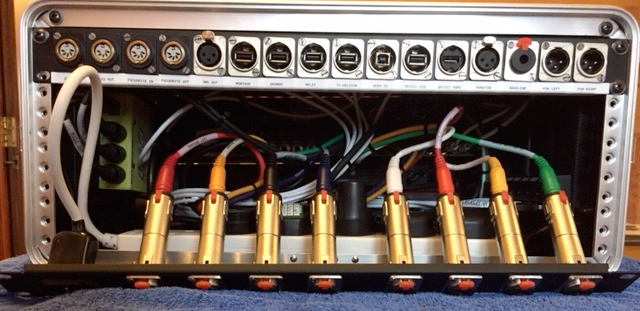
And everything labelled using a Brady hand held Cable Labeller (available from RS).
The big change for me whilst doing this is that previous to this work, I have used Cantabile mainly for backing tracks and DMX lights (in the Pure Floyd days I also ran NI B4II for organ duties), and in this context the gig laptop was at the end of the MIDI chain which was during Welsh Floyd
FC300 ==> Yamaha EX5 ==> Krog Kronos ==> Laptop
Earlier in Pure Floyd it was
FC300 ==> Yamaha EX5 ==> Novation Remote61 ==> Yamaha Motif Rack ES ==> Nord G2 ==> Yamaha FS1r ==> Yamaha A4000 ==> Laptop
So the laptop was always at the end of the chain. I avoided the use of MIDI routers/mergers on stage because the EX5 and Novation had the capability built in to do this (and the Novation would also hold notes whilst changing patches!) in that they could be set to “echo” MIDI in to MIDI out whilst also merging with their own data. But no keyboards seem to have this very handy feature any more.
In the new setup I have now moved to Cantabile being the hub in a “hub and spoke” model. The FC300, Montage and Kronos all connect to the computer. This will give me a lot more flexibil in that I can now use Cantabile to set up all sorts of routes between the units and VSTis.
So now the hardware is done, all soft synths are loaded, I now need to get programming Cantabile! ![]() As mentioned in another thread, my first aim was to get my Welsh Floyd setlist back in action (was 98% Kronos with EX5 as a master keyboard and a few sounds where it still trumped the Kronos). I have achieved that, which has taught a lot about how to setup Cantabile as a hub, so I am ready to take take the next step and get some VSTis in the mix
As mentioned in another thread, my first aim was to get my Welsh Floyd setlist back in action (was 98% Kronos with EX5 as a master keyboard and a few sounds where it still trumped the Kronos). I have achieved that, which has taught a lot about how to setup Cantabile as a hub, so I am ready to take take the next step and get some VSTis in the mix ![]()
6 Likes
Derek…am literally in the process of updating my own rig and saw this topic had moved back to the top and I wanted to add my two cents. Love it! Very clean setup and a lot of nice equipment. I too use the Quik-Lok for my mic for the very same reason. I didn’t alter the stand, but went to Home Depot and bought a piece of square tubing and through bolted it to the existing tube. I do hate that the existing tubes seem to stick out way too far for most keys that wind up on the 2nd tier. Kudos on a very sweet setup!
1 Like
Hi, Steve
Thanks. Yes, it’s been a bug bear of mine for a long time that the second tier tubes stick out too far, so it was time to get the hack saw out as otherwise it would have set the touch monitor too far back.
Be sure to share your rig once it is ready ![]()
Derek…I will be sure to give you a shout. Another day of woodworking and it should be done. It’s a replica C3 case I fashioned out of my existing rack. My old rack looked good arriving at the gig (it was all self contained in the form of a road case with all the classic hardware and Z-stand inside), but not so much on stage. One of those things you take a ton of time with and then a few weeks later, you realize you should have gone in another direction.
After seeing a lot of the latest builds, especially yours, it reaffirmed that I had to up my game, lol. I used to have a C3, with the slab sides, and have seen many rigs consisting of keys stashed inside, so I decided to convert the road case into a C3 replica (or as close as possible). It also solves a problem I always had because of the uniqueness of my rig and that was that the 2nd tier was much farther away than I was comfortable with. It was too much of a reach. This solves that problem as it is a custom build and it also eliminates a good deal of weight.
I have a system sort of like yours (certainly not equipment wise) but a two tier keyboard setup, with 4 pedals/footswitch, and a rack to the side with all my paraphernalia. I got rid of the 2nd tier of the Z stand and the support for it and now use it as support for my road case. It’s one of those rack cases with the sliding shelf. I’m the keyboardist as well as sound man, so mine includes power amp and digital mixer, besides my gear. It stashes inside my rig which has doors with removable hinges. Everything stays connected except for PA cables, mic cords and power. Setup will be about 10 min.
Steve
1 Like
Great setup Derek. Looks to be flexible, efficient and powerful.
Have you done much programming of the Montage at this point?
What’s your balance now between VST instruments and hardware with the new configuration?
1 Like
Thanks, David.
My only programming of the Montage so far has been setting up existing performances more to my taste, merging some and setting up set lists, including getting my old Welsh Floyd show back up and running.
n terms of balance between live and VST, I’ll find that out as I go along.  I’ll be developing a few song ideas over the holiday now which will be a combination of Kronos, Montage, DIVA and REPRO-1 at least.
Regards
Derek
1 Like
Back at the end of August, I posted my rig. (Aug 29). I liked the way it looked rolling into the gig, but not the look on stage so much, so I felt it needed some modifications, so here’s what it looks like now:
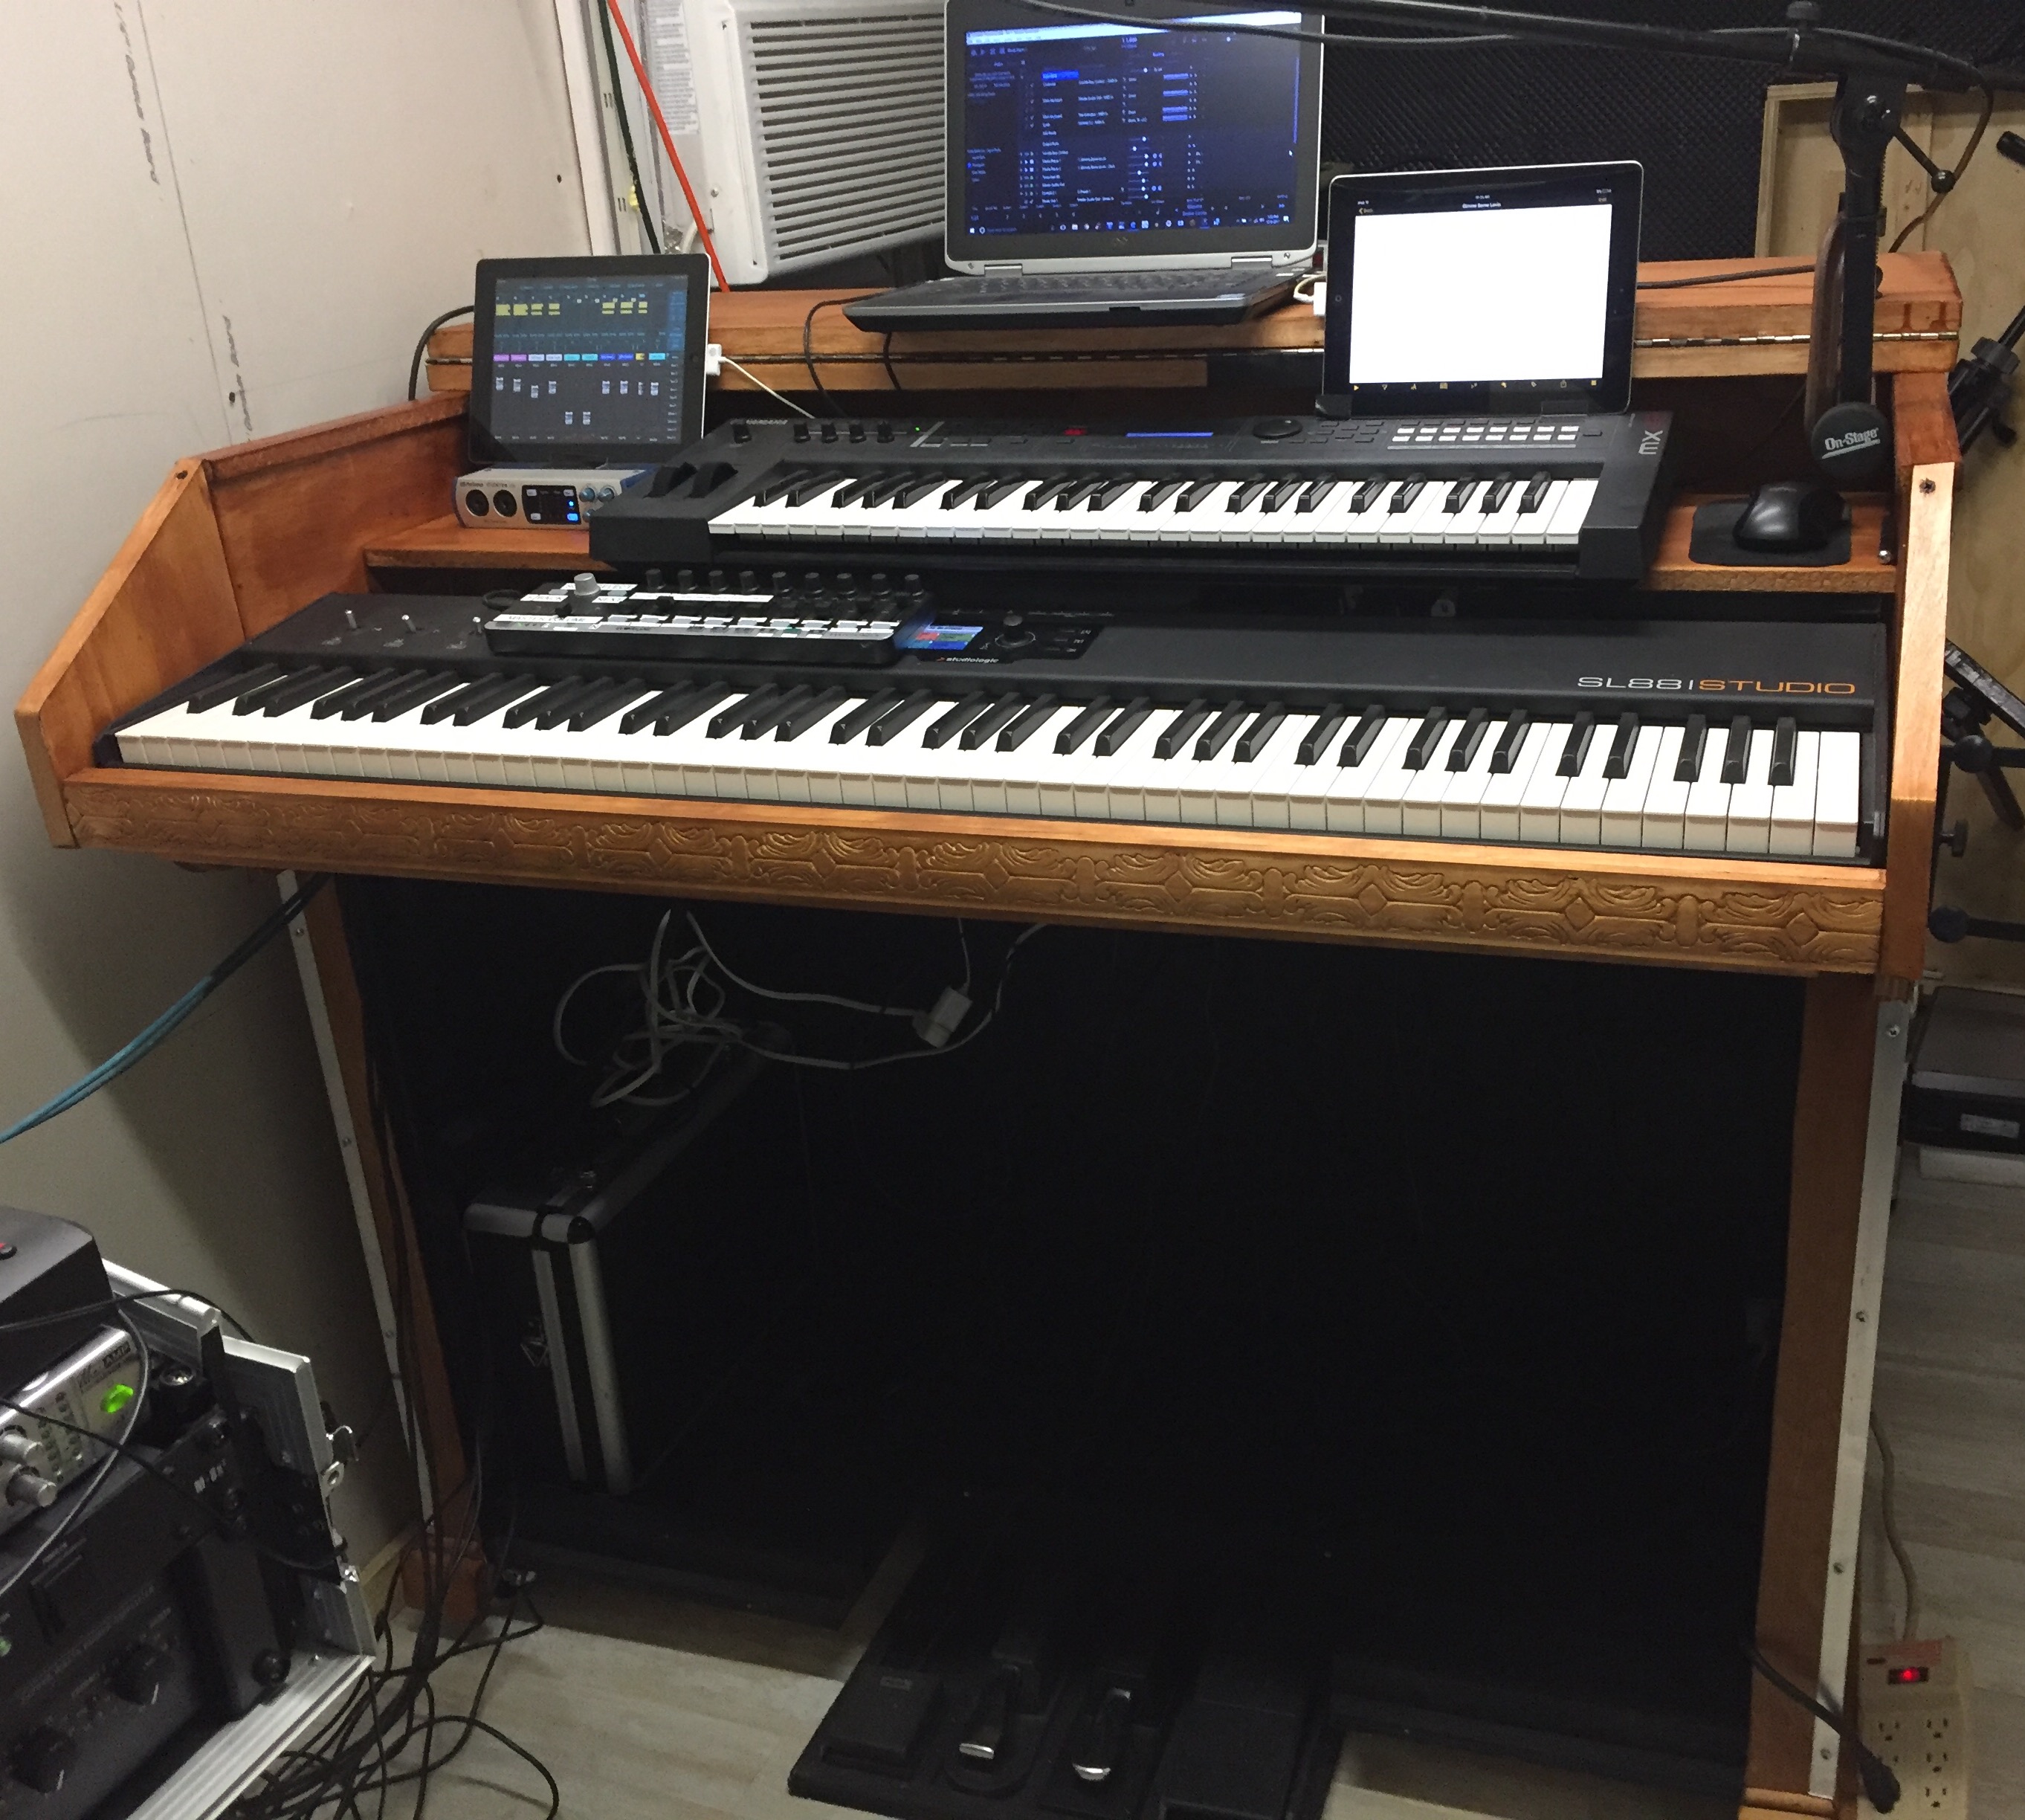
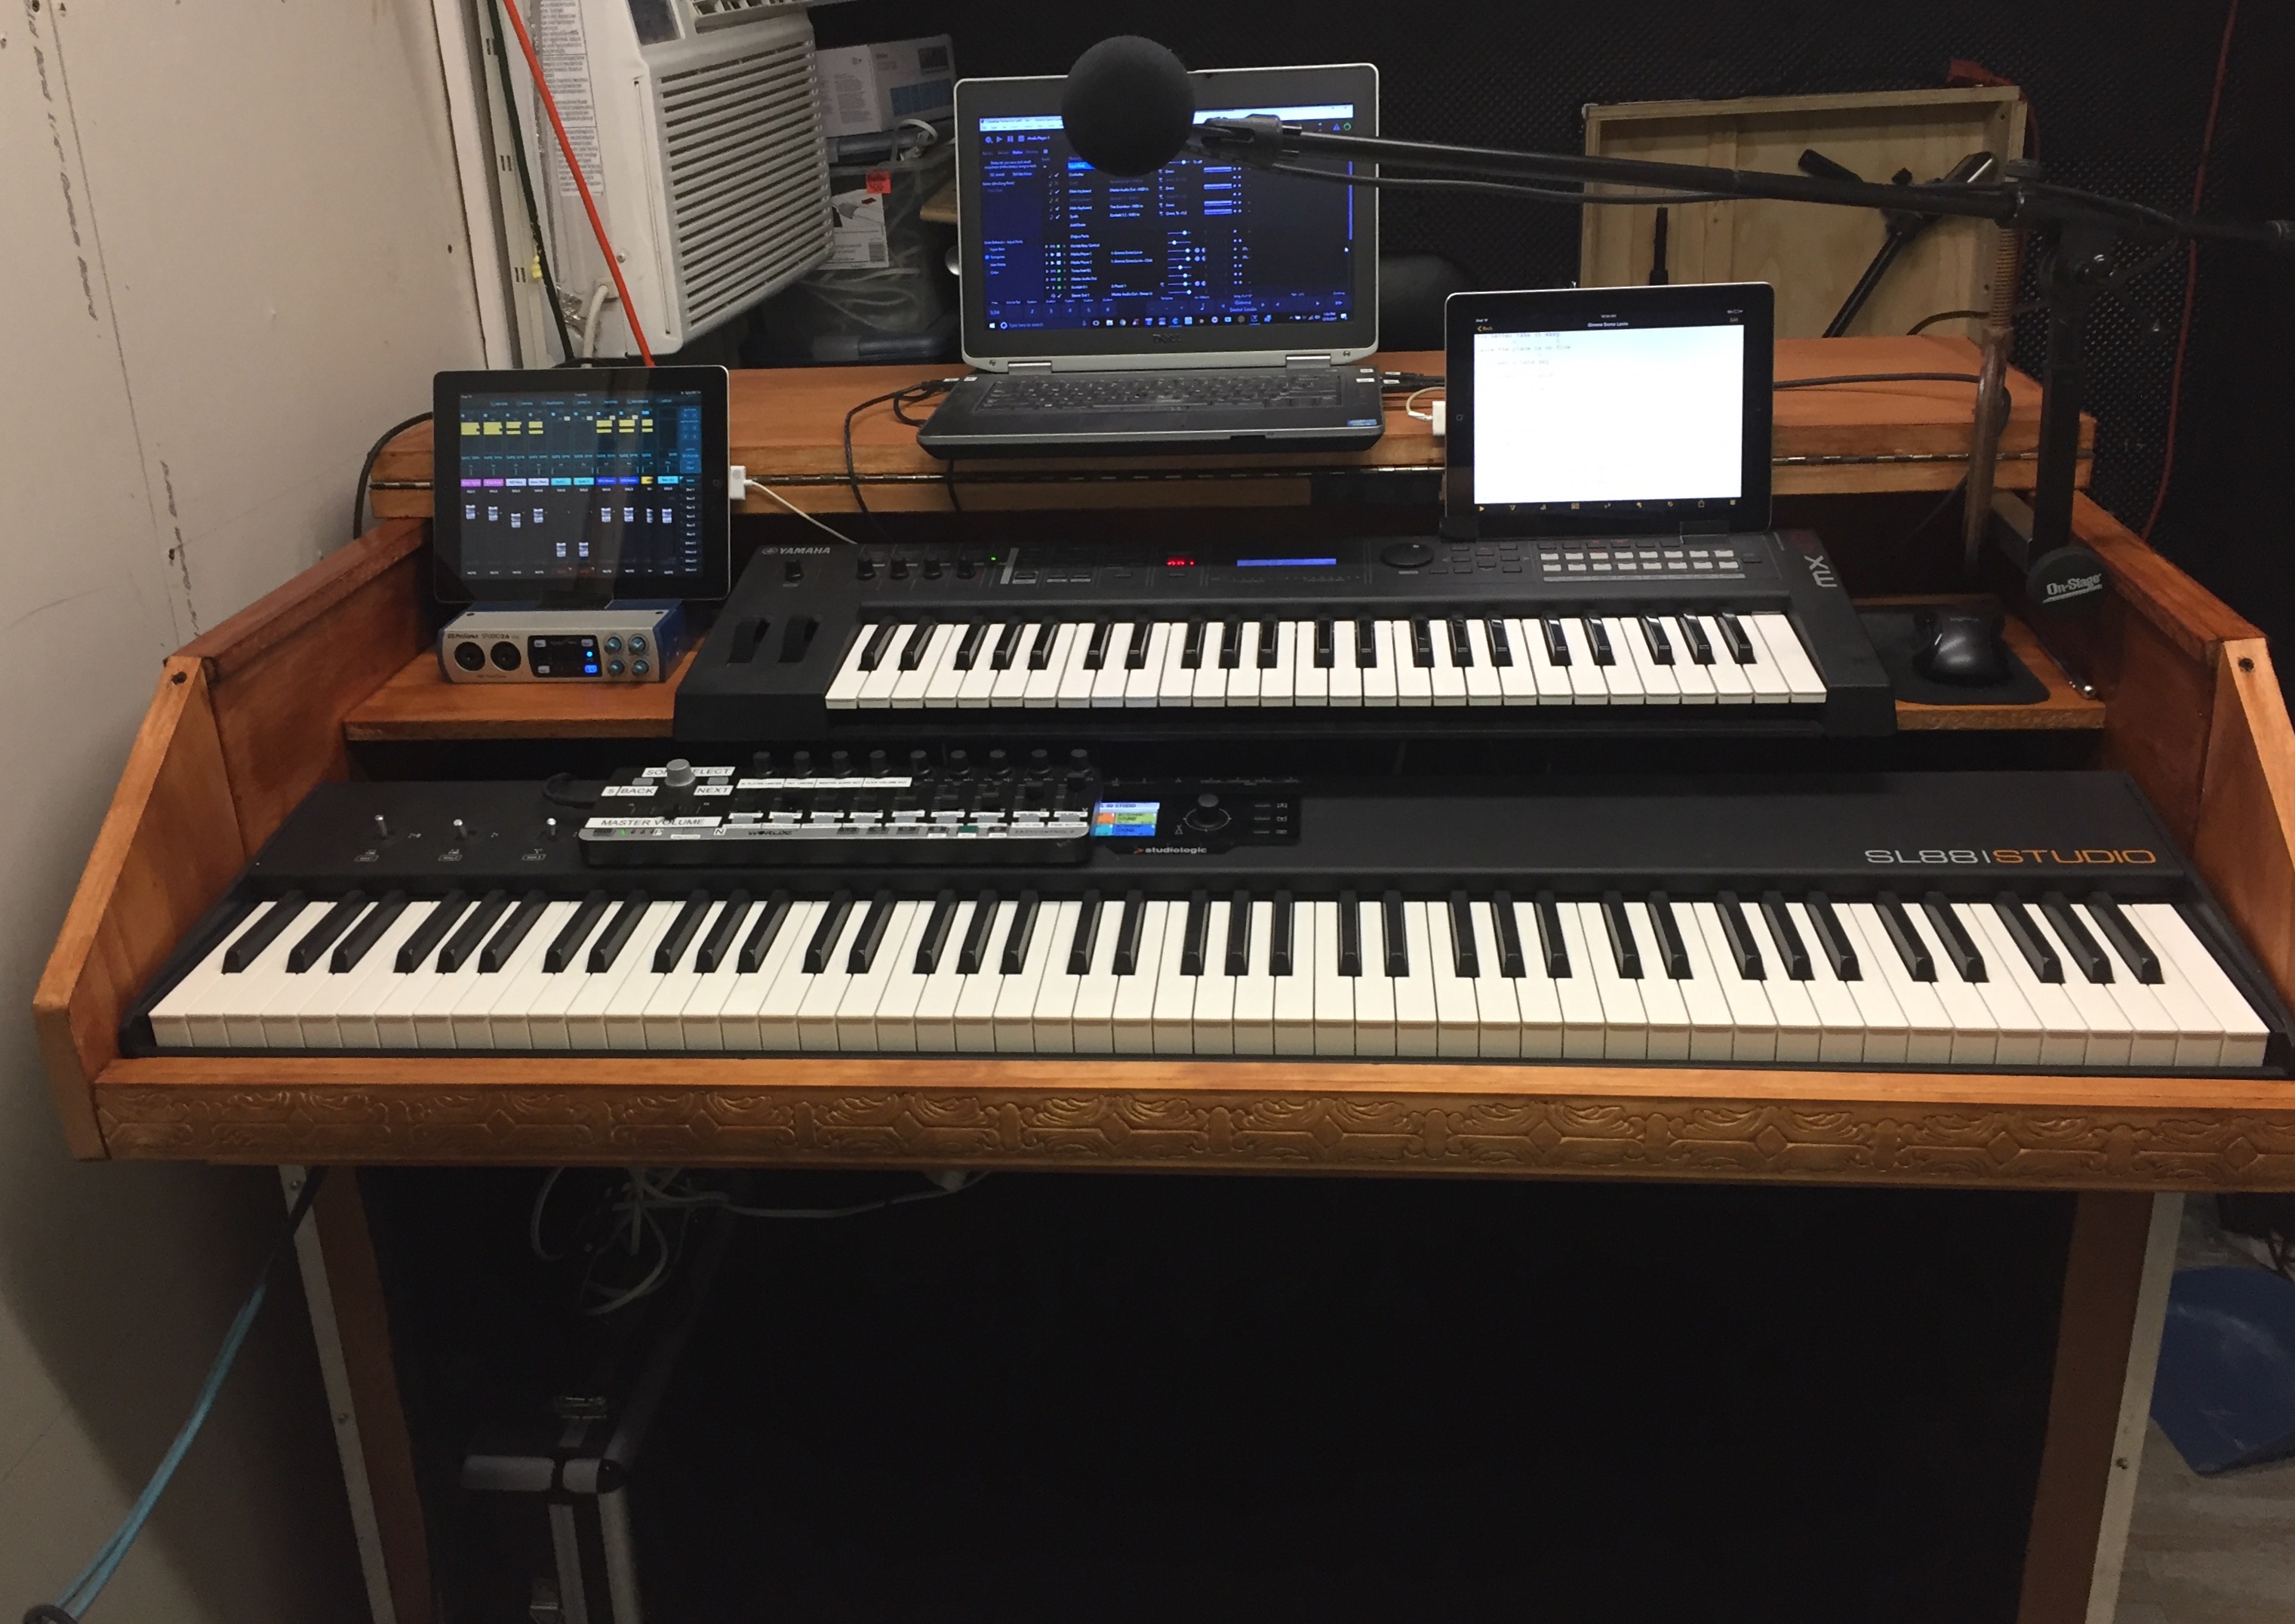
Much like my previous rig, this is just as, if not more portable. I’ve always loved the look of the Hammond C3 case with the slab sides, so that’s what it’s modeled after. The two screws you see and two at the bottom simply come out and the whole front comes off (I have plugs that hide the screws). I remove the two iPads and laptop and slide the controller straight back so the front is behind the separation line of the front addition and the two rubber pegs on the bottom of the keyboard drop in behind the top rail it sits on, locking it in place. (the C clamp has been removed and the square tubing was attached to the underside of the lid to hold the mic boom) The synth shelf has two screws that come out and the whole shelf slides straight back against two stops (to leave a 1" gap and protect all the cables) and the screws just get driven right back in to existing holes) The hinged top folds over and meets the front of the cabinet and butterfly latches
attached to a piece the same size as the shelf the MX49 sits on locks down the lid (after laying a piece of 1" foam over the MX and a 2" over the SL88). The Z stand minus the 2nd tier (it is now used as a support for the PA rack case) slides into the cabinet on the right hand side. The pedal board, and the PA rack goes in the left and the front wing slides in on top, corner to corner.
The piano hinges that used to hold the doors were retrofitted to the top and removable hinges were used for the doors, so they just slide on, the center post is simply screwed back in place…I almost forgot, the base molding simply unscrews into 2 side pieces and one for the front and they too reside underneath. The decorative base molding serves as a stop to make it easy to line up the screw holes. Two marks that you can’t see indicate the side to side placement, so it take all of :30 sec. to attach each piece. I wanted that classic mahogany and this pic shows it best because it was outside in the daylight

If you zoom in, you can see the decorative base molding. The corners of the baseboard are separated because it was drying with the poly on it. No need to have to try and separate corners that have glued themselves together.
This pic shows the handles (I just reused the same ones as before and retrofitted the metal edging)

All in all, I’m very happy with it and the fit is exactly as I designed it, all perfectly within reach. Oh, BTW, the interface and the MX have wide Velcro strips on the bottom so everything stays in place when packed up. I only have to connect the USB cables to the laptop and one each to the iPads. Everything else stays right in place and fully connected. I shut down the laptop and iPads with everything connected, and reconnect before booting up, so the laptop and iPads have no idea there was any disconnect.
3 Likes
Quite neat.
Looks great! How heavy is your faux C3 cabinet? My brain tells me it’s about 300 pounds. I assume it’s better than that 
Fred,
Thanks. It’s actually less than 85 lbs. without any gear. There’s no way I would cart anything as heavy as 300 lbs. if I had a crew of roadies carry it for me. It’s very easy to handle.
Thanks Derek. I had fun building it
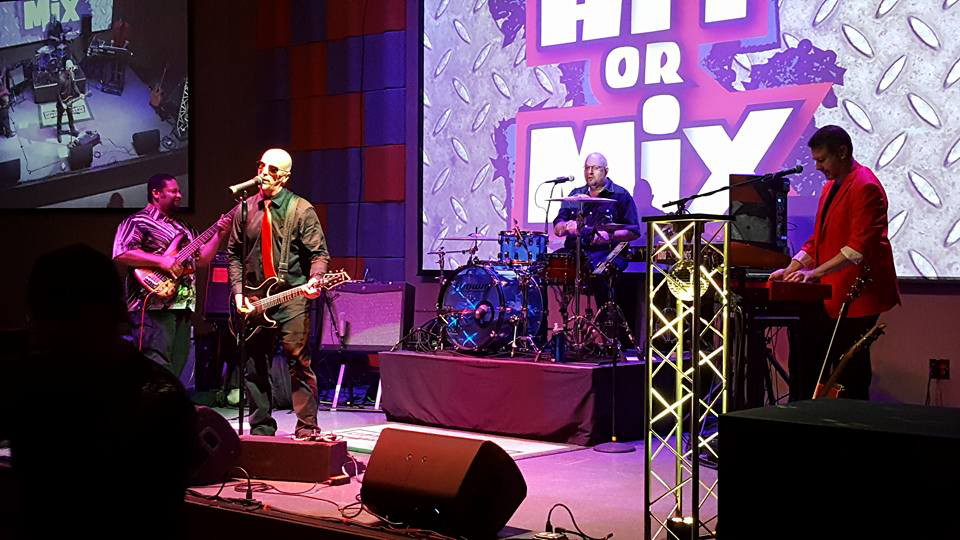
Well, after many months preparation, the new rig described above, and re-pictured here had its first outing at a low key open mic afternoon at my local music venue, where I was trying out some new ideas to see if the venue owner would like to put on a solo gig based on them (he did ![]() ). It went very well, and well received.
). It went very well, and well received.
So, as well as the Montage and Kronos, I had Cantabile running a backing track for one song, and then a solid click for another where timing is crucial and everything needs to be tempo synced, but the icing on the cake was finally having a computer powerful enough to run the more demanding VSTis.
So, in this set I used
- Spectrasonics Omnisphere and a lovely vocal pad sound called Ocean Garden from the Plugin-Guru “Kreatureesque” sound set
- UH-E Diva (in many places!) and REPRO-1
- Arturia Minimoog
- XILS Polymoog
- XILS PolyKobol
- Valhalla Reverb
With Cantabile providing all the splits and layers and routing between everything. Despite having had a few crashes in the studio, as this was not really a “proper gig”, I went with using the latest 3511 build, and it worked without a hitch.
So, its great to finally have this rig together with Cantbile at the heart of it. I am going to have a lot of fun with it with all of the various permutations it allows me. ![]()
Kudos due to Brad for making such a fantastic program, and thanks to all of the advice and help I’ve had over the past year in getting this together
6 Likes
This is a great testament to Brad and 35XX. Thanks for sharing Derek. Nice rig. So looking forward to using 35XX.
Corky
2 Likes
Absolutely concur with Corky Derek. That is a very slick no nonsense rig. Super clean setup. Congrats on the successful run and the ongoing work.
1 Like